# Client invitations and request links (/docs/account/client-access)
Source reviewed: 2026-10-01 · Product documentation
BeforeMay has several client-facing flows. A link for one flow does not grant
the recipient access to the firm's other clients or products.
| Flow | What the recipient does | What the access is for |
| ------------------------ | ---------------------------------------------------------------------- | -------------------------------------------------------------------- |
| Workpapers client upload | Accepts an email-bound invitation while signed in under that address | Their relationship with the inviting firm and its client upload flow |
| Sign | Opens the request-specific signing link; no BeforeMay account required | Reading and signing that request |
| Verify | Opens the check-specific link and agrees to the identity-check flow | Starting or resuming that check |
## For the firm [#for-the-firm]
Confirm the client record and email address before issuing any invitation or
request. Links can expire or be revoked. Issuing a new signing or verification
link invalidates the older credential for that request, so send the newest link
and avoid keeping both in circulation.
## For the client [#for-the-client]
For an upload invitation, sign in with the address that received it. If you
received it at the wrong address, ask your accountant to correct the invitation.
For a signature or check, verify the firm's name and what you have been asked
to do before proceeding. Do not forward a personal request link to a different
person to complete on your behalf.
If the link has expired, been cancelled or already been replaced, ask the firm
for a new one. Changing the link text or trying a colleague's account will not
restore it.
## What deleting your account does [#what-deleting-your-account-does]
The client mobile app's **Delete account** removes your sign-in and firm
connections. Documents and messages already sent remain the firm's records.
Read [account deletion](/delete-account) and [retention and deletion](/docs/trust/retention)
before assuming that deleting a login deletes financial records.
---
# Set up your practice (/docs/account)
Source reviewed: 2026-10-02 · Product documentation
Use the same BeforeMay account for Workpapers, Clients, Sign, Verify and BAS
Review. Your account identifies you; your practice membership decides whose
clients you can work with. A client accepting an upload invitation has a
separate client account and does not become a firm member.
## Choose your starting point [#choose-your-starting-point]
| Your situation | Start here | Confirm before continuing |
| ---------------------------------------------------- | -------------------------------------------------------------- | -------------------------------------------------------------------------------------------- |
| A colleague invited you | Open their invitation and sign in with the invited email | You join their practice, with the intended role |
| You are setting up a new practice | Open the product you need and sign in with your own work email | The practice belongs to you and has the right name |
| Your practice already uses another BeforeMay product | Open the next product with the same account | The same practice and client list are selected |
| You are a client uploading, signing or verifying | Follow the accountant's request | Use the [client access flow](/docs/account/client-access), rather than setting up a practice |
The path is **sign in → confirm the practice → complete the setup shown → add
clients → complete a first task**. Outlook and inviting colleagues are useful
when you need them; neither is required for a solo user's first working paper.
## 1. Sign in with the right account [#1-sign-in-with-the-right-account]
Open [Workpapers](https://beforemay.com.au/cases),
[Clients](https://client.beforemay.com.au), [Sign](https://sign.beforemay.com.au),
[Verify](https://verify.beforemay.com.au) or [BAS Review](https://bas.beforemay.com.au).
Use the address your colleague invited, or your own work email for a new practice.
Choose an offered provider or **Send magic link**. The email contains a link
and a six-digit code. Complete any second-factor setup or check shown before
working with practice data. [The sign-in guide](/docs/account/signing-in) explains
passkeys, authenticator apps and the temporary setup deadline some existing
members see.
**Check:** reaching the product with your account is the sign-in result. A
message saying that a code was sent does not mean you have signed in yet.
## 2. Confirm which practice you are working in [#2-confirm-which-practice-you-are-working-in]
If an invitation is offered, check the practice name and choose **Join**.
If you already belong to several practices, select the intended one. A new
account may start with a generated practice name; confirm it in setup before
using it in client-facing work.
If you expected an existing practice but cannot see it, check your sign-in
address and ask its Owner or Admin to check the invitation. If invitations
could not be loaded, reload and resolve that error before creating another
workspace. A second practice has a separate directory; it does not reconnect
you to the first one's clients.
**Check:** the correct practice name is selected and your role is appropriate.
An empty directory is expected in a new practice; it needs investigation if
you expected an existing client list.
## 3. Complete the setup steps shown [#3-complete-the-setup-steps-shown]
The wizard adapts to the practice and your permissions. A practice already set
up in another product can go straight to the new product's welcome, with any
policy update shown when applicable. You should not expect every screen below
on every visit.
| Step | What to do | What confirms this step |
| ----------------------------------------------------- | --------------------------------------------------------------------------- | ------------------------------------------------------------------------------------------- |
| Terms and disclosures, when shown | Read the documents and acknowledgements; accept using the screen's controls | The acceptance succeeds and the wizard advances |
| Practice details, for a new practice's Owner or Admin | Confirm the firm name; add a tagline and logo if needed, then continue | The save succeeds; no error remains on the step |
| Security, if not already completed at sign-in | Add and confirm a passkey, or set up and verify an authenticator app | The verification succeeds; simply displaying a QR or opening a passkey prompt is incomplete |
| Team, for an Owner or Admin | Invite the people who need access, or set up the team later | Created invitations are distinct from colleagues who have joined |
| How you heard about BeforeMay, when shown | Choose the relevant option or continue using the offered control | The wizard reaches the product's welcome |
| Product welcome | Use the final button to enter the product | You reach the product workspace after completion succeeds |
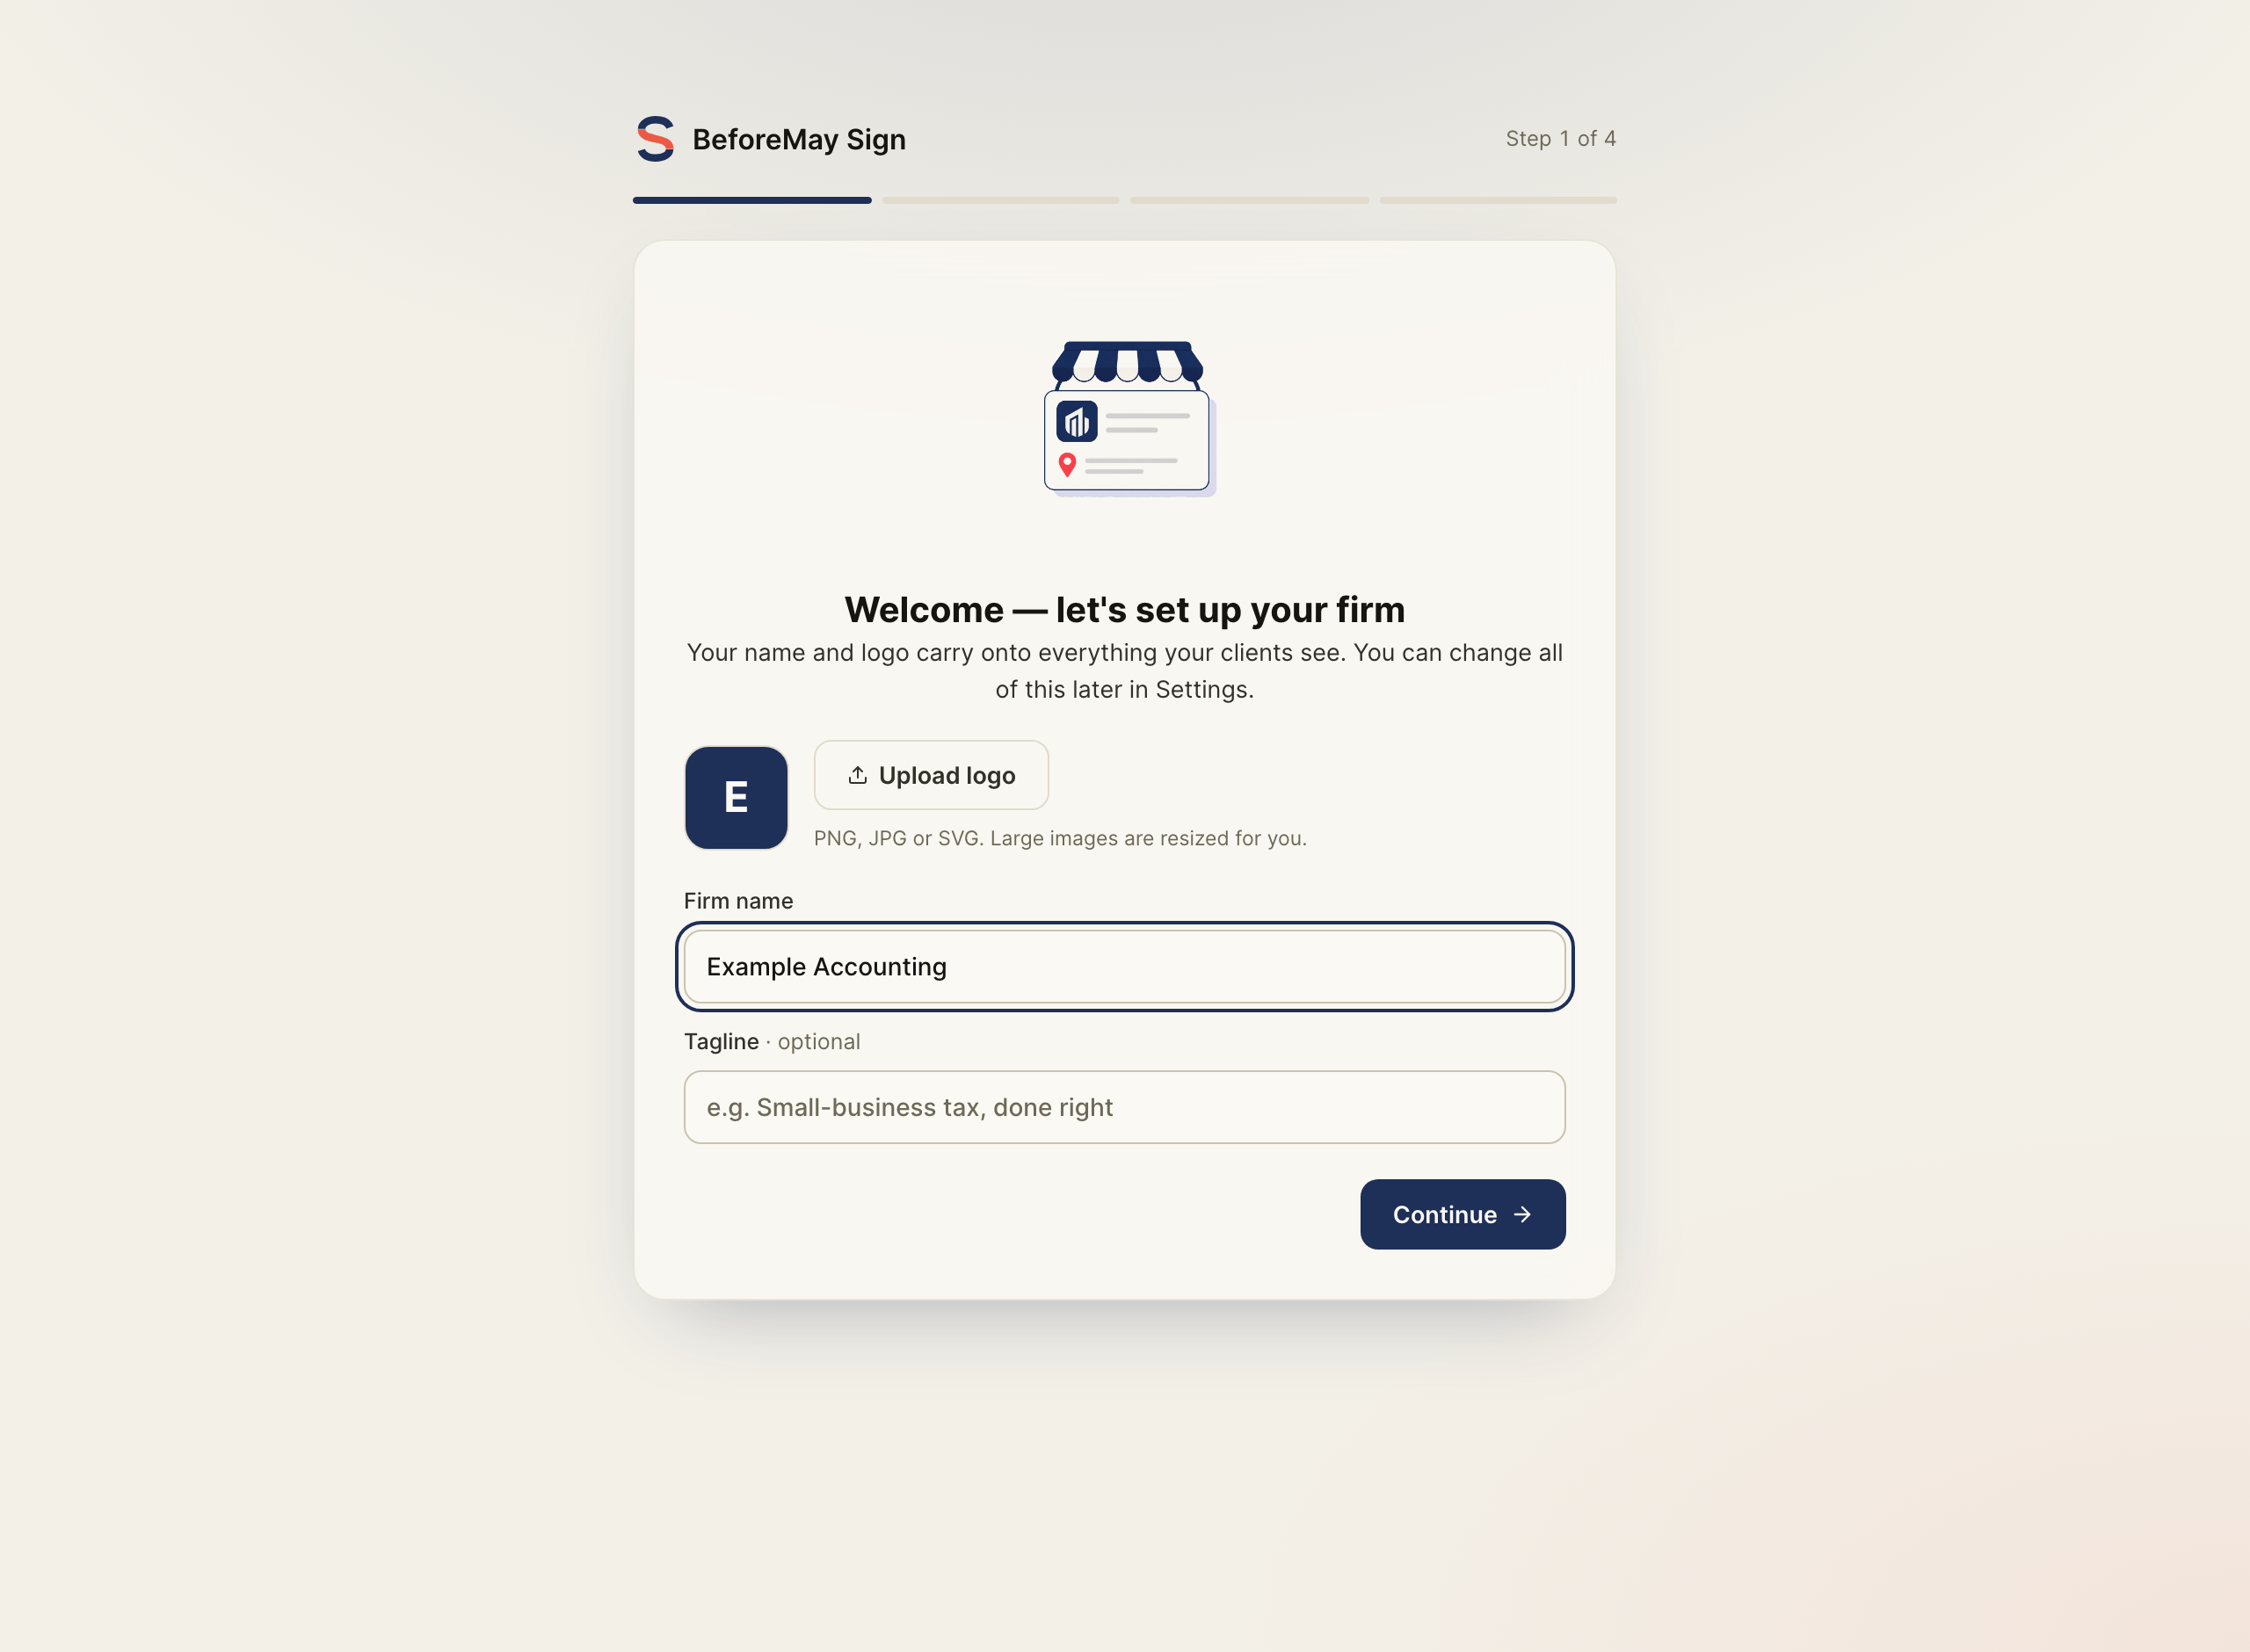
The real shared practice-details step in Sign, using fictional Example Accounting. No settings were saved. Step numbers and the screens offered depend on your practice's setup state.
Team and some optional setup steps offer **Set up later**. Using it does not
create an invitation or complete that optional task. Practice-member security
setup requires a second factor; eligible existing members may postpone only
within the temporary grace period shown on their screen.
## 4. Add the people and clients you will work with [#4-add-the-people-and-clients-you-will-work-with]
For colleagues, use [Team](/docs/account/team). Check the accepted roster, not
only the **Waiting to join** list. Each colleague uses their own login.
For clients, open the shared client directory. Add a client through the product's
client controls, or [import a list](/docs/tutorials/import-clients). Inspect the
preview before confirming. Then open one intended client and verify their name,
entity type, email and relationships before sending anything.
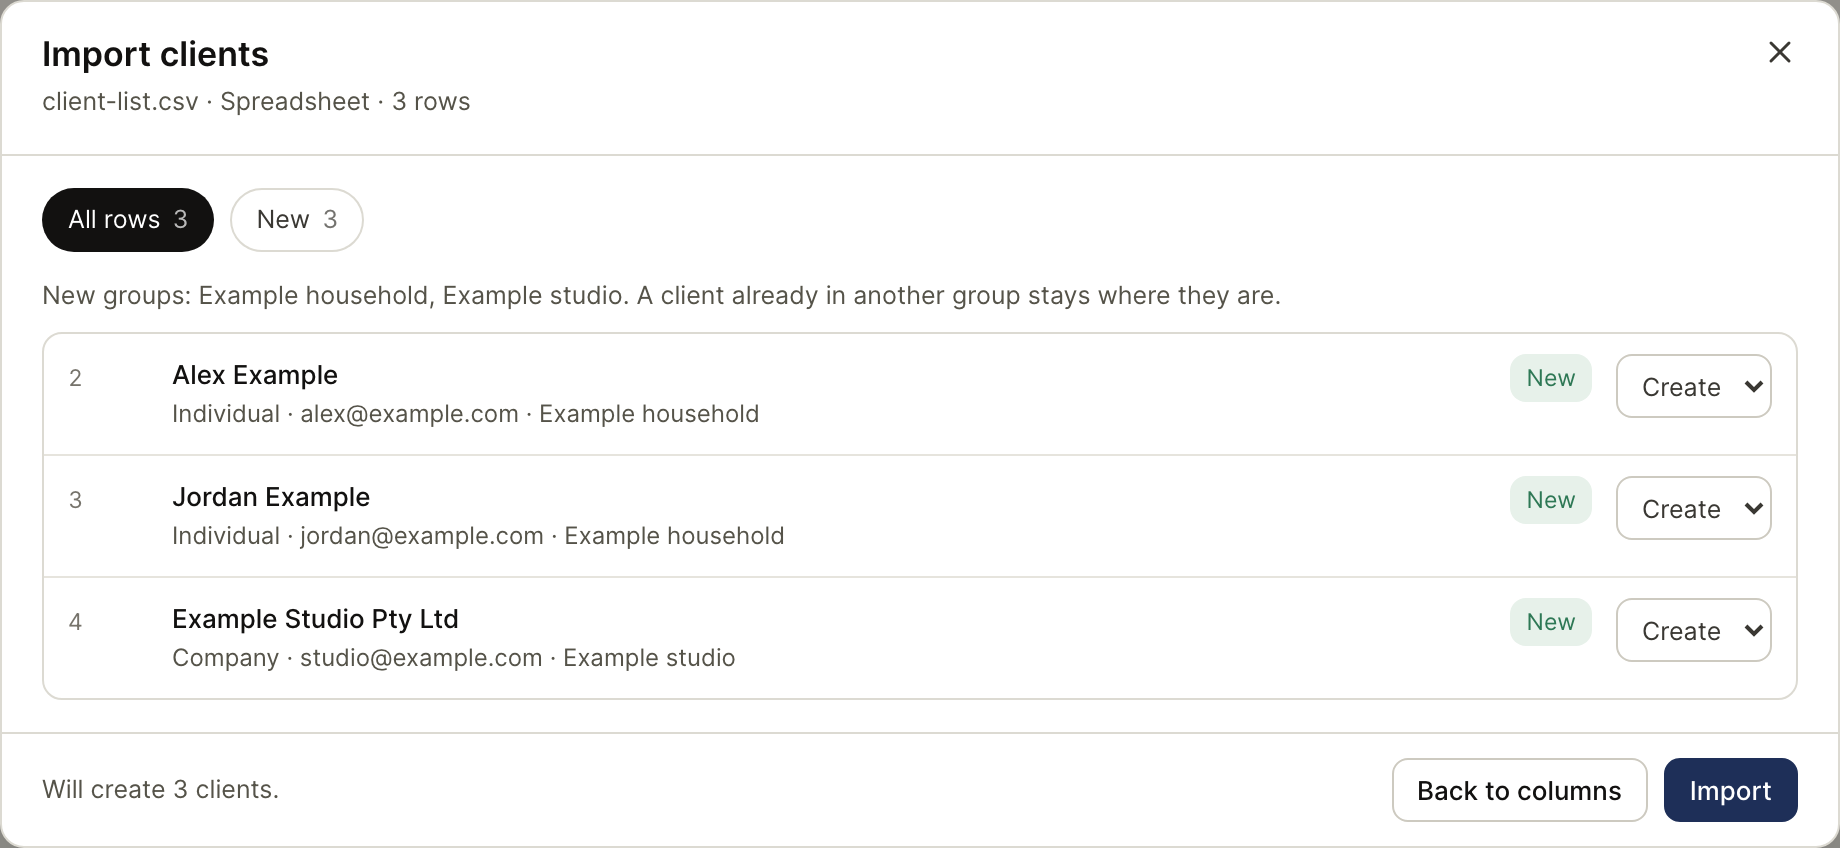
The actual import preview of three fictional clients. Preview is the review stage; the records are not added until the import is confirmed. This capture did not import them.
**Check:** the intended clients appear in the directory after the save/import
result succeeds. A file preview alone does not confirm that records were written.
## 5. Connect Outlook if your workflow needs it [#5-connect-outlook-if-your-workflow-needs-it]
Microsoft sign-in proves who you are. Connecting Outlook separately lets the
product use your mailbox after consent. For client mail and filing, follow
[Connect and check Outlook](/docs/tutorials/connect-outlook).
Each colleague connects their own mailbox. Confirm the connected address and
sender before relying on mail delivery or sending requests.
## 6. Complete one task and inspect its result [#6-complete-one-task-and-inspect-its-result]
| Product | Follow this walkthrough | Completion means |
| ---------- | --------------------------------------------------------------------------- | --------------------------------------------------------------------------------------------------------------- |
| Workpapers | [Build your first working paper](/docs/getting-started/first-working-paper) | A delivered workbook exists; complete your own review before marking the case complete |
| Clients | [Import your client list](/docs/tutorials/import-clients) | The intended records are visible and the summary's failures have been inspected |
| Sign | [Send an engagement letter](/docs/tutorials/send-a-letter) | A request exists and delivery is checked; the engagement is signed only when every required signer completes it |
| Verify | [Request and review an identity check](/docs/tutorials/identity-check) | Returned evidence is inspected and the practice's assessment is recorded |
| BAS Review | [Review a coded quarter](/docs/tutorials/review-bas) | Findings are reviewed and agreed changes are checked in the source bookkeeping system |
Before considering setup complete, confirm the right account, practice, role
and client. Confirm required security setup and any mailbox you connected. Finally,
use the tutorial's result check; arriving at the product's home screen does not
establish that your first client task is finished.
## Moving between products [#moving-between-products]
The practice products share the account, directory and team. On the
`beforemay.com.au` domain and its product subdomains, the session is shared
within the same browser. A different browser, private window or preview host
may ask you to sign in again. Product setup can still ask for information
specific to that product or acceptance of an updated policy.
Check the practice name before working: having the same account does not mean
all practices you belong to share their data.
## What is separate [#what-is-separate]
Sift's browser conversion does not require a BeforeMay account. Cloak's developer
dashboard uses its own account system. Signing and identity-check recipients
use a request-specific link; those links do not give access to the firm's
workspace. See [client access](/docs/account/client-access).
---
# Sign in and protect your account (/docs/account/signing-in)
Source reviewed: 2026-10-02 · Product documentation
Open the product you intend to use and choose **Sign in**. Use the email address
on your team invitation so the product can resolve your practice membership.
## Email code or magic link [#email-code-or-magic-link]
Enter your email address and follow the sign-in screen. For the code route,
enter the six-digit code from the email; you can paste the whole code into the
boxes. If you requested a magic link, open it in the browser you intend to use.
1. Enter **Work email**, then choose **Send magic link**.
2. Check that **Enter your code** shows the address you intended. The email
offers a link as well as the six-digit code.
3. Open that link, or enter the code on the original screen. Six complete digits
are submitted automatically; the sign-in button also remains available.
4. Finish the second-factor screen when asked, then confirm your practice.
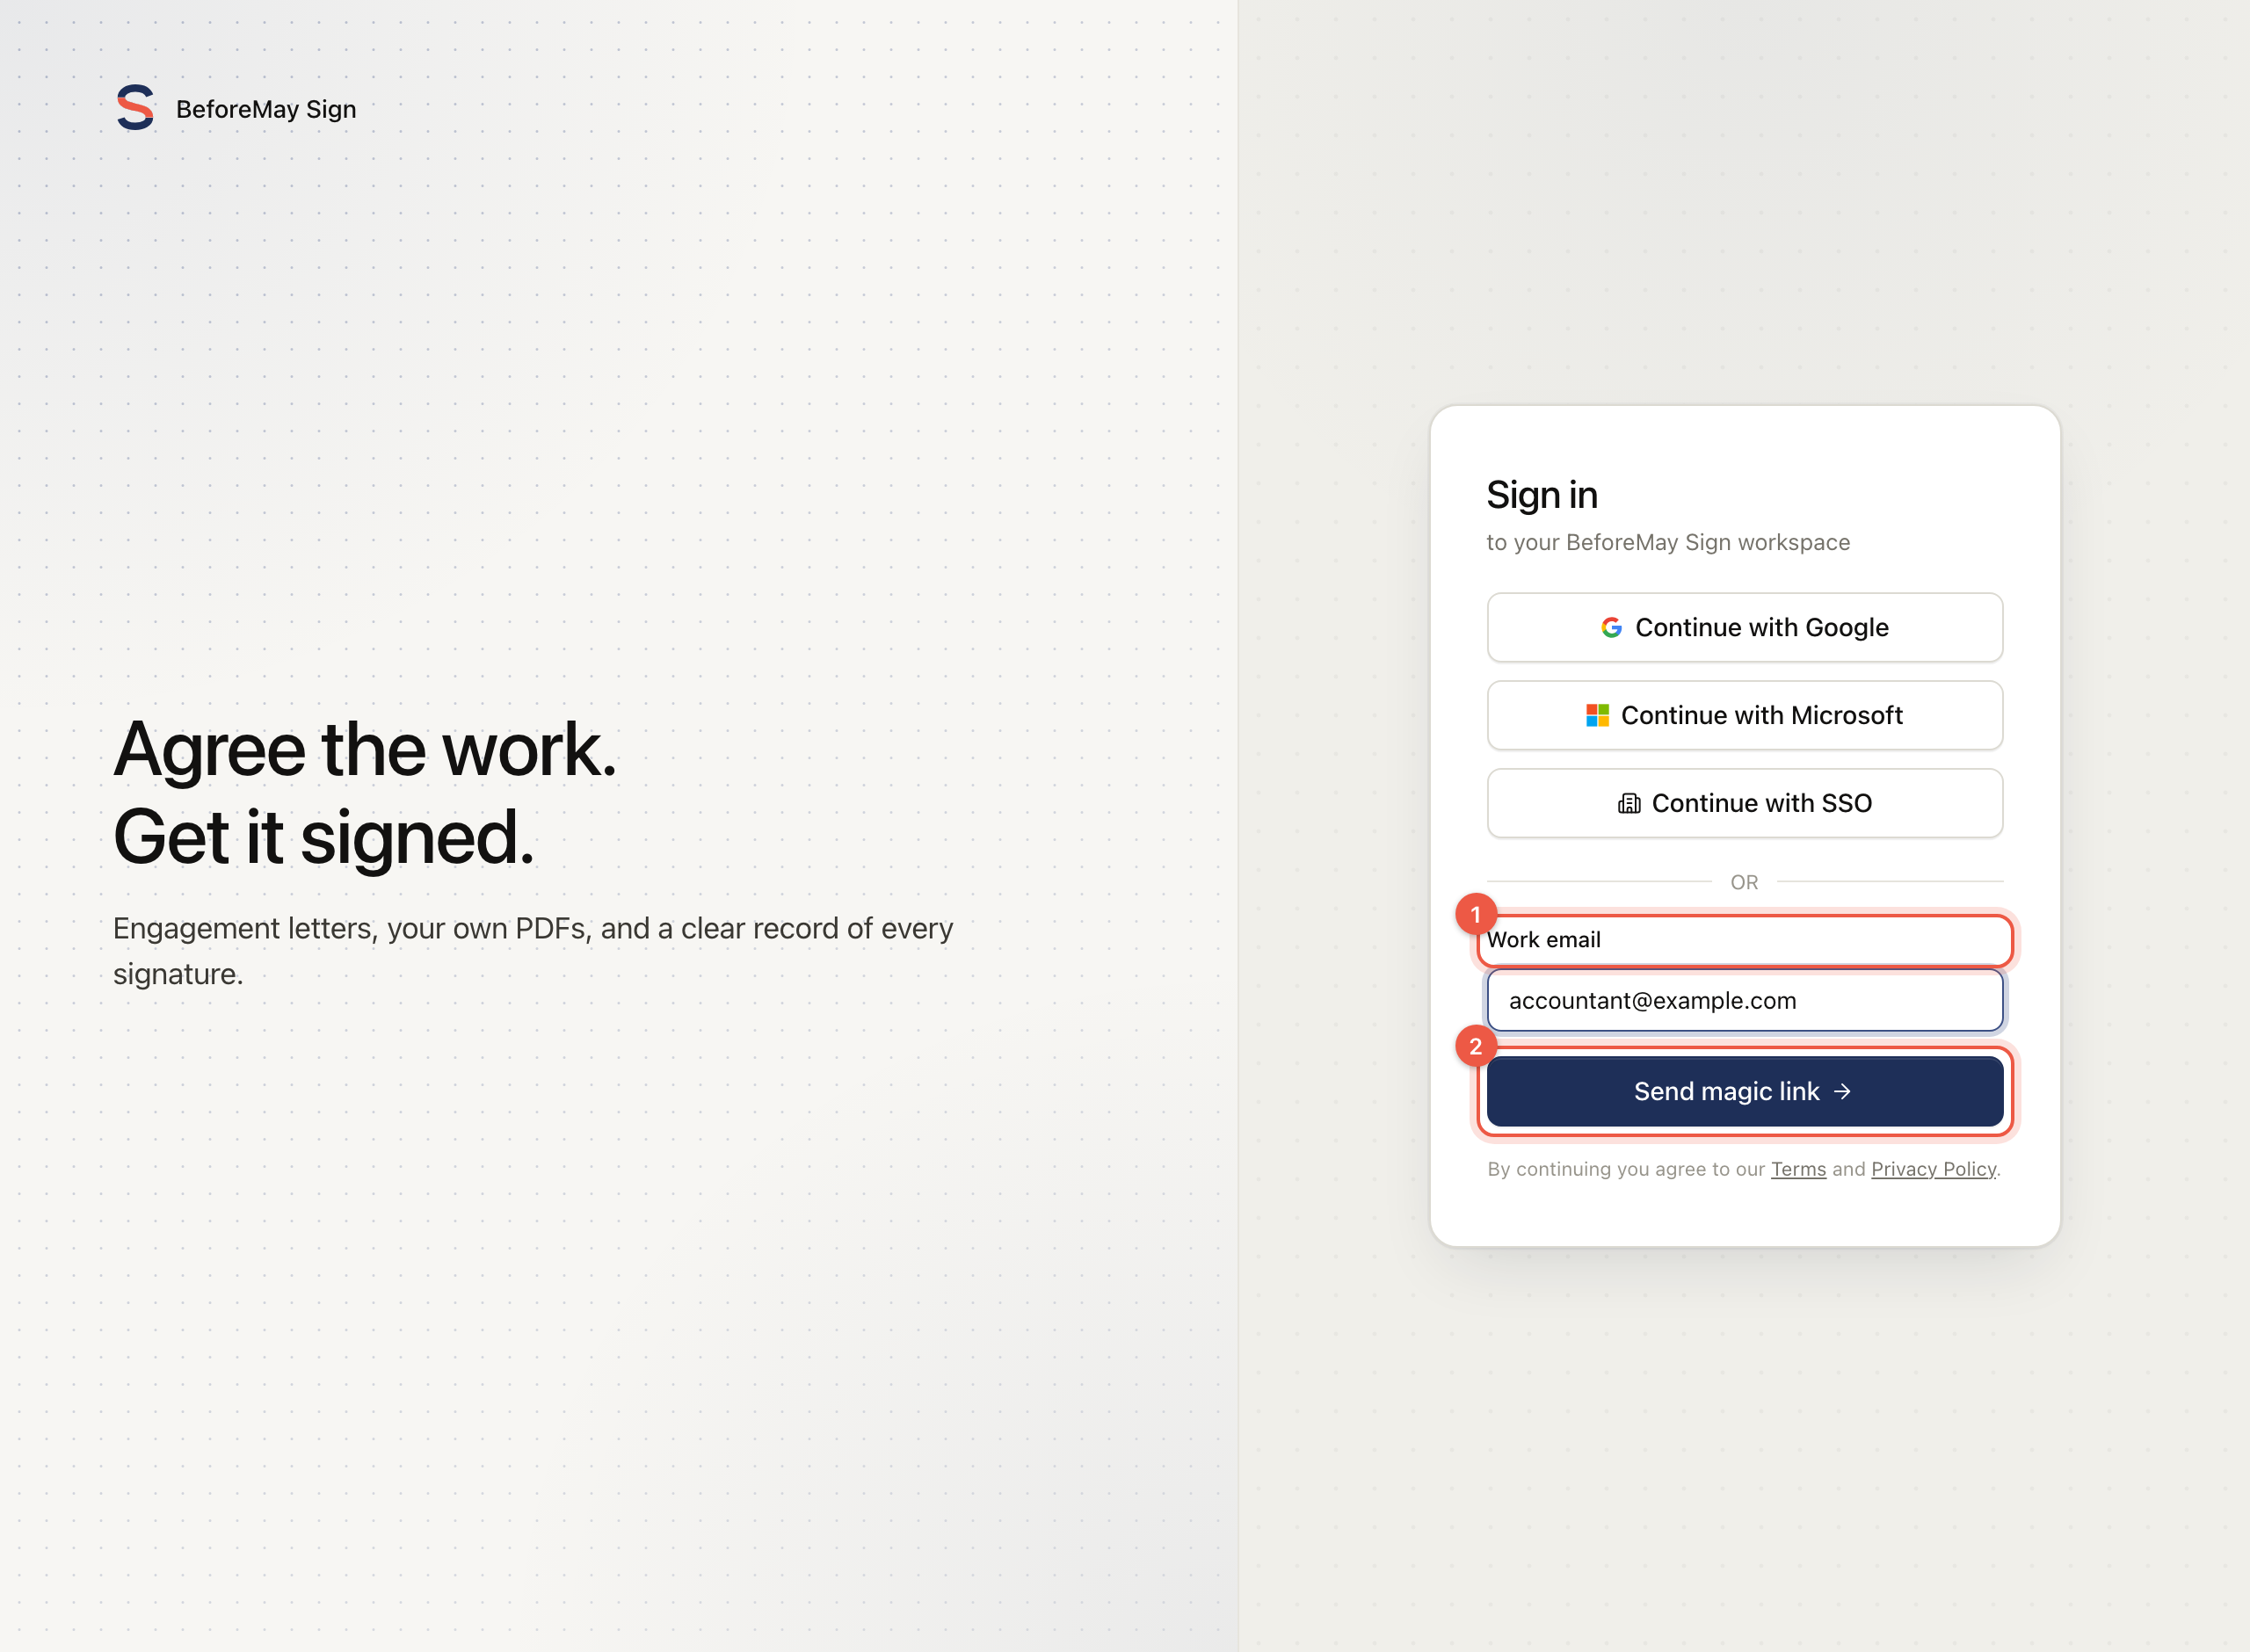
The actual shared sign-in component, shown in Sign with a fictional work email. 1: Confirm the address. 2: Request the email. This capture did not send a code or sign in.
**Resend** has a 60-second cooldown. Check spam and the address you entered
before requesting another message. Use the latest message rather than trying
every older code.
## Google, Microsoft and SSO [#google-microsoft-and-sso]
Use a provider offered on the screen. A provider sign-in still needs to resolve
the invited account and its practice membership. For SSO, the domain of your
work email identifies the configured identity provider. If the domain is not
set up, use another offered sign-in method or contact your practice's
administrator.
**Microsoft sign-in and Outlook connection are separate.** Signing in with
Microsoft does not by itself let BeforeMay read or send your mailbox. Follow
the [Outlook setup tutorial](/docs/tutorials/connect-outlook) for that connection.
## Second factor [#second-factor]
Practice-member setup requires a passkey or authenticator app. If you have not
added one, follow the setup screen before entering the workspace. Eligible
existing members can see a temporary grace-period banner; use **Set it up now**
and complete setup before the deadline shown.
For a passkey, choose **Add a passkey**, complete your device's prompt, then
**Confirm with your passkey**. For an authenticator, choose **Use an authenticator
app**, scan the QR code and verify a code from that app. Displaying the QR code
or closing the device prompt does not finish setup.
On later sign-ins, use the code from your authenticator app, or **Use your
passkey** when you have registered one and the browser supports it. A passkey
prompt you close has not completed the check; open it again when ready.
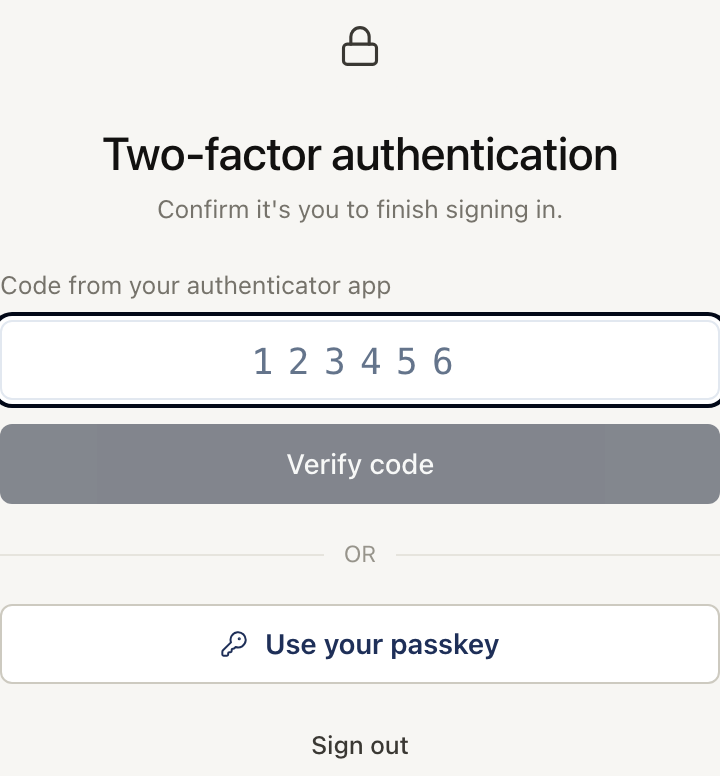
The shared second-factor screen with both an authenticator and a registered passkey available. The choices depend on your account and browser; this example did not verify either factor.
Authenticator codes here come from your authenticator app, rather than the
email used in the previous step. After successful verification, the product
continues to your workspace or any setup it still needs.
The practice screen locks after 30 minutes of inactivity. Unlock it with an
offered second factor, or sign out. Repeated incorrect authenticator codes can
temporarily block code verification; follow the error's retry time rather than
continuing to guess.
Do not share login codes, passkey access or a signed-in browser with colleagues.
Invite each colleague as their own member instead.
## If you cannot get in [#if-you-cannot-get-in]
* No email: confirm the address, check spam and wait for the resend timer.
* Wrong practice: confirm which address and provider you signed in with.
* Passkey unavailable: try a supported browser or an enrolled authenticator.
* Lost all second factors: ask an authorised practice Owner or Admin, or
[contact support](/docs/help), for a recovery reset. After a reset, sign in and
set up a new factor; the old devices no longer provide access. Creating a
second practice will not recover access to the first.
For the technical session boundary, read [access controls](/docs/trust/access-control).
## Check that sign-in is finished [#check-that-sign-in-is-finished]
| What you see | Meaning | Next action |
| ---------------------------------------- | ---------------------------------------------------------------- | ---------------------------------------------------------- |
| Enter your code | The email was requested; account verification is still pending | Use the latest code or link |
| Secure your sign-in | A second factor still needs to be set up | Add and confirm a passkey, or verify an authenticator code |
| Two-factor authentication | The account still needs its enrolled second factor | Verify using an offered method |
| Setup deadline banner | An eligible account is temporarily inside its setup grace period | Set up a factor before the displayed deadline |
| Locked | The workspace is locked after inactivity | Unlock using an offered method or sign out |
| Join your practice or practice selection | Authentication succeeded; confirm the membership/workspace | Join or select the intended practice |
| Setup wizard | The product has setup or policy steps to finish | Follow [practice setup](/docs/account) |
| Product workspace | You can work in the selected practice | Confirm its name and your role before opening client data |
Next: [confirm the practice and finish setup](/docs/account).
---
# Team roles and invitations (/docs/account/team)
Source reviewed: 2026-10-01 · Product documentation
Each colleague signs in with their own account. Open your product's **Team**
settings to see the practice roster and outstanding invitations.
## The three roles [#the-three-roles]
| Role | What it permits |
| ------ | ----------------------------------------------------------------------------------------------------- |
| Owner | Full access; chooses Admins and can transfer ownership to an existing member. |
| Admin | Manages clients, practice settings, billing and the team; cannot choose Admins or transfer ownership. |
| Member | Works with the practice's clients; cannot manage settings, billing or the team. |
There is one Owner. Ownership moves through a handover to an existing member,
not an invitation to a second Owner. An Admin can remove Members; the Owner can
remove Admins and Members. The Owner cannot remove their own seat in place of
transferring ownership.
## Invite a colleague [#invite-a-colleague]
1. Open **Team** with an Owner or Admin account.
2. Enter one email or paste the addresses offered by the invite form.
3. Choose the permitted access level and review the addresses.
4. Create the invitations. The recipient opens the link and signs in using the
invited address.
5. Confirm the person appears in the roster after accepting.
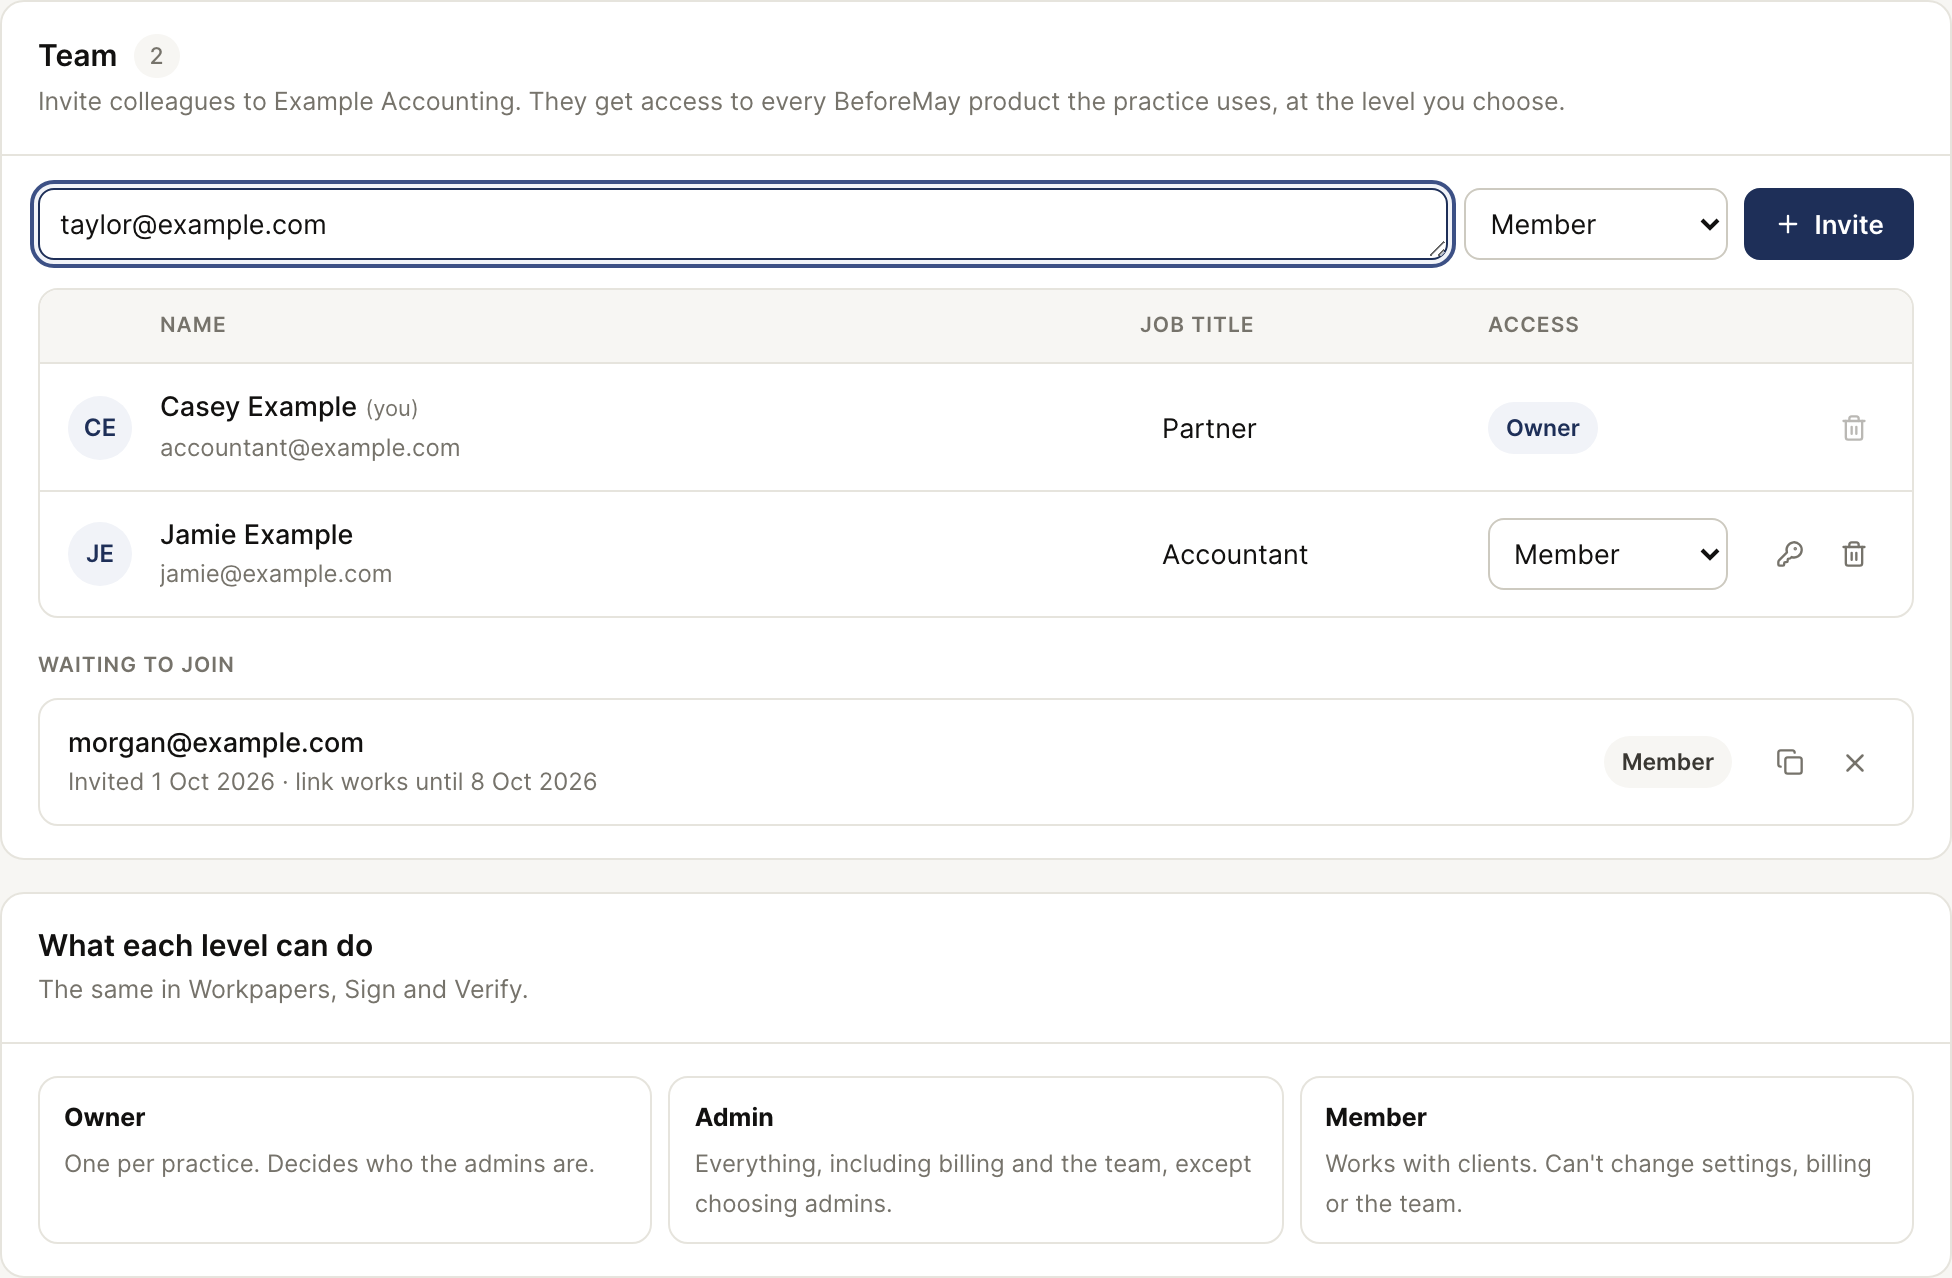
The actual shared team screen, with a fictional Owner, Member and a person Waiting to join. Taylor's address is only entered in the form; no invitation was created or sent in this capture.
Read the invitation result as well as the list. An invitation can be created
even when its email could not be sent. Resolve delivery using the offered link
controls; do not assume an email error means nothing was created.
## Confirm that a colleague has joined [#confirm-that-a-colleague-has-joined]
1. Ask the colleague to open the latest invitation and sign in using the
invited address. They must accept the invitation, not only sign in.
2. Refresh the team screen and find them in the main roster with the intended
**Access** level. **Waiting to join** means they are not yet a joined member.
3. Have them select the practice in the product they need. Missing Team or
settings controls can be expected for a Member; check their role before
treating that as a broken account.
The job-title field describes their position. It does not grant permissions;
the **Access** column does. A colleague should not need your login to finish
their own setup.
If they have not joined, check the email, link expiry and selected account. The
pending row's copy control issues a **new** link and invalidates the previous
one; send the replacement and stop using the older invitation.
An invitation from Sign or Verify returns to that product after sign-in.
Membership is still for the shared practice, not a second product-specific team.
## Change or remove access [#change-or-remove-access]
The Owner can change an existing person's access. Revoke an outstanding invite
when it is no longer needed. Removing a colleague's membership does not erase
the practice's client records.
API keys act as the practice rather than the colleague who created them. Review
[API keys](/docs/technical/mcp) separately when someone leaves; removing their
membership is not a replacement for revoking an integration credential.
Next: [add the practice's client list](/docs/tutorials/import-clients), or return
to the [setup walkthrough](/docs/account).
---
# BAS Review (/docs/bas-review)
Source reviewed: 2026-10-01 · Product documentation
The GST Audit Report is exported, but reading every line again before lodgement takes time. [BAS Review](https://bas.beforemay.com.au/app) reads that CSV in your browser and brings likely coding problems into a review queue. It is marked **Early access** in the app.
The live path starts with the business clients in your BeforeMay practice. Choose a client, quarter, accounting basis and BAS type; then supply the CSV. The review shows figures **As coded**, findings to work through, and **Rule coverage** so a check that could not run is visible.
The [sample practice](https://bas.beforemay.com.au/demo) shows additional case readiness and bookkeeping screens. Those screens use sample data; the live practice route goes straight from client selection to period setup.
---
# Prepare a BAS quarter (/docs/bas-review/prepare-quarter)
Source reviewed: 2026-10-01 · Product documentation
In Xero, go to **Accounting → Reports → GST Audit Report**, set the BAS date range, then **Export → CSV**. The report needs its tax-rate column: a transaction amount without its tax code cannot be reviewed by these rules.
In [BAS Review](https://bas.beforemay.com.au/app), choose the client and **The period**. Under **The ledger**, drop the CSV or choose **Choose a file**. The app reads it in this browser. It shows the filename and number of lines read before you continue.
Select **Cash** or **Accruals** under **Basis**, then **Simpler** or **Full** under **BAS type**. Both choices are required. The client may have a basis on file in Workpapers, but this page asks you to confirm it. The BAS type controls whether checks about G10 and G11 apply.
Under **What was lodged**, you can enter **1A — GST on sales** and **1B — GST on purchases**. They are optional, but without them the tie-back rule cannot run. Start the review only after checking the quarter and the export cover the same dates.
If the export contains a tax-rate name the parser does not recognise, those lines are held out and the run control stays disabled. Check the tax-rate names or export rather than treating a partial quarter as clean.
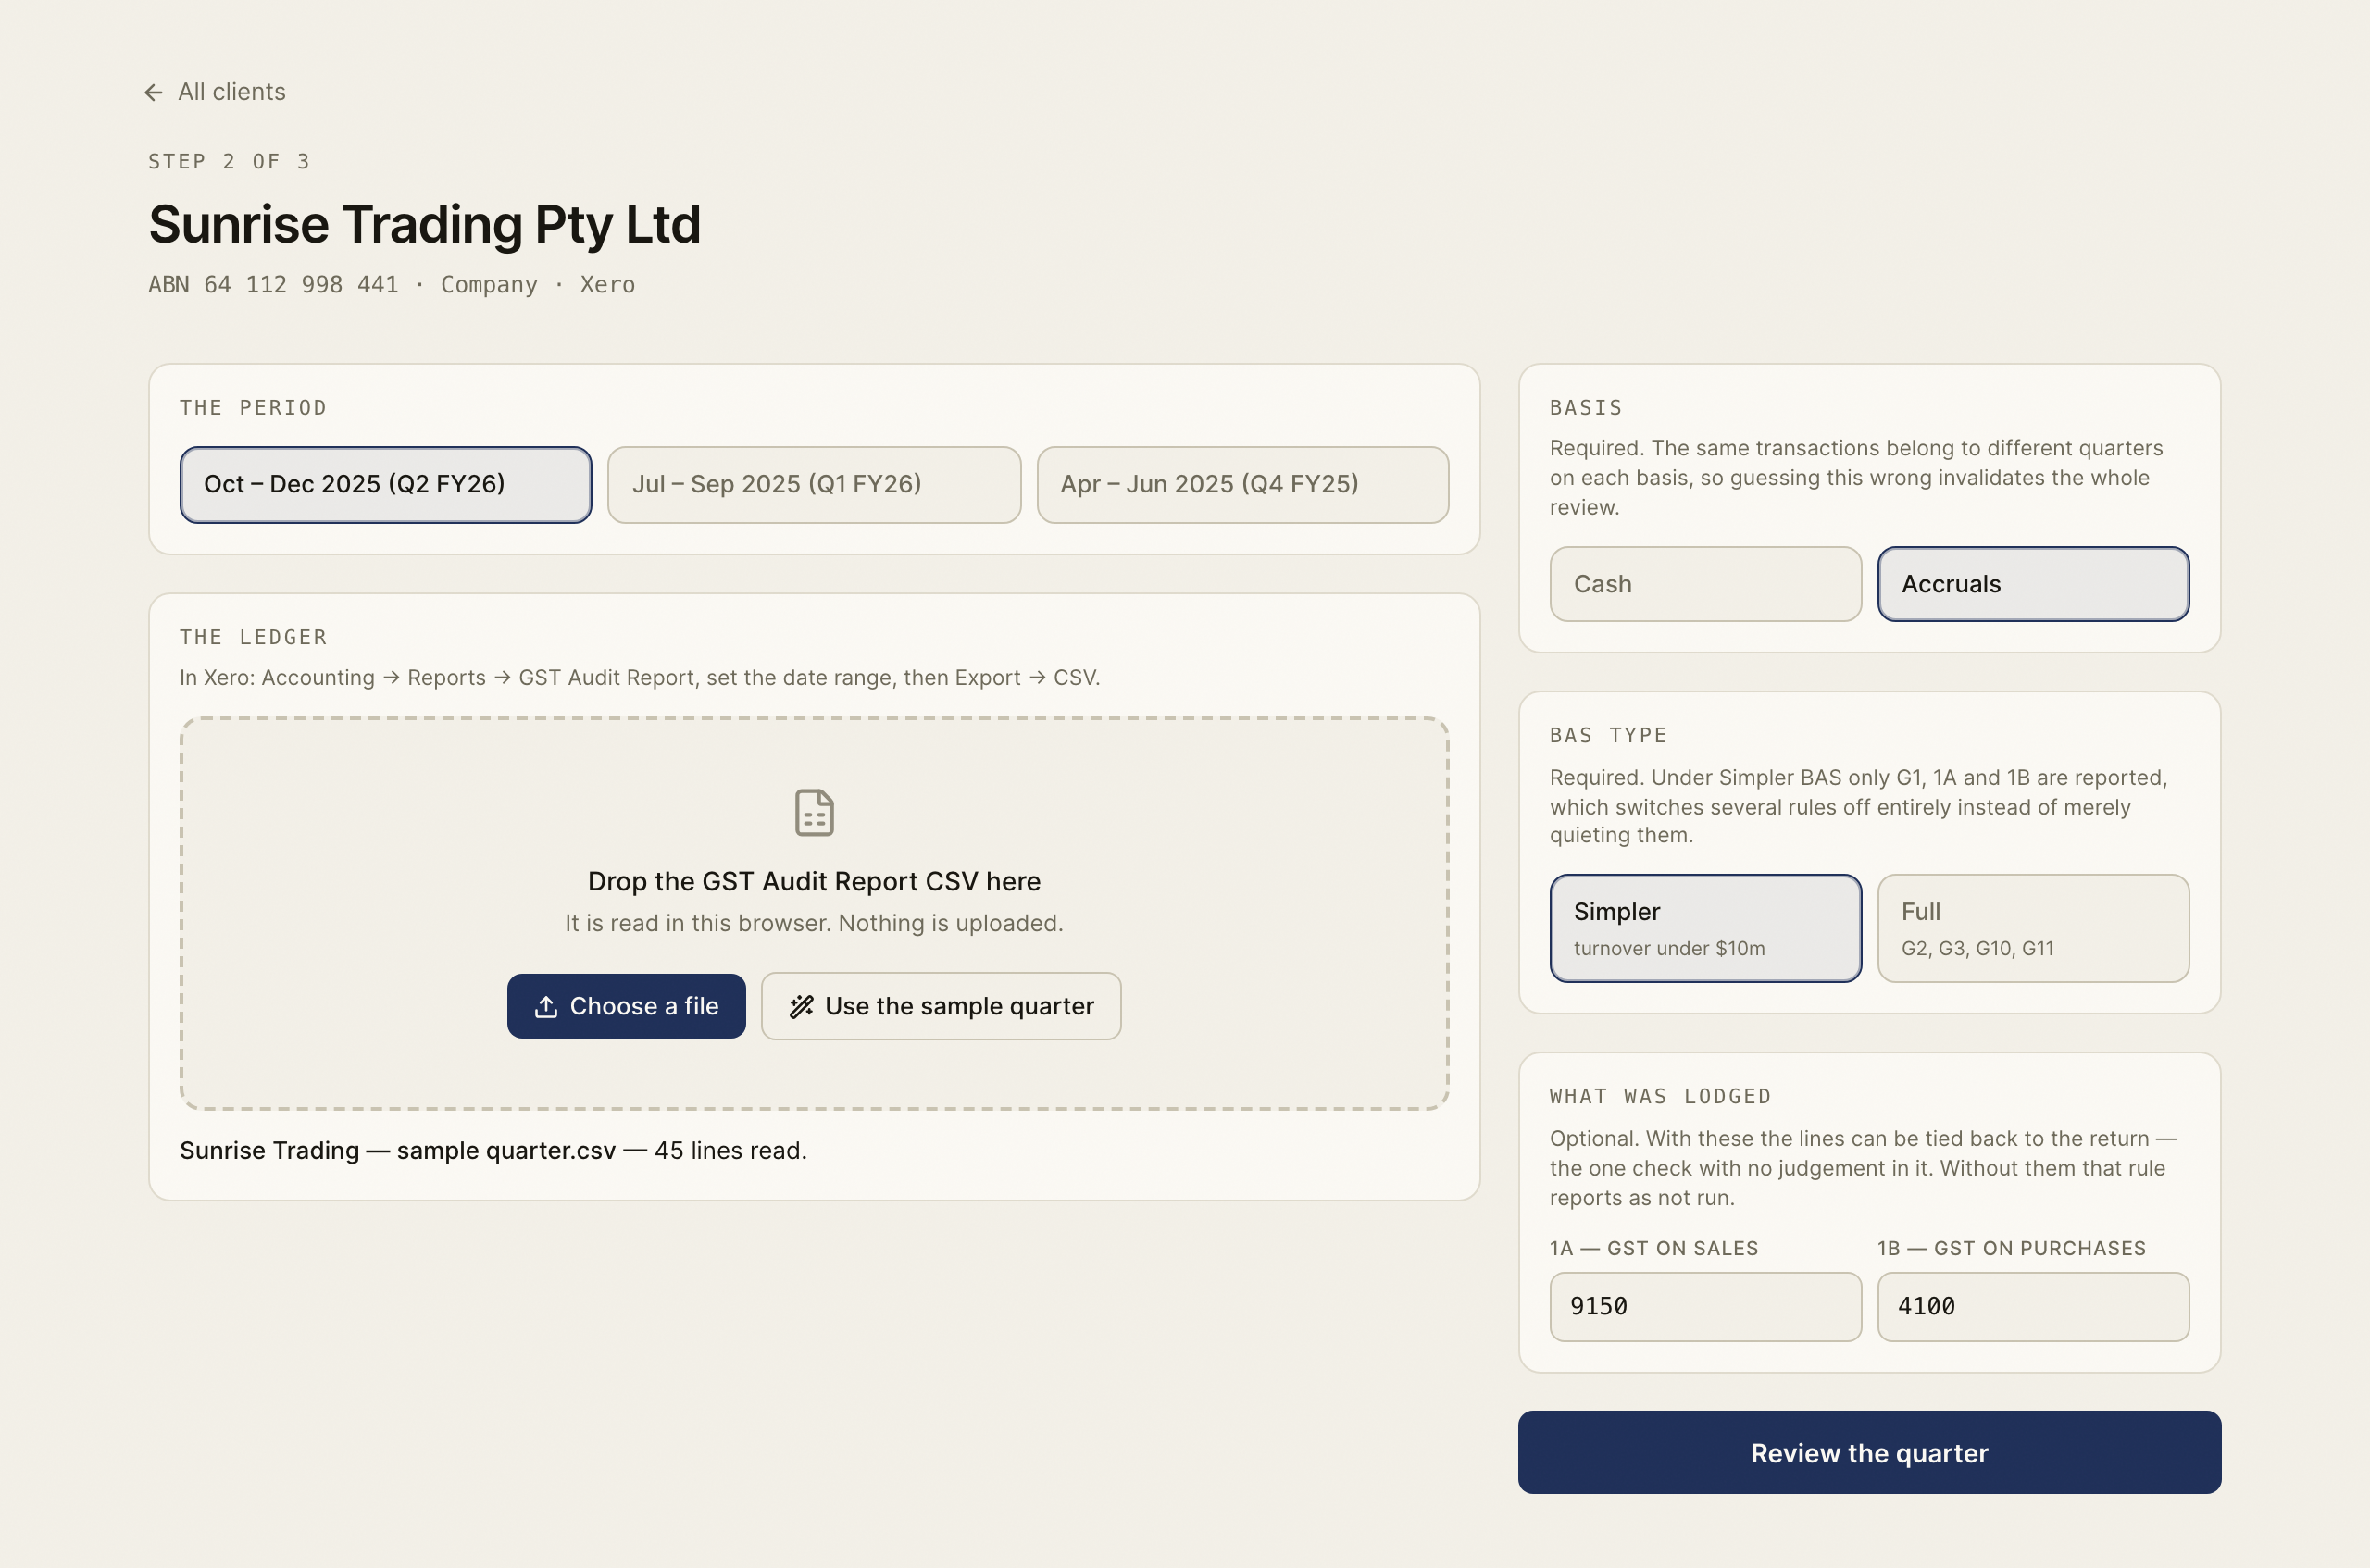
The actual setup screen using the built-in sample quarter. Match your own export’s period, basis and BAS type.
---
# What the BAS rules check (/docs/bas-review/rule-coverage)
Source reviewed: 2026-10-01 · Product documentation
Open **Coverage** in the review rail. **Rule coverage** separates rules that ran from rules that **could not run** and rules that **do not apply**. A rule that ran and found nothing is counted separately. These states matter when the CSV lacks a column the check needs.
| Rules | What to inspect in the source |
| ------------- | ---------------------------------------------------------------------------------------------------------------------------------------------------------------------------------------------------- |
| R01, R07 | Supplier GST registration for a claimed credit, and an overseas-looking supplier without a known Australian registration. R01 uses the transaction ABN first; a name-only match is lower confidence. |
| R02–R05 | GST against the total; GST on accounts that normally carry none; GST-free categories; insurance premiums whose stamp duty can make one-eleventh too much. |
| R06, R08a–R09 | Residential rent coding, excluded income, GST-free versus excluded expenses, and capital versus non-capital purchases. R08b and R09 are off for Simpler BAS. |
| R10–R11 | A GST claim without a named supplier, or a claim over $82.50 without a document marked attached. R11 cannot run if the export has no attachment column. |
| R12–R15 | Possible duplicates, full GST claims on vehicle or fuel costs, entertainment, and phone, internet or home-office accounts. These prompt review of the facts behind the line. |
| R16 | Whether calculated 1A and 1B tie to the figures entered under **What was lodged**. Without those figures it is **could not run**. |
For live supplier checks the app asks ABN Lookup about the quarter's suppliers before showing findings. The review header says which source answered. Only supplier ABNs and names are sent for that lookup; transaction amounts and descriptions stay in the browser. If the register is unavailable, the app labels its built-in fallback. Check a name-only result against the invoice before agreeing to a correction.
See [Check a supplier's GST registration](/docs/bas-review/supplier-gst-check) for the steps to review an R01 finding.
The CSV can omit a supplier ABN column. The parser then warns that registration checks must fall back to names, which are weaker evidence. It never treats an unknown registration state as a proven failure.
---
# Return to a BAS review (/docs/bas-review/saved-reviews)
Source reviewed: 2026-10-01 · Product documentation
The live [BAS quarter](https://bas.beforemay.com.au/app) page shows the practice's business clients and saved quarter states. Open the client and period you want to revisit, then choose the same GST Audit Report CSV again.
When a live review opens, BeforeMay restores saved verdicts for matching findings. The header shows **Opening…**, **Saving…** or **Saved** as the review state is read and written. If it shows **Not saved — retrying on your next change**, do not assume the latest decision is on the practice record.
The stored review holds the period, figures, finding counts and your decisions. The ledger CSV stays on your computer. Keep the source export with the firm's BAS file so the review can be reproduced later. A new export whose transactions or rule findings differ may not display every earlier verdict on the current queue; check the figures and coverage again before relying on it.
---
# Check a supplier's GST registration (/docs/bas-review/supplier-gst-check)
Source reviewed: 2026-10-01 · Product documentation
A GST claim on a supplier invoice may need a closer look when the supplier's registration changed during the quarter. BAS Review checks the supplier against the transaction date, then puts a possible problem in the findings queue under **R01**.
## Check the match before deciding [#check-the-match-before-deciding]
Open the finding and compare its ABN, supplier name, transaction date and GST amount with the invoice. An ABN on the CSV line gives the check a direct match. If the export has no supplier ABN column, the setup page warns that registration checks fall back to contact names. A name-only R01 finding has lower confidence: another business may trade under a similar name. Check the invoice's ABN before accepting a correction.
The review header says whether **Supplier GST: Australian Business Register** answered, whether some lookups failed, or whether the short built-in list was used because the register was unavailable or not connected. A failed lookup or an unknown registration state is not reported as a proven registration failure. The **Coverage** tab shows whether R01 ran.
## What leaves the browser [#what-leaves-the-browser]
For lines that claim GST, the live lookup sends the supplier ABN, or the supplier name when there is no ABN, to BeforeMay's ABN Lookup service. It does not send the CSV, transaction amount or description. The result is used to assemble the review in the browser. Keep the invoice with the BAS file and use it to decide the finding.
---
# Work the BAS findings (/docs/bas-review/work-findings)
Source reviewed: 2026-10-01 · Product documentation
The review opens with the transaction sheet in the middle and the **Review** rail beside it. The top row shows **G1**, **1A**, **1B** and **Net GST** from the imported lines. The left column keeps the quarter, basis, BAS type, source file and **As coded** figures in sight.
Read the current finding against its transaction and evidence. Its severity is shown as **Fix before lodging**, **Worth a look** or **For the file**. Accept a finding when the proposed correction is supported; dismiss it when the source shows the coding is right. The queue moves to the next open point. You can also use `a` to accept, `d` to dismiss, and `j`/`k` to move through findings when you are not typing in a field.
**Still open** adds the GST impact of undecided findings. **Agreed correction** adds the impact of findings you accepted. These are review figures, not a changed Xero ledger or a lodged BAS. Check the source and make any ledger correction in the system that owns the books.
The **Coverage** tab lists checks that ran, checks that found nothing, and checks that could not run. A quarter with no findings can still have missing coverage.
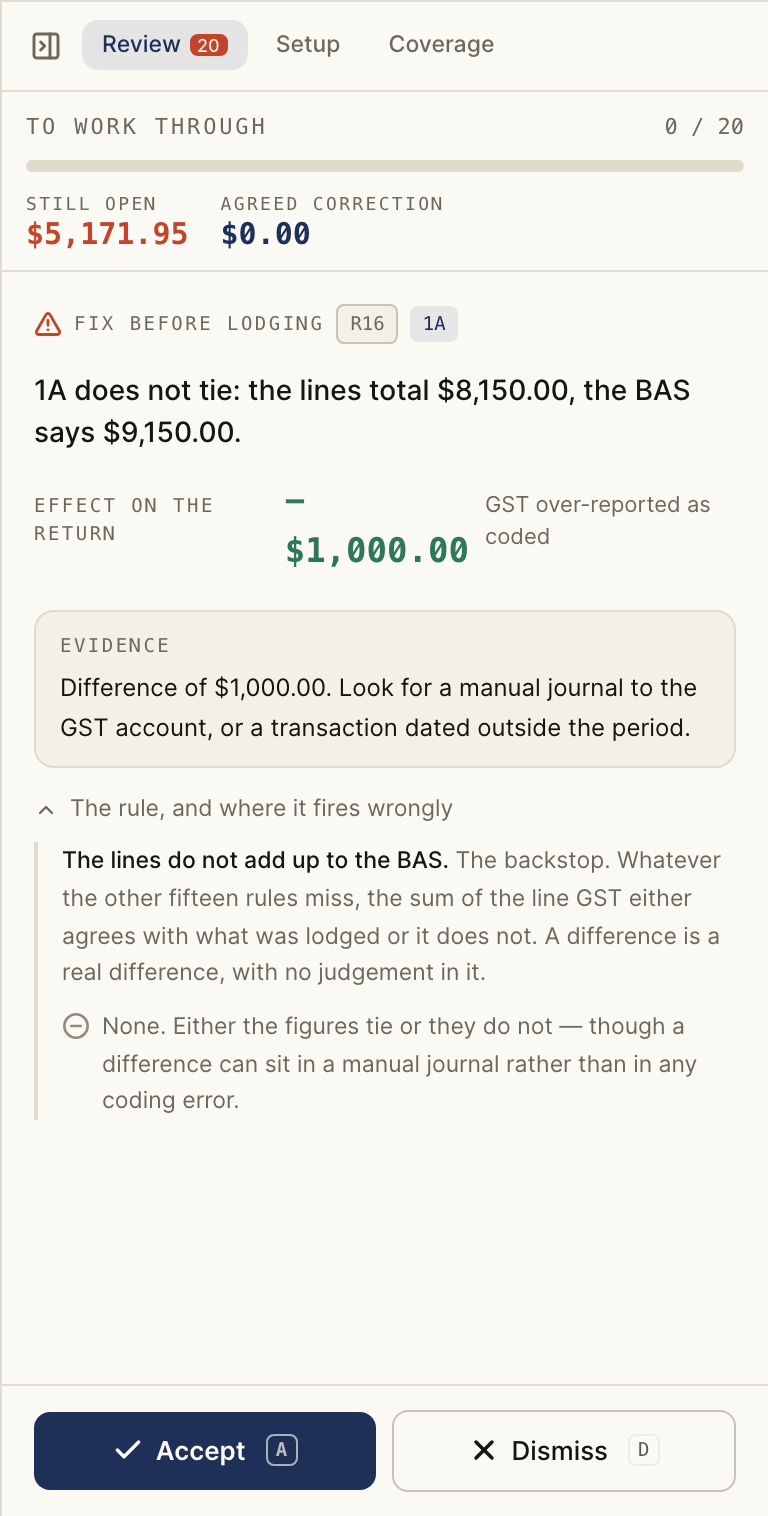
The built-in sample’s actual exception rail. Accept and Dismiss record a review decision; they do not change Xero.
---
# Buy more returns (/docs/billing/buy-more-returns)
Source reviewed: 2026-10-01 · Product documentation
Open **Plan & usage** under **Billing**. The returns meter shows what the practice has used against its allowance. **Credit history** shows where the underlying credits went.
{/* SCREENSHOT: Billing Plan & usage page with the returns meter and Buy returns, /cases/billing */}
To add capacity, find **Top up** or **Pay as you go** on the same page. Under **Buy returns**, choose the number you need. The amount beside it and the **Buy … returns — …** button update together. Check that total before continuing to checkout.
Purchased returns are a one-off addition to the allowance and the page says they **never expire**. A firm without a paid plan can buy them as it needs them. Only the practice owner and admins can manage billing; a member should ask one of them to make the purchase.
If a build asks for another credit, read the case's own quote before proceeding. The amount can depend on the case and whether included updates have been used.
---
# Check storage use (/docs/billing/check-storage)
Source reviewed: 2026-10-01 · Product documentation
Open **Billing → Plan & usage**. The storage meter sits below the returns meter. It counts the practice's stored receipts and working papers against the plan allowance.
{/* SCREENSHOT: Plan & usage storage meter and over-allowance explanation, /cases/billing */}
If the practice is over its allowance, the same page explains **Storage over your allowance** and the current charge based on average use. Read that figure there before changing the plan or payment method; it is a usage charge, not a block of storage to buy in advance.
If the page says storage usage could not be loaded, refresh it before relying on the meter. Owners and admins can use **Payment methods** to check the card on file.
---
# Download a tax invoice (/docs/billing/tax-invoices)
Source reviewed: 2026-10-01 · Product documentation
Open **Billing → Tax invoices**. Each row shows the invoice number, date, amount and status. Choose **Invoice** on the row you need; it opens the available invoice PDF or hosted invoice.
{/* SCREENSHOT: Tax invoices list showing an Invoice link beside a paid charge, /cases/billing/invoices */}
Plan renewals and return top-ups appear here. If there are no rows, the page says **No invoices yet**. If billing history fails to load, refresh before assuming a charge has no invoice.
For a charge older than the most recent 24 shown here, open **Payment → Manage in Stripe**. That is also where the page sends you for a refund request. An owner or admin can access billing; members should ask one of them for the invoice.
---
# Add an email to a case (/docs/cases/add-an-email)
Source reviewed: 2026-10-01 · Product documentation
Save the message as an email file, then open the case and drop it on the file area. You can also use **Browse files** to select the saved message. The case accepts .eml, .msg, .mbox and .emlx files.
The uploader opens the email and adds its covering text as a note alongside the attachments. Check **Sources** after the upload finishes; each resulting file is read through the usual case process.
{/* SCREENSHOT: Case upload area after a saved email expands into a note and attachments, /cases/c5 */}
On Windows, dragging a message directly out of Outlook may pass no file to the browser. If you see **Nothing came through in that drop**, drag the message to your desktop first, then drop the saved file into the case. Dragging an attachment out of the message also works.
Encrypted mail needs the recipient's key. Open it in your mail app and save the attachments, or ask for an unencrypted copy. The case gives a reason when it cannot open an email or an attachment.
---
# Chasing documents (/docs/cases/chasing-documents)
Source reviewed: 2026-10-01 · Product documentation
A build produces two kinds of output that people constantly merge, and should
not.
| | Review point | Chase |
| --------------- | -------------------------- | --------------------------------------- |
| What it is | A judgement the AI made | A document that is absent |
| Where it shows | Against the workpaper line | The **Awaiting** panel |
| What you do | Reply to it, or ignore it | Ask the client through Email or Message |
| Who resolves it | You | Them |
"This looks like a private-use apportionment" is a review point. "There is no
June bank statement" is a chase. Putting the second in your review queue means
sitting on a task you cannot complete.
The **Awaiting** panel is the whole list, and it keeps what has already arrived
struck through rather than deleting it — so "have we asked for this yet" has an
answer after the fact.
{/* SCREENSHOT: Awaiting card with Chase action and outstanding items, /cases/c4 */}
## How the chase list is built [#how-the-chase-list-is-built]
Not by counting files. A chase line has an identity — what kind of document,
which period, which instance — so twelve monthly BAS is not "BAS: 12 uploaded"
but a period with gaps in it. A missing quarter is a gap in a range, and that is
how it is reported.
## Sending it [#sending-it]
Choose **Chase** to open a draft under **Email**, or switch to **Message** for
the portal conversation. Check the selected documents and edit the wording
before you use **Mail app** or **Copy**. See [Request missing documents](/docs/cases/request-documents).
You can build a working paper with documents outstanding, and often should —
the result tells you what the gaps actually cost. What you cannot do is treat
that build as final.
---
# Mark a case complete (/docs/cases/complete-a-case)
Source reviewed: 2026-10-01 · Product documentation
Open the case after reviewing its working paper and outstanding documents. Choose **Mark complete** in the case header. The dialog lets you rate the result from one to five and add an optional note under **Anything to note?**. Choose **Mark complete** again to save it.
{/* SCREENSHOT: Mark complete dialog with rating and optional note, /cases/c5 */}
The case moves to **Complete** in the case list. The header then shows **Completed · …/5**; open it to edit the rating or note with **Update**.
If you want to mark several cases at once, choose **Select** on **Cases**, select the rows, then **Mark complete**. Bulk completion does not capture a rating. Open a case to leave one.
Completion is your review decision. The [next-year roll-forward](/docs/cases/roll-forward) action appears on a completed case.
---
# Invite a client to their portal (/docs/cases/invite-a-client)
Source reviewed: 2026-10-01 · Product documentation
The invitation belongs to a case. Check the client and financial year at the top of the case before sending it.
1. Open the case and choose **Invite client** in the header.
2. Confirm the email address you want the invitation bound to. The client must sign in with that address.
3. Choose **Send invitation**. The case copies the invitation link. Paste it into your email or message to the client. If they have not accepted it and need the link again, choose **Resend invitation** and share the link it gives you.
{/* SCREENSHOT: Case invite dialog with Send invitation and the resulting link-copied notice, /cases/c5 */}
The client opens the link, signs in with the invited address and chooses **Accept invitation**. Once accepted, their uploads go into this case. The invitation page also gives them a **Decline** choice.
If they say the link opens under the wrong account, ask them to check the email shown on the invitation page. [What the client sees](/docs/client-portal/what-the-client-sees) covers the next screen.
---
# Fix a locked PDF or phone photo (/docs/cases/locked-pdfs-and-photos)
Source reviewed: 2026-10-01 · Product documentation
If a PDF asks for a password during upload, enter it in the case's password dialog. The password stays in that browser tab; the unlocked copy goes through the ordinary upload path.
{/* SCREENSHOT: Password prompt for a locked PDF during case upload, /cases/c5 */}
If the locked file is already in **Sources**, open its row and choose **Enter password**. The case replaces the stored locked file with the readable copy after it succeeds. Closing the dialog leaves the locked row in place.
An older iPhone HEIC photo may also sit in **Sources** unreadable. Open its row and choose **Convert to JPG**. If conversion fails, save the photo as JPG on the phone or computer and upload that copy.
{/* SCREENSHOT: Sources row showing Enter password or Convert to JPG repair action, /cases/c5 */}
Check the resulting document row before generating the paper. A row that is still flagged has not become usable evidence just because the file arrived.
---
# Request missing documents (/docs/cases/request-documents)
Source reviewed: 2026-10-01 · Product documentation
Open the case and find **Awaiting** in the right rail. This is the list to check before you chase a client.
## Add what is missing [#add-what-is-missing]
Choose **Add** below the list. If it is empty, use the **+** button in the **Awaiting** heading. **Add documents to request** lets you search the document list or type a one-off name. The full list opens from the expand button as **Awaiting from client**.
{/* SCREENSHOT: Awaiting card with Add and Chase controls, /cases/c5 */}
Upload the document when it arrives. The list keeps received items visible so you can see what was asked for and what came in.
## Chase the client [#chase-the-client]
Choose **Chase** on the **Awaiting** card, or **Chase up** at the bottom of **Sources**. The overlay opens on **Email**. Check the selected documents, edit the draft, then use **Copy** and paste the text into your mail app. **Message** is the portal conversation route; if the client has not joined, its invite field lets you prepare an invitation link first.
{/* SCREENSHOT: Chase-up overlay showing Email and Message tabs, /cases/c5 */}
The selection in this overlay shapes this request. It does not remove an item from **Awaiting**.
---
# Restore a deleted case (/docs/cases/restore-a-case)
Source reviewed: 2026-10-01 · Product documentation
To remove a case, open its menu, choose **Delete case…**, then confirm **Move to Trash**. The confirmation tells you that the case and its documents remain recoverable for the displayed period.
{/* SCREENSHOT: Case delete confirmation showing Move to Trash, /cases/c5 */}
Open **Trash** from the Cases navigation. Find the client and financial year, then choose **Restore** on that row. The case returns to the case list with its documents. **Back to cases** takes you there.
{/* SCREENSHOT: Trash page showing a case, recovery countdown and Restore, /cases/trash */}
**Delete now** and **Empty trash** are permanent deletion actions. Use **Restore** while the countdown is still running if the removal was a mistake.
---
# Roll a case forward (/docs/cases/roll-forward)
Source reviewed: 2026-10-01 · Product documentation
Finish this year's case and choose **Mark complete**. In the case header, choose **Roll forward to FY …**. On the **Complete** tab of **Cases**, the row offers **Roll forward FY …** as another way in.
{/* SCREENSHOT: Completed case header with Roll forward to FY action, /cases/c6 */}
The new case keeps the client and entity type, and carries forward the document chase list. Check the new financial year and its **Awaiting** list before requesting anything; last year's list is a starting point for this year's evidence.
If next year's case already exists, the header changes to **Open FY … case**. Open that case rather than creating another. Last year's workbook remains with last year's case; build this year's paper from this year's source files.
---
# The case model (/docs/cases/the-case-model)
Source reviewed: 2026-10-01 · Product documentation
**A case is one client, one financial year.** Everything — documents, review
points, the workbook, the chase list — hangs off that pair.
The constraint is deliberate. A client folder that spans years cannot answer
"what is outstanding for FY2025-26" without someone deciding which documents
belong to which year, and that decision is exactly the one people get wrong at
volume.
## Finding a case [#finding-a-case]
{/* SCREENSHOT: Cases list with current search and financial-year filters, /cases */}
The **financial year** filter is the one to reach for first: at any point in a
season you are working one year and glancing at another, and the list is sorted
by priority, not by year.
It appears once your list spans more than one year — in a firm's first season
there is nothing to choose between, and rolling last year's cases forward is
what creates the second.
{/* SCREENSHOT: Cases list with financial-year filter open, /cases */}
Search covers **cases and the documents inside them** — a client's name, a file
name, or a phrase that appeared in a statement.
## Stages are derived, not set [#stages-are-derived-not-set]
The list reflects what has happened in the case: documents arriving, a build
running and work still outstanding.
**Mark complete** is manual because finishing the review is your decision. A
completed case moves to the **Complete** tab and carries the date it was marked.
{/* SCREENSHOT: Completed case with its date and rating, /cases/c6 */}
Add a document after a build and the **Working paper** card says **Documents
changed since the last generate.** Choose **Update** to rebuild from the
changed set before relying on the figures.
## Next year [#next-year]
On a completed case, choose **Roll forward to FY …**. The new case carries
client details and the chase list. Check that list against this year's records
before asking for files. See [Roll a case forward](/docs/cases/roll-forward).
---
# Upload a folder of files (/docs/cases/upload-a-folder)
Source reviewed: 2026-10-01 · Product documentation
Open the right case first. Under the drop area, choose **Upload folder** and select the folder of source files. You can drop files onto the case instead. If the client sent a ZIP, drop it or choose it through **Browse files**; the uploader opens the ZIP and checks each file inside separately.
{/* SCREENSHOT: Case drop area with Browse files and Upload folder, /cases/c5 */}
Watch **Uploading & analysing** until it clears, then look through **Sources**. A ZIP is a container; the files inside become the case documents. The ZIP itself is not stored as a source document.
A cloud file that exists only as a OneDrive or iCloud placeholder may need to download to your computer before it can be read. Keep the folder available while the case checks it. If a file or subfolder could not be opened, read the upload result rather than assuming the whole folder landed.
Use [What to upload](/docs/getting-started/what-to-upload) to decide whether the case has enough evidence to build.
---
# Change the portal language (/docs/client-portal/change-language)
Source reviewed: 2026-10-01 · Product documentation
On the invitation page, ask the client to look for the globe button. It is labelled **Choose language** for assistive technology. The same control stays in the portal header after they join.
{/* SCREENSHOT: Portal invitation with the language menu open and native-language options, /portal/ */}
Open it and choose the language written in its own script: **English**, **简体中文**, **繁體中文**, **Tiếng Việt**, **हिन्दी**, **Español** or **Français**. The portal changes on that device. The firm-side Workpapers case stays in English.
The client's own choice on a device takes precedence over a practice preference. If a checklist item was entered only in English, its text can still appear in English; the surrounding portal controls follow the chosen language.
---
# Help a client upload from a phone (/docs/client-portal/upload-from-a-phone)
Source reviewed: 2026-10-01 · Product documentation
Once the client has accepted the practice invitation, they can open the BeforeMay mobile app for the same practice. The work screen has **Still needed** and **Uploaded** lists.
1. Ask them to open **Still needed** and tap the document the practice requested.
2. They can choose **Take a photo**, **Choose from library** or **Choose a File**.
3. After sending it, they can check **Uploaded**. A completed checklist item shows **Done**.
{/* SCREENSHOT: Mock mobile client checklist with Still needed, Uploaded and the camera options, mobile client case */}
The app may read a photo and match it to a checklist item. If it does not match, the file can still be uploaded for the accountant to review. A client can also attach a photo or file in **Messages**.
For a blurred receipt, ask for another picture with the whole page visible. The case's **Sources** row is where you check whether the upload became readable evidence.
---
# What your client sees (/docs/client-portal/what-the-client-sees)
Source reviewed: 2026-10-01 · Product documentation
In the case, choose **Invite client**, confirm the address and choose **Send invitation**. Paste the copied link into your email or message to the client. The link opens an invitation page showing the practice name. The client signs in with the address you invited and chooses **Accept invitation**.
{/* SCREENSHOT: Client invitation page with Accept invitation and the invited address, /portal/ */}
After joining, the client sees their **Overview**, **Documents**, **Messages**, **Activity**, **Invoices** and **Profile** in the portal. The overview shows readiness and items still needed. The **Documents** area lists what they have sent; **Messages** is the conversation with the practice.
{/* SCREENSHOT: Mock client portal overview showing checklist and still-needed count, /client/ */}
An item in the case's **Awaiting** list can appear in the client's checklist. Ask the client to use the requested item when uploading so the file lands against the right request. Their uploads enter the same case you invited them from. They can also see files the practice has shared with them.
If a client reports an empty or wrong workspace, first confirm the invitation email and the signed-in account. [Inviting a client](/docs/cases/invite-a-client) covers issuing a fresh link.
---
# Add or import clients (/docs/clients/client-list)
Source reviewed: 2026-10-01 · Product documentation
The first job is getting one dependable list. On [Clients](https://client.beforemay.com.au/app), choose **Add client** for a single record or **Import** for an existing list.
## Add one client [#add-one-client]
Enter the name and any email you have, then choose **Add client**. The form shows possible matches while you type. Check them before choosing **Add as a new client**: a second record for the same person makes the later email and file history harder to read.
Open the client from the list to complete the record. The **Overview** tab holds its profile and activity; the other tabs hold relationships, email, files and carry-forward reports.
## Import a list [#import-a-list]
Choose **Import**. The import flow reads the spreadsheet, offers a column mapping, and shows a preview before **Import** writes anything. Check names, entity types, ABNs and the proposed action for rows that match a record already in the directory.
XPM, FYI and Xero exports have recognised mappings; a general spreadsheet can be mapped by hand. A TFN column is dropped from the import rather than mapped to a client field. Download the result after the import to see which rows were created or updated.

The actual client-import preview with the downloadable fictional list. No records were imported for this screenshot.
---
# Keep a client's email and files (/docs/clients/email-and-files)
Source reviewed: 2026-10-01 · Product documentation
The signed engagement letter is in one place; the client's reply with a revised statement is in another. Open the client's **Email** and **Files** tabs to work from one record.
## Read and file email [#read-and-file-email]
Connect your Outlook from **Email** first. The client tab tells you when mail reading has not been switched on for the practice or your mailbox has not been connected; **Go to Email** takes you to the setup page.
On a client record, **Email** shows messages associated with that client. Open a message and choose **Save to files** when it belongs in the record. This saves the message as an `.eml` file against the client. It does not silently file every message you read.
## Add and find files [#add-and-find-files]
On **Files**, choose **Upload** or drop files onto the client page. Files saved from email appear there too. You can browse by year and category or by case, or switch to the list. The firm-wide [Files page](https://client.beforemay.com.au/app/files) brings together client-record files, portal uploads and case files; its folders start with client, financial year and category.
Open a file to check it before relying on the filename. The preview drawer provides a download action and lets you move through the current folder.
---
# Client files and previews (/docs/clients/files)
Source reviewed: 2026-10-01 · Product documentation
A client's files can come from a direct firm upload, the client upload flow or
a Workpapers case. BeforeMay Clients exposes files both on the client page and
in the practice's **Files** view. Use the client, year, category and source
filters to narrow the list.
## Upload to the right place [#upload-to-the-right-place]
An upload against the client record belongs to the client and need not have a
case. An upload to a Workpapers case belongs to that year's evidence. If you
want a document to inform a particular working paper, file it through that case's
upload flow; having a file somewhere in the client's directory is not by itself
a guarantee that the next build will use it.
## Preview and download [#preview-and-download]
Open a file to preview it. The shared viewer supports PDFs, images, Word
`.docx` documents, text and email. PDF find, image zoom and the drawer's
previous/next controls help compare the file with the record you are reviewing.
Use **Download** when you need the original file.
Email previews unpack the covering message and attachments. Remote email images
are held back. A Word fallback may show the content without exactly reproducing
the original layout; check the original before relying on a visual detail.
## A preview is not a review [#a-preview-is-not-a-review]
Opening a file does not confirm that its figures are correct, make an unreadable
scan readable or update an already generated workbook. After adding or replacing
case evidence, inspect the case's changed-document notice and update the working
paper when needed.
For extensions and format limitations, read [file formats](/docs/technical/file-formats).
For what deletion removes, read [retention and deletion](/docs/trust/retention).
---
# Clients (/docs/clients)
Source reviewed: 2026-10-01 · Product documentation
You open a client's email to answer a question, then need the document they sent last month. **Clients** puts the record, related people, mail and files on the same client page.
Open [BeforeMay Clients](https://client.beforemay.com.au/app) and sign in with your BeforeMay account. The list is shared with Workpapers, Sign and Verify. A new client added here appears in that shared directory.
The client page has **Overview**, **Relationships**, **Email**, **Files** and **Reports** tabs. The firm-wide **Files** page also shows files held against client records, portal uploads and cases.
For a step-by-step import with example screenshots, use the [client import tutorial](/docs/tutorials/import-clients). Read [Outlook setup](/docs/clients/outlook) and [file storage and previews](/docs/clients/files) for the detailed behaviour.
---
# Raise and follow an invoice (/docs/clients/invoices)
Source reviewed: 2026-10-01 · Product documentation
Open [Invoices](https://client.beforemay.com.au/app/invoices) and choose **New invoice**. Pick the client, fill the invoice details and **Add a line** for each charge. The page draws a PDF as you work. Add your practice's ABN and bank details in invoice settings if the page says they are missing.
Choose **Save draft** while the amounts or recipient still need checking. When it is ready, **Send to client…** sends the PDF from your connected Outlook mailbox. If you send it outside BeforeMay, download **PDF** and use **Mark as sent** so the list reflects what happened.
The invoice list can be searched by client or invoice number and filtered by state. Open a sent invoice to choose **Send a reminder…** or **Mark as paid…**. A sent invoice is locked; **Copy** creates a new draft if you need different wording or amounts. **Void** keeps the old invoice and its number on the list.
An invoice is attached to a client record. This screen does not require a Workpapers case.
## Confirm the result [#confirm-the-result]
Confirm the recipient, dates, GST and payment instructions before sending. An overdue label follows the due date and unpaid state; it does not establish that a reminder reached the client. Record a payment only after verifying it. Inspect any sending error before retrying.
This client-invoice flow does not provide time tracking or work in progress accounting. For mailbox setup, read [Outlook](/docs/clients/outlook).
---
# Outlook and client mail (/docs/clients/outlook)
Source reviewed: 2026-10-01 · Product documentation
Each member connects their own Microsoft Outlook mailbox. Open **Email** in
BeforeMay Clients, or the Outlook connection offered in Workpapers, and complete
Microsoft's consent screen. Reading may need to be enabled for your practice.
For the full sequence and result checks, follow
[Connect and check Outlook](/docs/tutorials/connect-outlook). Microsoft sign-in
alone does not connect your mailbox.
## Several mailboxes [#several-mailboxes]
You can connect more than one mailbox. The most recently connected working
mailbox is the default sender for calls that do not select a mailbox. Check the
sender before sending a client communication, especially after connecting
another account. A reply's saved draft keeps its mailbox context.
## Read and file [#read-and-file]
The inbox can group existing clients and possible clients. Suggested matches
need your judgement: two people with a similar name are not necessarily the
same client. Open the message, confirm who it belongs to and use the filing
controls to save the message or its attachments to the selected client. In
Workpapers, importing client mail can add evidence to a selected case.
The mailbox index holds envelopes such as sender, recipients, subject, date,
folder and attachment presence. Email body text is read from Outlook when
opened. Explicitly saving an email or attachment creates a stored client or case
file; that is different from merely viewing it in the inbox.
## Automatic filing [#automatic-filing]
BeforeMay Clients has a practice-level automatic filing option, off by default.
When an Owner or Admin enables it, new mail to or from addresses on client
records can be saved from colleagues' connected mailboxes with reading allowed.
It does not send messages. Review client addresses and the setting with your
team before enabling it.
## Disconnect [#disconnect]
Disconnect the selected mailbox to remove its connection and index. Outlook
itself is not deleted, and messages or attachments already filed to clients
remain those clients' records. With multiple mailboxes, the default sender can
move to the next working one.
See [data flow](/docs/trust/data-flow) and the [Privacy Policy](/privacy) for the
processing boundary. If the connection fails, read [troubleshooting](/docs/help/troubleshooting).
---
# Record client relationships (/docs/clients/relationships)
Source reviewed: 2026-10-01 · Product documentation
A company record tells you little until you know which people sit behind it. Open the client in [Clients](https://client.beforemay.com.au/app) and use **Relationships** to record its connected people and entities.
The full map and the controls for adding or removing a relationship live on that tab. The **Overview** page keeps a smaller **Related** card; use **View map** when the structure needs room. Record the relationship itself rather than burying it in a note, so the same directory can be read in Verify and the other BeforeMay products.
For an ownership question, check the direction and type of each link before relying on the map. The **Beneficial owners** card is derived from the relationships recorded so far; an incomplete map can leave that card with nobody it can identify. Add the missing shareholders, trustees or directors under **Relationships** and check again.
---
# Cloak (/docs/cloak)
Source reviewed: 2026-10-01 · Product documentation
An old tax file needs to be shared without the identifiers scattered across its pages. [Cloak](https://cloak.beforemay.com/#tool) detects supported identifiers in a PDF, shows the proposed masks on the page, and makes a redacted PDF after you review them.
Digital PDFs are read and redacted on your device. A scan has no text layer; the tool offers an optional **OCR this scan on our AU server** action and still builds the final redacted PDF in your browser. Check every page, especially names in prose or an unlabelled address, and draw boxes where detection missed something.
---
# Redact a PDF with Cloak (/docs/cloak/redact-a-pdf)
Source reviewed: 2026-10-01 · Product documentation
Open [the tool](https://cloak.beforemay.com/#tool) and choose a PDF. Cloak shows **Detected** groups for the identifiers it found. Turn a group on or off, then inspect the masks on every page. Automatic names are recognised where they appear in a labelled field; a name in a letterhead or paragraph may need a manual mask.
Use **Hide more** to click a word, drag across a line, or choose **Draw a freeform box** for content the detector missed. Click a hidden box again to undo it. Read the page around each mask so you do not remove figures the recipient needs.
Under **Style**, choose **pattern**, **blackout** or **label**, then **Download redacted PDF**. The downloaded name ends in `.redacted.pdf`. Cloak also offers **Download detections JSON**; that export omits the matched source text but should still be handled as a record of where identifiers appeared.
Open the PDF you downloaded and inspect every page before sharing it. Automatic detection has limits; the page preview and your manual masks are part of the review, not a guarantee that every identifier was found.
---
# Handle a scan or make a demo copy (/docs/cloak/scans-and-demo-copies)
Source reviewed: 2026-10-01 · Product documentation
When Cloak says **This is a scan — there's no text to read in the browser**, you can choose **OCR this scan on our AU server**. That sends the scan to BeforeMay's Australian service for detection. The page says the scan is processed in memory and discarded; the detected boxes return for review. You can also skip OCR and draw boxes by hand. The final PDF is generated on your device in either case.
For a product demonstration, **Fake data — swap in invented values** replaces detected identifiers with consistent surrogate values. The button changes the download action to **Download fake-data copy**, and the filename ends in `.demo.pdf`. This is a pseudonymised demo copy. It is not anonymised and is not the redacted file to use for a privacy obligation. Manual boxes remain blacked out; some OCR boxes without source text do too.
---
# Build your first working paper (/docs/getting-started/first-working-paper)
Source reviewed: 2026-10-01 · Product documentation
## Before you begin [#before-you-begin]
Have the client, financial year and return type, plus readable source documents.
Choose the correct practice. This walkthrough prepares an Excel working paper;
it does not lodge a return.
If you have not yet confirmed your account, practice and client directory,
finish [practice setup](/docs/account) first. The same client can have several
cases for different years; choose the intended client and period together.
## Create the case [#create-the-case]
From **Cases**, choose **New case** and confirm the client, year and one of the
return kinds offered by the current form. The return kind selects the relevant
working-paper pack. If the kind you need is not offered, confirm support before
proceeding; do not substitute a different entity kind.
Use **Upload & auto-fill** for a prior return or ATO prefill, or **Enter
manually**. Individual is available to every practice; Company and Trust
require invitation access. Partnership is not offered in the new-case picker.
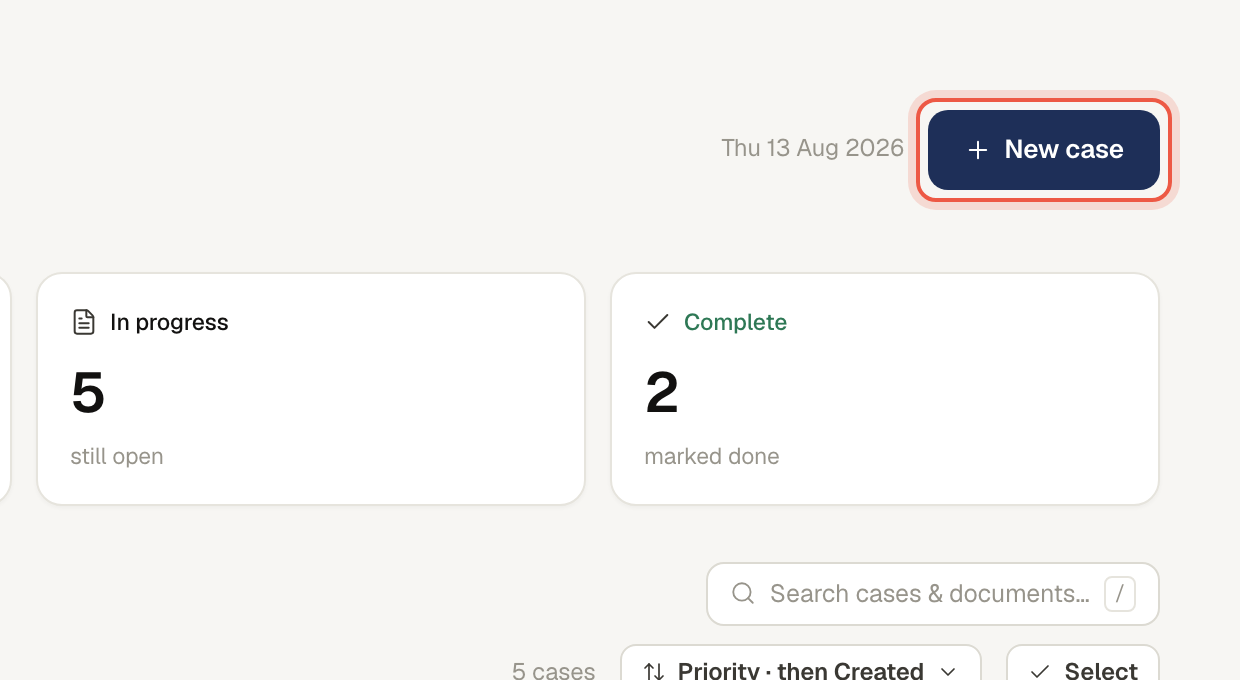
Example of creating a case. Confirm the client and period before continuing.
**Check:** the new case opens with the intended client and year. If you already
have a case for that work, inspect it before creating another one.
## Add evidence [#add-evidence]
Drop files on the case or use its file picker. Add the prior return and current
ATO prefill when relevant, alongside the year's actual source records.
Check the **Sources** list, analysis state and any unreadable or duplicate notice.
Wait for uploads and required reading to finish before preparing the paper.
**Check:** each intended file is in **Sources**, with any reading failure or
missing-evidence issue understood. Selecting files in a picker is not the
same as a finished upload.
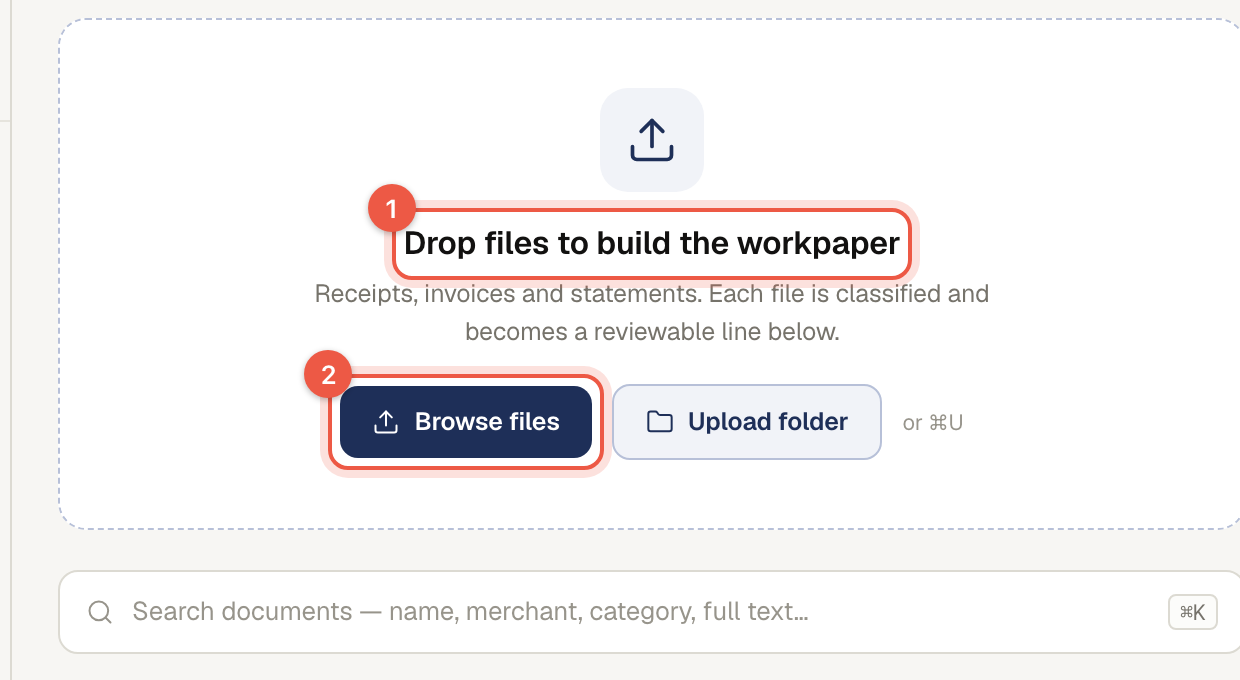
Files are added to the case's evidence. The current screen may show Add in the Sources rail.
Use [what to upload](/docs/getting-started/what-to-upload) for examples by entity
and [file formats](/docs/technical/file-formats) for limits.
## Prepare the paper [#prepare-the-paper]
Choose **Prepare working paper** from the case. Check the preflight choices,
notes, allowance and any incomplete-evidence warning. Independent review and
who answers AI questions can be selected where your account permits them.
AI auto-answer permission is a personal setting in **Settings → Advanced**;
read its acknowledgement before enabling it.
The action reports **Preparing working paper…**, **Reviewing — open draft**
or **Waiting on your answer…** as the run progresses. A draft can be inspected
read-only, but is not the delivered workbook. Respond to questions using
[the question guide](/docs/review/questions).
**Check:** read the run's current state. **Waiting on your answer…** needs your
response; **Reviewing — open draft** is still in progress. Continue to your
final review only when a workbook is delivered.
## Review the result [#review-the-result]
Open **Working paper** when output is delivered. Check the client and year,
material amounts, source references, review points and missing documents.
Resolve findings and inspect any changes the assistant makes. Delivery does
not establish that every automated check passed or your review is complete.
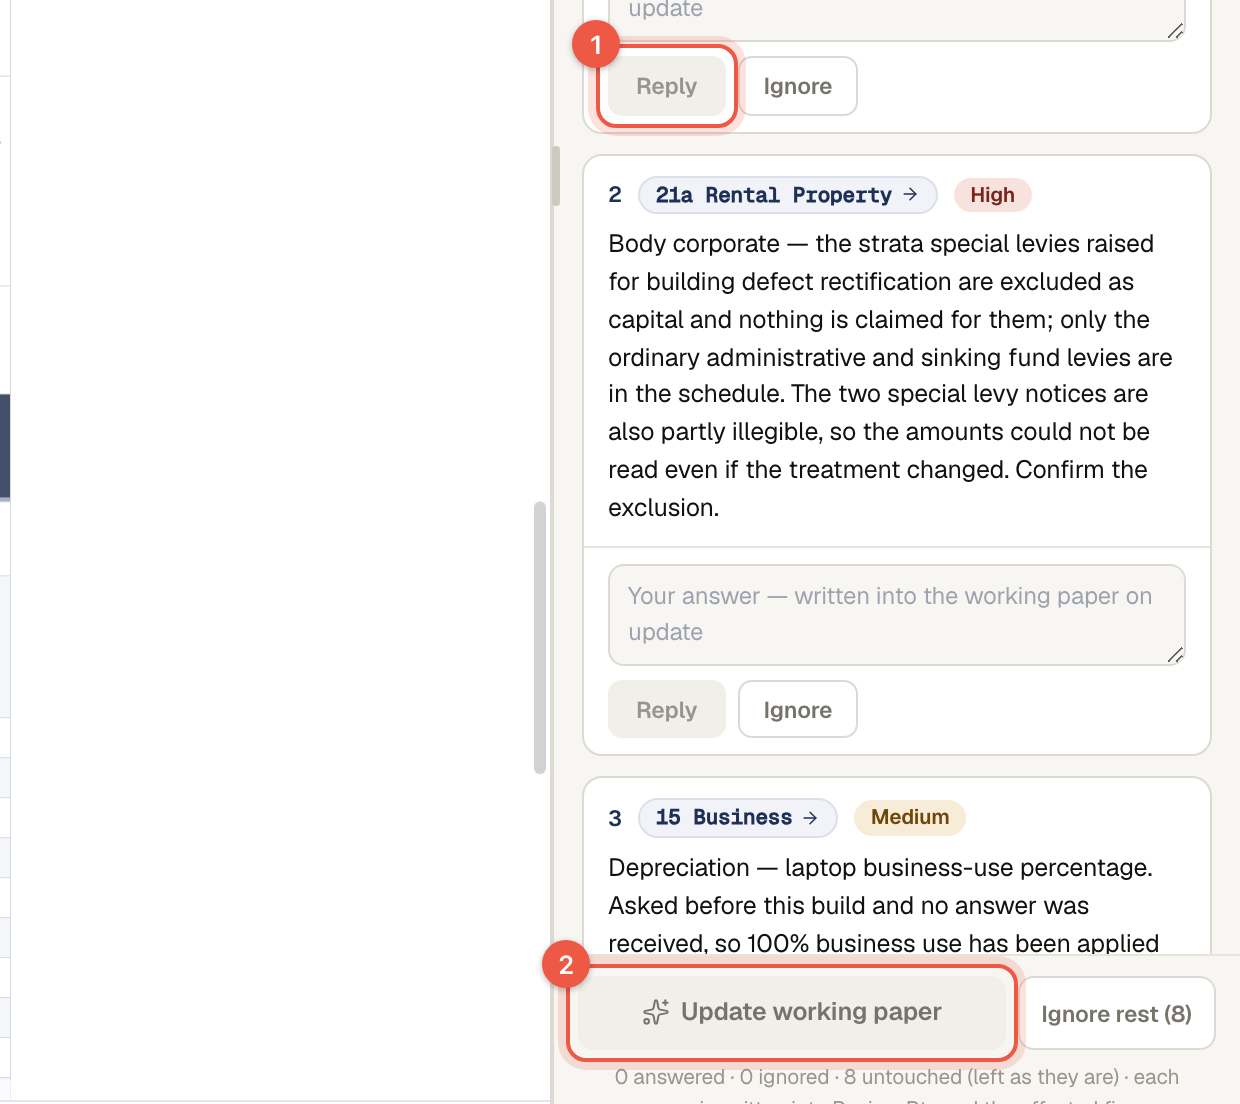
Example review points. Use the current panel to record answers and hand them to the assistant.
The build can deliver a rendered paper with remaining check findings. Other
conditions prevent delivery or hold the run for investigation. Read the stated
result rather than treating every available workbook as a clean outcome.
## Save, download and complete [#save-download-and-complete]
Editable non-formula cells can be corrected in the current workbook. Save and
check the resulting version and affected totals. Download the current `.xlsx`
for your records. Use **Mark complete** only after your own review is finished.
Keep the relevant source documents with the reviewed version.
Manual edits autosave; check the **saved** state before relying on a download.
**History** records edits and delivered versions. An update normally continues
from the edited paper; a fresh build starts from the source documents again.
Example delivered workbook. Formula cells remain locked in the editing flow.
## When the result is incomplete [#when-the-result-is-incomplete]
If evidence changed after preparation, use the case's Prepare/update workflow
to refresh it. If a run fails, keep its reference and the error; do not repeatedly
start new builds without understanding the cause. A failed draft remains an
inspection aid, not output to file as complete.
## Completion check [#completion-check]
| Check | What to inspect |
| ---------------------- | ------------------------------------------------------------------------------------------------- |
| Correct context | Client, entity kind and financial year on the case and workbook |
| Evidence included | The intended files are in Sources; reading failures and missing evidence are resolved or recorded |
| Delivered output | You are looking at the delivered workbook, rather than an in-progress or failed draft |
| Review finished | Material figures and source references checked; questions and remaining findings dealt with |
| Saved version retained | Reopen the current version after edits, compare affected totals and download the intended `.xlsx` |
| Case complete | Use Mark complete after your review; a completed case is not a lodged return |
Next: [check a figure against its source](/docs/tutorials/trace-a-figure).
---
# What to upload (/docs/getting-started/what-to-upload)
Source reviewed: 2026-10-01 · Product documentation
Start with readable source files in the [supported formats](/docs/technical/file-formats).
Prior-year records and current-year ATO prefill provide useful comparison
context alongside the client's actual statements and evidence.
## The two that matter most [#the-two-that-matter-most]
**Last year's return.** It provides a comparison for recurring income,
deductions and balances. Check whether a prior-year item is still relevant
and whether this year's evidence supports it.
**This year's ATO pre-filling report.** It gives the build a second source to
check against client-supplied income records. Read any disagreement it raises.
## The rest, by entity type [#the-rest-by-entity-type]
| Return type | Also worth having |
| ----------- | -------------------------------------------------------------------------- |
| Individual | Payment summaries, private-health statement, rental agent summary, logbook |
| Sole trader | Bank statements for the full year, asset purchases, home-office basis |
| Company | Trial balance, BAS for every quarter, the ATO integrated client account |
| Trust | Trial balance, the trust deed if a distribution question is likely, BAS |
## What happens when a file lands [#what-happens-when-a-file-lands]
Each file shows **Uploading & analysing** while it is read. When it settles it
carries a suggested name, the period it covers, and the role it plays — a trial
balance and a supporting receipt are routed differently, and that routing is
what puts a figure in the right schedule.
The **Sources** rail is where you see what it decided:
{/* SCREENSHOT: Current Sources rail after document classification, /cases/c5 */}
A document still being read is not part of the case. Pressing generate while
files are mid-analysis builds a working paper from the ones that happened to
finish first.
## When a file cannot be read [#when-a-file-cannot-be-read]
Check any reading failure or flagged source row. Replace an unreadable photo
with a clearer copy or provide a readable export before relying on its figures.
{/* SCREENSHOT: Current flagged source row showing why a file could not be read, /cases/c5 */}
## The trial balance is its own page [#the-trial-balance-is-its-own-page]
For enabled company and trust cases, the trial balance has a dedicated screen.
Upload an export, or import a trial balance already in the case. Accounts are
auto-classified; correct any mapping, then choose **Save**.
{/* SCREENSHOT: Trial balance page for an enabled company case, with Upload file and Save, /cases//trial-balance */}
## Duplicates [#duplicates]
Files are hashed on content. Upload the same document twice — under a different
name, from a different folder — and the second copy is kept for the record and
excluded from the build. You do not need to delete it.
---
# Reconcile ATO pre-fill with client records (/docs/guides/ato-prefill-reconciliation)
Source reviewed: 2026-10-01 · Product documentation
The client's bank statement shows an interest credit that looks close to, but not quite the same as, the ATO pre-fill amount. Choosing one figure without recording why leaves the reviewer to repeat the search.
## Compare by payer and income type [#compare-by-payer-and-income-type]
For **2025–26**, gather the current-year ATO pre-filling report, bank and dividend statements, income statements and the prior return. Work payer by payer. Check the name, period, gross amount, withholding and any component that a bank or fund reports separately. A pre-fill can arrive after the client documents, so make sure both cover the same year and version.
For interest and dividends, keep the underlying statements with the comparison. For salary, compare the income statement as well as any payslip the client sent. A missing prior-year stream is a document chase; a current-year amount that differs from the pre-fill is a review question with two sources. Record the reason and the figure used, including a corrected statement or payer amendment when that is the answer.
## Let the case expose the disagreement [#let-the-case-expose-the-disagreement]
Upload both sets of records to the individual [Workpapers case](/docs/getting-started/what-to-upload). The build uses the pre-fill-backed income figure and raises a review point when the client document conflicts with it. Open the linked source, [reply to the finding](/docs/review/review-points), and hand the settled answers to the working-paper assistant. Inspect its proposed changes and the resulting figures. Do not erase the differing document; it explains why the question existed.
The comparison is a 2025–26 workflow. Any tax rates or thresholds needed for the finished return come from that income year's workbook rules, not a number supplied by this page.
---
# Check a BAS before lodgement (/docs/guides/bas-before-lodgement)
Source reviewed: 2026-10-01 · Product documentation
The BAS totals tie to the ledger, but a supplier invoice can still be coded to the wrong GST rate. Review the transactions that make the totals, not only the totals themselves.
## Set up the right quarter [#set-up-the-right-quarter]
Export the **GST Audit Report** from Xero as a CSV for the quarter. In [BAS Review](/docs/bas-review/prepare-quarter), select the client and period, confirm **Cash** or **Accruals**, and select **Simpler** or **Full**. Enter the proposed or lodged **1A** and **1B** figures if you want the tie-back check to run. Keep invoices, credit notes and supporting records available while you review.
## Work the exceptions against evidence [#work-the-exceptions-against-evidence]
Read each transaction beside the rule's explanation. Common points include GST on accounts that normally carry none, insurance coded at a full one-eleventh, a missing supplier, a possible duplicate and a capital purchase coded as an ordinary expense. The supplier registration check uses an ABN when the export has one; a name-only result deserves a closer invoice check. Choose **Accept** only when the source supports the correction, or **Dismiss** with the source in mind.
Before you conclude, open **Coverage**. A rule that **could not run** because the CSV lacks an attachment column or because no 1A/1B figures were entered is an evidence gap, not a clean result. The review's **Agreed correction** summarises accepted impacts; change the coding in the ledger and check the BAS totals again there. The saved review holds your decisions, while the CSV remains in your firm's files.
This is a BAS review workflow for a quarter that falls in the **2025–26 income year**. The product does not lodge the BAS.
---
# Build a company paper from a trial balance (/docs/guides/company-trial-balance)
Source reviewed: 2026-10-01 · Product documentation
The Xero closing trial balance is balanced, but the accounts still need tax adjustments and the GST control does not yet explain the unlodged quarter. A balanced export is a starting point.
## Establish the books [#establish-the-books]
For **2025–26**, collect the closing trial balance, prior-year workpaper, general-ledger detail for doubtful accounts, BAS lodgments if GST-registered, the ATO integrated client account, dividend and loan records, and supporting investment statements. Import the software trial balance as the current-year per-books position. Check account classification before looking at taxable income: revenue, expenses, assets, liabilities and equity have different paths through the workbook.
Record year-end adjustments as journals with a source for each one. Reconcile the tax provision to ATO payments and instalments, and the GST control to the unlodged BAS plus timing differences where they apply. Check the franking account against tax actually paid and dividends, and the Division 7A schedule against agreements and repayments. Do not force an out-by to nil with an unexplained journal.
## Review the linked paper [#review-the-linked-paper]
In a company [Workpapers case](/docs/getting-started/first-working-paper), use the dedicated [trial-balance screen](/docs/getting-started/what-to-upload) to upload the export and correct classifications. The delivered **T01 Trial Balance** carries the per-books figures and adjustment journals; **T10 Tax Calc**, **T50 Income Tax Rec** and **T60 BAS & GST Rec** link from it. Read the summary checks and open the source for any figure that looks wrong. The workbook can also carry a downstream journal list for posting back to Xero.
The workbook's company rate selection and other year-specific figures are taken from its **2025–26** rate book. This guide supplies no rate from memory.
---
# Work through crypto disposals from exports (/docs/guides/crypto-exchange-disposals)
Source reviewed: 2026-10-01 · Product documentation
The exchange CSV has a neat gain column. It may have no record of the coins moved in from another wallet, or the purchase that established their cost base. Begin with the transaction trail, not the summary.
## Put the exports in time order [#put-the-exports-in-time-order]
For **2025–26**, gather full transaction-history exports from each exchange and wallet used, including acquisition history brought forward. Identify sales to fiat, swaps into another asset or stablecoin, spending and gifts as disposals. A transfer between the client's own wallets is a movement to reconcile across both sides, not a disposal. Match units sold to acquisition parcels using one stated method per asset and carry exchange and network fees into the cost working.
Check AUD values against the export. When an export has no AUD amount, the 2025–26 workpaper rules use a dated RBA conversion where available; an unsupported estimate should stay outstanding. Keep staking and similar rewards separate from disposal gains as income at receipt. A balance-only statement cannot establish the acquisition cost of units later sold.
## Read what the paper can support [#read-what-the-paper-can-support]
Upload the exports to an individual [Workpapers case](/docs/getting-started/what-to-upload). The worker stages a crypto ledger before the build when it can parse the histories. The **18c CGT Other** schedule then summarises the ledger by asset and holding class, with its source and parcel method. When history or pricing is missing, the figure stays **OUTSTANDING** and the capital-gains summary is provisional. Read the source and [missing-document points](/docs/cases/chasing-documents) before using a net gain.
---
# Review a Division 7A loan schedule (/docs/guides/division-7a-loan-review)
Source reviewed: 2026-10-01 · Product documentation
The general ledger has a shareholder loan balance. That balance alone cannot show whether the agreement, interest and repayments support the year-end position.
## Build one trail per loan [#build-one-trail-per-loan]
For the **2025–26 income year**, collect the loan agreement, prior-year closing schedule, bank entries for advances and repayments, and the company trial balance. Check the borrower and agreement date, then reconcile the opening balance to last year's file. Keep each loan separate. A transfer between accounts is not automatically a repayment by the borrower.
For a complying loan, compare the year's actual repayments with the schedule's minimum yearly repayment and calculate interest using the applicable benchmark. The rate in the repo's **2025–26** rate book is **8.37%**. Check any new loan's lodgment-day position separately; a current-year advance is not made safe by copying an old schedule's terms. If the repayment falls short, identify the amount and escalate the deemed-dividend treatment for review.
## Check the company workpaper [#check-the-company-workpaper]
Upload the agreement, bank evidence and trial balance to a 2025–26 company [Workpapers case](/docs/getting-started/first-working-paper). Its **T40 Div7A Loans** sheet has a row for each loan and computes interest, minimum repayment, closing balance and shortfall from entered facts. Open the source behind the repayments, then read the [review points](/docs/review/review-points). A shortfall is raised as a high-priority point for the accountant to resolve; the workbook does not make the underlying factual decision for you.
The 8.37% figure is from `skills/company-workpaper/reference/rate-book.json` for **2025–26**. Check the income year on any file you roll forward before reusing it.
---
# Task guides (/docs/guides)
Source reviewed: 2026-10-01 · Product documentation
The job usually begins with a document that does not quite answer the question: an agent statement without the direct-paid expenses, a share sale without its purchase notes, or a coded quarter without its lodged figures.
These guides cover the **2025–26 income year** where income-tax treatment is involved. They describe what to collect, what to reconcile and where BeforeMay helps. The accountant still checks the source and signs off the judgement.
---
# Build a rental schedule from agent statements (/docs/guides/rental-agent-statement)
Source reviewed: 2026-10-01 · Product documentation
The client sends an annual agent statement and a folder of council and strata bills. Some of those bills have already been paid by the agent. Adding both sets of amounts is the easy way to overstate the rental loss.
## Start with receipts and the agent's totals [#start-with-receipts-and-the-agents-totals]
For the **2025–26 income year**, get the agent's annual statement, bank evidence for rent paid outside the agency, loan statements, depreciation or capital-works schedule, and invoices the owner paid directly. List rent when received; do not divide the final payment around 30 June because its tenancy period crosses year end.
Use the agent statement's own rent and expense totals. Match a forwarded rates bill to the statement before putting it in a separate paid-personally column. A bill already included in agent disbursements is evidence for that statement amount, not another expense. The statement covers the period the agent managed; do not apply a second letting-period fraction to its own figures.
## Check the direct-paid side [#check-the-direct-paid-side]
Add only costs the owner paid on top of the agent statement. For a cost covering private or unavailable periods, document the period and the basis of any apportionment. Loan interest follows the use of the borrowed funds; the property offered as security does not establish that use. Borrowing expenses and capital works have their own schedules, so keep the source documents instead of dropping their full invoice amounts into other expenses.
## Check the delivered schedule [#check-the-delivered-schedule]
Upload the sources to an individual [Workpapers case](/docs/getting-started/what-to-upload). The 2025–26 workbook has a sheet per rental property and a summary feeding item 21. Compare its agent-statement and personally-paid columns with your source list. Open any disputed cell's document and resolve the [review point](/docs/review/review-points) before accepting the net figure.
---
# Work out CGT on a share sale with parcels (/docs/guides/share-sale-cgt-parcels)
Source reviewed: 2026-10-01 · Product documentation
A broker's annual summary says 300 shares were sold. The client bought them in several parcels at different prices. One average purchase figure would hide which units were sold and whether each parcel was held long enough for a discount.
## Reconstruct the parcels [#reconstruct-the-parcels]
For **2025–26**, get purchase and sale contract notes, the opening holdings register or prior workpaper, and any corporate-action records. Use the trade date for the sale and each acquisition date for its parcel. Record units, total purchase cost including brokerage, sale proceeds and the source note for both sides. Match the sale against the oldest parcel first unless the records support a specifically identified parcel; split a sale across rows when it crosses parcels.
The holding-period check belongs to each parcel's own dates. Under the repo's **2025–26** rate book, the individual CGT discount is **50%** where the parcel qualifies. Apply losses in the capital-gains summary before the discount calculation. A missing purchase cost or date is outstanding evidence; zero would assert a known nil and distort the gain.
## Review the register and summary [#review-the-register-and-summary]
Upload the notes and prior-year register to an individual [Workpapers case](/docs/getting-started/what-to-upload). The investment register records the parcels and feeds the share component of item 18 and the capital-gains summary. Check that closing units and cost agree with the holding statement, then follow a disposal row to its source. Resolve a provisional cost base through [review points](/docs/review/review-points) rather than treating the computed total as final.
The 50% figure is from `skills/individual-itr-workpaper/reference/rate-book.json` for **2025–26**; eligibility depends on the parcel facts.
---
# Prepare a trust distribution working paper (/docs/guides/trust-distribution-working-paper)
Source reviewed: 2026-10-01 · Product documentation
The trust's accounts are close to final, but the distribution minute is still in a different folder. Put it beside the deed before you allocate a dollar to a beneficiary.
## Gather the records [#gather-the-records]
For the **2025–26 income year**, collect the prior-year workpaper, closing trial balance or cashbook, investment and fund tax statements, the deed's income clause, and the trustee resolution. Check who is named, each beneficiary's status and the percentages or specific entitlements the resolution actually records. An absent or unclear resolution is a question for the trustee, not a percentage to infer from last year.
## Separate accounting income and tax character [#separate-accounting-income-and-tax-character]
Reconcile the accounts to the income and deduction schedules first. Franked distributions, capital gains and foreign income need their character kept through the tax calculation. Compare distributable income under the deed with the accounts result and record the basis if they differ. Then allocate each character to beneficiaries under the resolution; check that the allocations and totals reconcile after rounding.
If the resolution streams a gain or franked distribution to one beneficiary, check the deed and record why that allocation is supported. Record TFN-held status, entity type and residency for each beneficiary. Missing beneficiary detail or an unallocated amount changes the review, even when the total income figure ties.
## Use the working paper [#use-the-working-paper]
Create a trust case in [Workpapers](/docs/getting-started/first-working-paper) for 2025–26 and upload those records. The delivered workbook has a tax calculation and distribution statement linked to its trial balance and investment schedules. Read the beneficiary rows, source links and [review points](/docs/review/review-points); answer any question about the deed or resolution before treating the allocation as complete.
For the income-year treatment used here, the repo's trust workpaper pack is the source. This guide describes the review job in fresh language; the pack remains the product's internal rules.
---
# Glossary (/docs/help/glossary)
Source reviewed: 2026-10-01 · Product documentation
| Term | Meaning |
| --------------------------- | ------------------------------------------------------------------------------------------------------- |
| Account | A person's sign-in identity; separate from their practice membership. |
| Practice / firm / workspace | The organisation whose members work on its clients and records. |
| Client record | A person or entity in the shared directory. It can exist without a case. |
| Case | A Workpapers engagement for a client and financial year/return type. |
| Source document | The original evidence the firm holds, distinct from an outbound processed copy. |
| Recognised text | Text read from a file or scan; recognition alone does not verify its figures. |
| Draft workbook | Output available for inspection before delivery, or from some failed runs; not the final deliverable. |
| Delivered workbook | Output released by the build process; it can still have findings to resolve. |
| Current version | The version the case uses now, including supported edits; distinguish it from an earlier history entry. |
| Review point | A question, judgement or issue for the accountant to consider and resolve. |
| Chase / Awaiting | Missing evidence requested from the client. |
| Prepare | The case action that begins or refreshes the working-paper workflow. |
| Signed URL | A temporary credential granting access to a particular stored file. |
| Request token | The credential in a signing or verification link; treat it as personal to the intended recipient. |
| MCP | The machine interface through which authorised practice software calls the documented Workpapers tools. |
| Scope | A permission on an API key, such as reading cases or starting builds. |
| CDD record | A customer due-diligence evidence summary with recorded assessments and decisions. |
| Not run | A check did not run or lacks required evidence; it is not a pass. |
| Redaction | Removal or replacement of selected information from material sent onward. |
| Pseudonymisation | Substitution that can still be linked back; it does not make material anonymous. |
Follow [tutorials](/docs/tutorials) for these terms in context.
---
# Get help (/docs/help)
Source reviewed: 2026-10-01 · Product documentation
For a task walkthrough, start with [tutorials](/docs/tutorials). For an error,
read [troubleshooting](/docs/help/troubleshooting). For unfamiliar product terms,
use the [glossary](/docs/help/glossary).
## Product support [#product-support]
Email [support@beforemay.com.au](mailto:support@beforemay.com.au) with:
* the product and practice name;
* the task you were trying to complete;
* the exact error and the time it occurred, including your timezone;
* the relevant case, request or run reference, if available;
* browser/device and whether the issue also happens after a reload;
* a screenshot cropped to the problem and cleared of sensitive details.
Do not include passwords, API keys, sign-in codes, TFNs, full signed file URLs
or personal signing/verification tokens. If a source document is needed,
support can arrange the appropriate way to inspect it. Avoid repeated actions
that create invoices, requests or builds while waiting for help.
## Privacy and security [#privacy-and-security]
Email [privacy@beforemay.com.au](mailto:privacy@beforemay.com.au) for a privacy
request or suspected security/privacy incident. Describe what happened and
which product is affected without sending credentials or a client's identity
image in the initial message. The [Privacy Policy](/privacy) explains the
response process; this page does not add a separate response-time promise.
## Clients of an accounting firm [#clients-of-an-accounting-firm]
Contact your accountant first for a wrong invitation address, replacement link,
missing upload request or questions about your records. The firm controls those
records. [Client access](/docs/account/client-access) and
[account deletion](/delete-account) explain the relevant boundaries.
---
# Troubleshooting (/docs/help/troubleshooting)
Source reviewed: 2026-10-01 · Product documentation
## Sign-in and workspace [#sign-in-and-workspace]
| Symptom | Next step |
| ------------------- | ---------------------------------------------------------------------------------------------- |
| No login email | Check address and spam; wait for the 60-second resend timer. |
| Unexpected practice | Check the signed-in address and select the intended membership. |
| Passkey cannot run | Use a supported browser or an enrolled authenticator; contact support if neither is available. |
| Invitation refused | Use the invited address; ask the firm to correct or reissue it if needed. |
See [sign-in](/docs/account/signing-in) and [client access](/docs/account/client-access).
## Files and working papers [#files-and-working-papers]
| Symptom | Next step |
| ------------------------- | ---------------------------------------------------------------------------------------------------------- |
| Upload refused | Read the format/size message; export a supported type or unzip the archive. |
| Unreadable evidence | Replace with a clearer original or digital copy; do not treat it as checked. |
| Preparing or reviewing | Inspect the current run state. A visible draft is not delivered output. |
| Waiting on an answer | Open the question, check the evidence and respond within the workflow's displayed window. |
| Build failed or held | Keep the run reference and error; resolve the stated cause or report it before repeatedly starting builds. |
| Delivered with findings | Read and resolve the outstanding items; delivery does not mean every check passed. |
| Documents changed | Refresh the working paper through Prepare/the update flow before treating its figures as current. |
| File link no longer opens | Reopen the document/workbook to obtain a fresh signed URL. |
For a wrong amount, follow [source tracing](/docs/tutorials/trace-a-figure).
Do not use a failed draft as a filed return or final working paper.
## Mail, Sign and Verify [#mail-sign-and-verify]
A request or invoice may exist even if the email did not send. Inspect the
result and request list before creating another. For Outlook, check the
connected mailbox, Microsoft consent and the default sender. Reconnect a failed
connection when prompted.
For an expired signing/check link, the firm can issue a replacement. The new
link supersedes the old one. For Verify, a failed refresh leaves the previous
stored result visible; **Not run** is not a clearance. See [Sign](/docs/products/sign)
and [Verify](/docs/products/verify).
## Local tools and BAS Review [#local-tools-and-bas-review]
Sift needs a digital PDF with readable text; a scan is not an empty statement.
For BAS Review, check export type, headings, dates, basis and unknown tax rates.
Review the save status before leaving a real quarter. Keep the original CSV
because the ledger lines are not stored on the server.
If these steps do not resolve the problem, [report it with context](/docs/help).
---
# BeforeMay docs (/docs)
Source reviewed: 2026-10-01 · Product documentation
Choose the guide for the work you are doing. Start with a walkthrough if you
are new, or go straight to the system details if you are evaluating BeforeMay
for your practice.
- [Use BeforeMay](/docs/products) — Set up your practice, work with clients and finish a task.
- [Technical & integrations](/docs/technical) — Connect your software and understand the system behind it.
- [Security, data & AI](/docs/trust) — Follow the data, inspect the controls and assess the limits.
## Start with a task [#start-with-a-task]
* [Build your first working paper](/docs/getting-started/first-working-paper) — upload, generate, review and download.
* [Check a figure against its source](/docs/tutorials/trace-a-figure) — follow a workbook cell back to the evidence.
* [Import your client list](/docs/tutorials/import-clients) — map columns, review matches and confirm the import.
* [Send an engagement letter](/docs/tutorials/send-a-letter) — prepare the PDF, test it and track signatures.
* [Request an identity check](/docs/tutorials/identity-check) — send the link and read the evidence it returns.
* [Review a coded BAS quarter](/docs/tutorials/review-bas) — inspect GST exceptions and their effect on the figures.
## One practice, several products [#one-practice-several-products]
Workpapers, Clients, Sign, Verify and BAS Review use the shared BeforeMay
account and client directory. What you can do depends on your practice role
and the product you open. Sift and Cloak have different processing and account
arrangements; read their guides before assuming the same rules apply.
| Product | What to read |
| ------------------------- | --------------------------------------------------------------------------------- |
| Workpapers | [Documents, working papers and review](/docs/getting-started/first-working-paper) |
| Clients | [Client records, files, Outlook and invoices](/docs/clients) |
| Sign | [Letters, PDFs and signing evidence](/docs/products/sign) |
| Verify | [Identity checks and due-diligence records](/docs/products/verify) |
| BAS Review — early access | [Reviewing an exported GST Audit Report](/docs/products/bas-review) |
| Sift | [Convert a digital PDF to Excel or CSV](/docs/products/sift) |
| Cloak | [Review and redact a PDF](/docs/products/cloak) |
## Workpapers cases [#workpapers-cases]
BeforeMay keeps a client's source files, document requests and working paper in
one financial-year case. The delivered Excel working paper still needs your
review. Company and trust papers are available to practices enabled for those
return types.
## Evaluating BeforeMay [#evaluating-beforemay]
Start with [data flow](/docs/trust/data-flow), [access controls](/docs/trust/access-control)
and [AI processing and human review](/docs/trust/ai-processing). The
[assessment guide](/docs/trust/audit-evidence) explains the evidence to request
for a technical or business review.
The [Privacy Policy](/privacy) and [Terms and Conditions](/terms) remain the
policy and contractual documents. These guides explain product behaviour;
they do not replace those documents or your practice's professional judgement.
---
# Invite a team member (/docs/practice/invite-a-team-member)
Source reviewed: 2026-10-01 · Product documentation
Open **Settings → Team**. In **Email addresses to invite**, enter one address or paste a list, then choose **What they can do once they join**. Review the addresses and choose **Invite** (or **Invite …** for a list).
{/* SCREENSHOT: Settings Team page with email entry, access choice and invite action, /cases/settings/team */}
The practice levels are **Owner**, **Admin** and **Member**. An invitation offers **Admin** to the owner and **Member** to an owner or admin. A practice has one owner; handing ownership over is a separate action. Members work with clients and cannot change the team, billing or practice settings.
Invitations that have not been accepted appear under **Waiting to join**. An expired invitation can be sent again with **Invite again**. A fresh invite link stops the old one working. The team list also lets authorised people change access or remove a member.
Team access is shared across Workpapers, Sign and Verify. Removing someone from the practice removes their access to those products straight away, while their name remains on work they already did.
---
# BAS Review — early access (/docs/products/bas-review)
Source reviewed: 2026-10-01 · Product documentation
[Open BAS Review](https://bas.beforemay.com.au). The current flow reviews an
already coded quarter from a **Xero GST Audit Report CSV**. It does not connect
to Xero to fetch or change the ledger, and it does not lodge a BAS.
## What you supply [#what-you-supply]
Choose the client and period, cash or accruals basis, and BAS type. Export the
GST Audit Report on the matching basis and dates. The parser finds columns by
their headings and reports an unrecognised tax-rate name rather than guessing
its treatment.
The [quarter tutorial](/docs/tutorials/review-bas) explains the review steps.

The actual period setup with the built-in sample quarter. The tutorial explains how to check the basis and dates.
## What a finding means [#what-a-finding-means]
A finding identifies a possible coding exception and shows its dollar effect
on the supported BAS figures, including G1, 1A and 1B. Inspect the transaction
and evidence before accepting or dismissing it. Accepting a finding records
your decision in the review; make any agreed ledger correction in your
bookkeeping system separately.
A rule that needs information not present in the export may be **Not run**.
Missing attachment information does not mean that the transaction has no
attachment. A clean finding list therefore does not certify that every possible
GST issue was tested.
## What is stored [#what-is-stored]
The CSV is parsed in the browser and its transaction rows are not uploaded.
For a signed-in practice, saved review state includes the client and period,
source filename, aggregate figures and counts, agreed correction and hashed
finding identifiers with your decisions. That is stored review metadata, even
though the ledger lines remain in the browser. Keep the source export so you
can reopen the period's evidence.
Use the sample at [BAS Review demo](https://bas.beforemay.com.au/demo) to learn
the workflow. Its sample practice is separate from your live client list.
---
# Redact a PDF with Cloak (/docs/products/cloak)
Source reviewed: 2026-10-01 · Product documentation
Open the [BeforeMay redaction tool](/redact) for the public PDF workflow.
Cloak detects possible identifiers, lets you review them and produces a redacted
copy. Detection suggestions need your review before the file is shared.
## Digital PDFs [#digital-pdfs]
The digital-PDF flow reads, detects and redacts in the browser. Drop the file,
inspect the detected identifiers and pages, correct the selection and download
the redacted copy. Keep the original separately as the source record.
Check that every identifier you intend to remove is covered. A detector can
miss a value or mark an unrelated value. Inspect the downloaded copy, including
pages with annotations and images, before giving it to another person.
## Scans [#scans]
A scan has no readable text layer for browser detection. The tool explains this
and offers its scan-processing route where available. That route uses the
Australian OCR service; it does not have the same no-upload boundary as the
digital-PDF flow. Read the notice before submitting a scan.
## Redaction and substitution [#redaction-and-substitution]
Use true redaction when the recipient must not recover the selected information.
A demo copy with substitute values is pseudonymisation, not anonymisation. It
can retain names, addresses and other information that identifies someone.
See [AI processing](/docs/trust/ai-processing) for the separate outbound gate used
by Workpapers; manually redacting in Cloak is not a prerequisite that replaces
that gate.
## Developer access [#developer-access]
Cloak's developer dashboard and redaction API use their own account and service.
They are separate from the Workpapers MCP interface. Confirm the enabled
endpoint, credentials and processing agreement with support before integrating;
this guide does not assume that a browser-local conversion has an equivalent
public API.
---
# Choose a product guide (/docs/products)
Source reviewed: 2026-10-01 · Product documentation
Start with the product that owns your task. A shared account does not make
all products process files in the same way.
| Product | Task | Starting point |
| ---------- | ----------------------------------------------------------- | ---------------------------------------------------------------- |
| Workpapers | Build and review Excel working papers for a client and year | [First working paper](/docs/getting-started/first-working-paper) |
| Clients | Manage client records, files, email and invoices | [Client records](/docs/clients) |
| Sign | Prepare letters or upload a PDF for signature | [Sign guide](/docs/products/sign) |
| Verify | Request identity checks and maintain due-diligence evidence | [Verify guide](/docs/products/verify) |
| BAS Review | Inspect GST coding exceptions from a Xero CSV export | [BAS Review guide](/docs/products/bas-review) |
| Sift | Extract tables from digital PDFs in the browser | [Sift guide](/docs/products/sift) |
| Cloak | Detect, review and redact identifiers in PDFs | [Cloak guide](/docs/products/cloak) |
BAS Review is early access and BeforeMay Clients is a preview product.
Availability, configuration and the actions offered in your practice can differ.
Use the live product's messages when an action is unavailable.
## Set up once [#set-up-once]
Read [account and practice setup](/docs/account) and [team roles](/docs/account/team)
for the shared practice products. Then follow a [tutorial](/docs/tutorials).
## Assess before adopting [#assess-before-adopting]
Read [security, data and AI](/docs/trust) if you are responsible for choosing
software for the practice. Sift's local file conversion, Cloak's optional scan
processing, Workpapers' AI processing and Verify's identity provider have
separate data flows. The [data-flow guide](/docs/trust/data-flow) describes them.
---
# Convert a PDF with Sift (/docs/products/sift)
Source reviewed: 2026-10-01 · Product documentation
[Open Sift](https://sift.beforemay.com). Sift reads a digital PDF in your
browser and exports `.xlsx` or `.csv`. This conversion does not upload the file,
use an AI provider or require a BeforeMay account.
## Before you begin [#before-you-begin]
Use a PDF with a readable text layer. Scans and photos need OCR and are not the
same input. The current file limit is **20 MB**. Keep the original PDF so you
can check every extracted amount against it.
## Convert and check [#convert-and-check]
1. Choose the extraction layout offered by the tool and drop the PDF into it.
2. Review the detected tables beside the source pages.
3. Check headings, dates, debit/credit signs, totals and rows split across pages.
4. Edit cells when the extraction needs correction.
5. Download the result as Excel or CSV and open it to check the exported values.
For a safe first try, use the sample statement supplied inside Sift. The sample
is demonstration material, not evidence of your own client's transactions.
## If extraction is incomplete [#if-extraction-is-incomplete]
If the tool reports a scan or no usable text, use the original digital statement
if available. A blank result is not evidence that the document contains no
transactions. If the columns are misaligned, try the other extraction layout
and compare again with the source.
Closing or reloading the page can discard the in-memory work. Download the
checked result before leaving. Sift produces extracted values, not a reviewed
working paper or an accounting reconciliation.
---
# BeforeMay Sign (/docs/products/sign)
Source reviewed: 2026-10-01 · Product documentation
[Open Sign](https://sign.beforemay.com.au). Sign uses the shared practice,
clients and team. Start from the letter library or **Upload your own PDF**.
The [letter tutorial](/docs/tutorials/send-a-letter) walks through preparing,
testing and sending a request.
The actual letter library on a fictional practice. Follow the letter tutorial for the preparation and testing steps.
## Prepare the document [#prepare-the-document]
Choose a template, fill the client and engagement details and read the whole
rendered PDF. The templates are editable starting points: your practice must
review their terms, scope, fees and suitability. Place the signature, name and
date fields for the intended signer when the flow offers placement.
For several signers, check the people, their fields and signing order or groups.
A signer waiting for a later turn has not yet received an active request to sign.
## After sending [#after-sending]
The **Sent** list shows each request. Open it to see the PDF, each signer's
status and the signing history. **Signed PDF** becomes available for the
completed document, including its certificate page. **PDF as sent** is the
original version while the document is still awaiting signatures.
| State | Meaning |
| ------------- | --------------------------------------------------------------------------------------- |
| Sent / Viewed | A request is open; Viewed indicates the link was opened. |
| Waiting | This signer is waiting for their turn. |
| Signed | That signer completed the signing step. Check every signer for a multi-signer document. |
| Declined | A signer declined. Resolve this with the client before proceeding. |
| Voided | The request was cancelled. |
A request can be created even if the email fails. Read the sending result and
use the supplied link when manual delivery is needed. **New link** replaces
an open signer's earlier link. **Void** cancels the remaining open request;
it does not undo a signature already recorded.
## Evidence and limits [#evidence-and-limits]
The record ties the source document hash, signing actions and completed PDF
together. It supports review of what was sent and signed. It is not an identity
check or a determination that the signer had authority to bind an entity.
Choose the correct signer and retain any authority evidence your practice needs.
---
# BeforeMay Verify (/docs/products/verify)
Source reviewed: 2026-10-01 · Product documentation
[Open Verify](https://verify.beforemay.com.au). Verify shares the practice,
client directory and team. It requests identity evidence through Didit and
keeps a result and event record for the practice.
## Choose the purpose [#choose-the-purpose]
**Proof of identity** and **AML/CTF due diligence** are different purposes. A
photo-ID result does not establish that every required screening or
assessment has been completed. For a company or trust, verify the relevant
people through its client record and review the recorded ownership and control
relationships.
Use [the identity-check tutorial](/docs/tutorials/identity-check) to create and
send a check.
## Read the evidence, not only the status [#read-the-evidence-not-only-the-status]
The check page separates document authenticity, liveness, face match,
government database evidence and PEP/sanctions screening. The available evidence
depends on the configured provider workflow. **Not run** is not a pass.
**Verified** is the provider's overall identity outcome, not your firm's final
CDD or risk decision.
Inspect possible screening matches and provider notes. Record the scope and
risk assessment, supporting evidence and any required sign-off. Reassessment
adds a record so earlier assessments remain visible. Use **Export CDD record**
to retain the client's evidence summary.
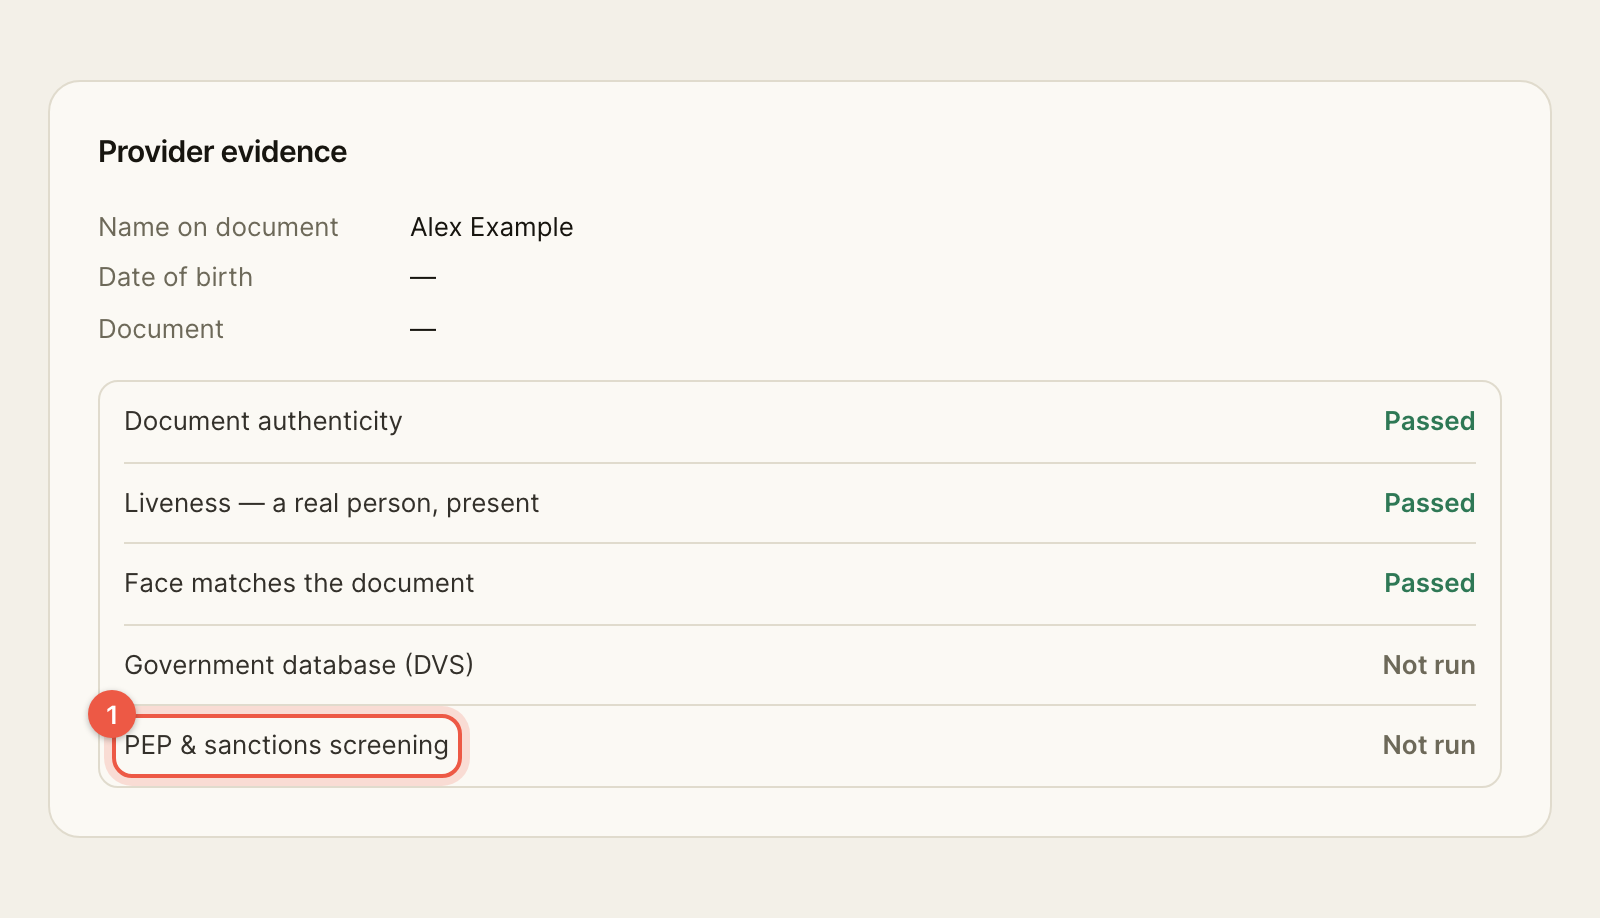
Example evidence shown by the actual component: passed identity checks do not make Not run screening a pass. The result is fabricated for this illustration.
## Keep the record current [#keep-the-record-current]
When available, ongoing monitoring can raise a **Needs review** alert. Review
the changed evidence and record why you acknowledge it. A failed refresh leaves
the last stored result visible; it has not produced a fresh clearance. The
review-due date follows the recorded risk and review settings and needs to fit
your practice's program.
## Where the ID goes [#where-the-id-goes]
The person consents on the client page and provides their ID image, selfie and
liveness capture directly to Didit. The [Privacy Policy](/privacy) describes
processing in the European Union. BeforeMay keeps the result summary rather
than those biometric images. Workpapers' outbound AI redaction process is not
this identity-check flow.
Verify helps organise evidence. Your practice decides the service's scope,
the client's risk and whether further work or approval is required.
---
# When the AI asks a question (/docs/review/questions)
Source reviewed: 2026-10-01 · Product documentation
A preparation run can pause on a question and show **Waiting on your answer…**.
Open the question, read its options and evidence and respond on the case. Use a
written answer when the choices do not capture the facts you need to explain.
{/* SCREENSHOT: Current build question with response options, /cases/c2 */}
## The waiting window [#the-waiting-window]
The current Advanced setting describes a normal question waiting window of up
to **15 minutes**. Follow the current run's message and respond promptly; do
not assume the run will wait indefinitely. If it is no longer awaiting input,
inspect its result before attempting another response or build.
The case and notification/email paths can help you find an outstanding question.
Do not depend on a browser notification alone: browser permission, the open tab
and timing affect whether you see it.
## AI auto-answer [#ai-auto-answer]
**Settings → Advanced** offers a personal AI auto-answer permission for that
practice. Enabling it first requires reading and acknowledging the warning.
It is your setting, not a switch that grants the same permission to colleagues.
The preparation choices then decide who answers for that run, subject to the
recorded permission.
With automatic answering selected, the AI can apply its recommended answer and
continue without your immediate decision. Its answers are recorded in the
working paper's **Review Pts** and case Activity so you can review them afterwards.
This removes a human checkpoint during the build; it does not remove your
responsibility to check the outcome.
## After the answer [#after-the-answer]
Inspect the resulting workbook and findings. A question marked answered is not
proof that the answer was supported by the client's evidence. If the facts were
wrong or incomplete, record the correction and use the offered assistant/update
flow to revise the work.
Next: [review points and findings](/docs/review/review-points).
---
# Review points and findings (/docs/review/review-points)
Source reviewed: 2026-10-01 · Product documentation
A review point is an item the accountant should consider. Read its reasoning,
source evidence and affected schedule before deciding what to do. Review
points, missing-evidence requests and automatic-check findings can coexist.
Open the working paper's **Review Pts** panel to inspect its points. The former
case-menu **AI findings** action is no longer available; this guide covers the
working paper's review points and preparation findings.

Example review points; the current panel can hand answers to the working-paper assistant.
## Respond [#respond]
Use the panel's answer/reply controls to record the facts or correction. Use
**Ignore** when the point is not relevant to the case. Untouched points are not
a positive agreement with the AI's treatment. Clearing a list does not prove
the underlying evidence is complete.
The current answer handoff sends responses to the workpaper assistant. It does
not itself guarantee that a new full build has started. Read any proposed cell
change or structural update, then inspect the affected figures and totals after
it is applied. Controls can be unavailable while another run is active or when
you are viewing an older paper.
## Reconcile disagreements [#reconcile-disagreements]
Compare the ATO prefill, source documents, client/year and timing. Explain a
material disagreement rather than assuming whichever number appears first is
complete. A large year-on-year variance is context, not by itself proof of error.
## Review options matter [#review-options-matter]
Independent review can be turned off for a preparation run where the product
offers that choice. AI auto-answer can also change whether a judgement call
waits for you; inspect the recorded answers afterwards. Read
[questions](/docs/review/questions) and [AI processing](/docs/trust/ai-processing)
for those boundaries.
Next: [check a figure](/docs/tutorials/trace-a-figure). Mark the case complete
only when your own review is finished.
---
# Check and export a Sift sheet (/docs/sift/check-the-output)
Source reviewed: 2026-10-01 · Product documentation
The output is an **Extracted table — editable**. Correct a cell in the sheet when the source PDF says something different. Use **Show source** or **Hide source** on a wide screen to check the PDF while you work.
In **Bank statement** mode, Sift checks the running balance in the original extraction. **The running balance reconciles.** means each displayed balance follows the previous extracted row. A warning that the balance does not follow names the first break it found. Compare that row with the PDF: a line may have been missed, or the statement may include an account where the balance restarts.
That balance message describes what Sift originally read. If you edit the table, check the changed rows yourself; the message is not recalculated as approval of your edit. Choose **CSV** for the current table or **Download Excel** for the extracted tables. Use **New file** to clear the result before starting another PDF.
---
# Convert a PDF with Sift (/docs/sift/convert-a-pdf)
Source reviewed: 2026-10-01 · Product documentation
Open [Sift's tool](https://sift.beforemay.com/#tool). Choose **Bank statement** for a statement with transaction and running-balance columns. Choose **Any table** for a different tabular PDF. Then **Drop a PDF here, or click to choose**. The limit shown on the page is **PDF · up to 20 MB · read on your device**.
Sift reads the PDF locally. The result shows the source name, row count, page count and mode. For a statement, the extracted columns usually need to agree with the printed date, description, debit, credit and balance. If a PDF contains several tables, select the table tab you need.
If Sift reports **No tables found**, try **Any table** or check whether the PDF is a scan. When pages have no text layer, Sift marks how many look scanned; OCR for scanned statements is unavailable in this browser tool. Digital pages in the same PDF may still be extracted. Do not assume missing scanned rows are included in an Excel download.
---
# Sift (/docs/sift)
Source reviewed: 2026-10-01 · Product documentation
You have a bank statement PDF and need its rows in a spreadsheet. [Sift](https://sift.beforemay.com/#tool) reads a digital PDF on your device, reconstructs a table, and lets you inspect it before downloading. No sign-in is needed.
Choose **Bank statement** for date, description, debit, credit and balance columns, or **Any table** for another tabular PDF. The current picker accepts PDFs up to 20 MB. A scanned page without a text layer cannot be fully extracted by this browser tool.
---
# Follow a signing request (/docs/sign/follow-signatures)
Source reviewed: 2026-10-01 · Product documentation
Open [**Sent**](https://sign.beforemay.com.au/app/sent). Search by client or signer; the list shows **Status**, **Sent** and **Signed** dates. Open a row to read the document and its signing history. A request with several signers shows their order and how many have signed.
For an open request, **New link** copies a replacement for the current signer. Their old link stops working. **Void** ends the live request but leaves it in the sent list. If a signer has declined or the request is closed, read that state before starting a fresh document.
The signer sees the document and fields at their `/sign` link. They can **Decline** and enter an optional reason, or complete the marked places and choose **Finish**. Sign does not require them to join your BeforeMay practice.
---
# Sign (/docs/sign)
Source reviewed: 2026-10-01 · Product documentation
The client has agreed to proceed; the letter still needs the right names, terms and signatures. [BeforeMay Sign](https://sign.beforemay.com.au/app) starts from its **Library** or from your own PDF, sends the signing request and keeps the signed PDF and audit trail with the client.
The signer opens a `/sign` link without a BeforeMay account. Your practice signs in with the same account and client list used by Workpapers and Verify.

The actual engagement-letter library on a fictional practice.
---
# Prepare an engagement letter (/docs/sign/prepare-a-letter)
Source reviewed: 2026-10-01 · Product documentation
Open the [letter **Library**](https://sign.beforemay.com.au/app/library). Browse **All letters** or a section, and open one to read it. The library presents letters in the style set for their type under **Branding**. Use a library letter as it stands, or save a practice copy under **My letters** before changing language the whole team should reuse.
On the letter, fill the highlighted blanks. The right panel separates **Details**, **Signers** and **Design**. Choose the client from the shared list, check who signs for a company or trust, and read the whole document before sending. Click a paragraph to edit it, or use **Full text** for larger wording changes. The page shows how many fields remain and changes to your wording save into **My letters** as you edit.
An owner or admin can open [**Branding**](https://sign.beforemay.com.au/app/brand) to set the letterhead, colours and style. The editor warns when logo or practice details are missing; the letter can then go out in plain type. Check the final PDF, including the signer names and fee table, before using **Send for signature**.
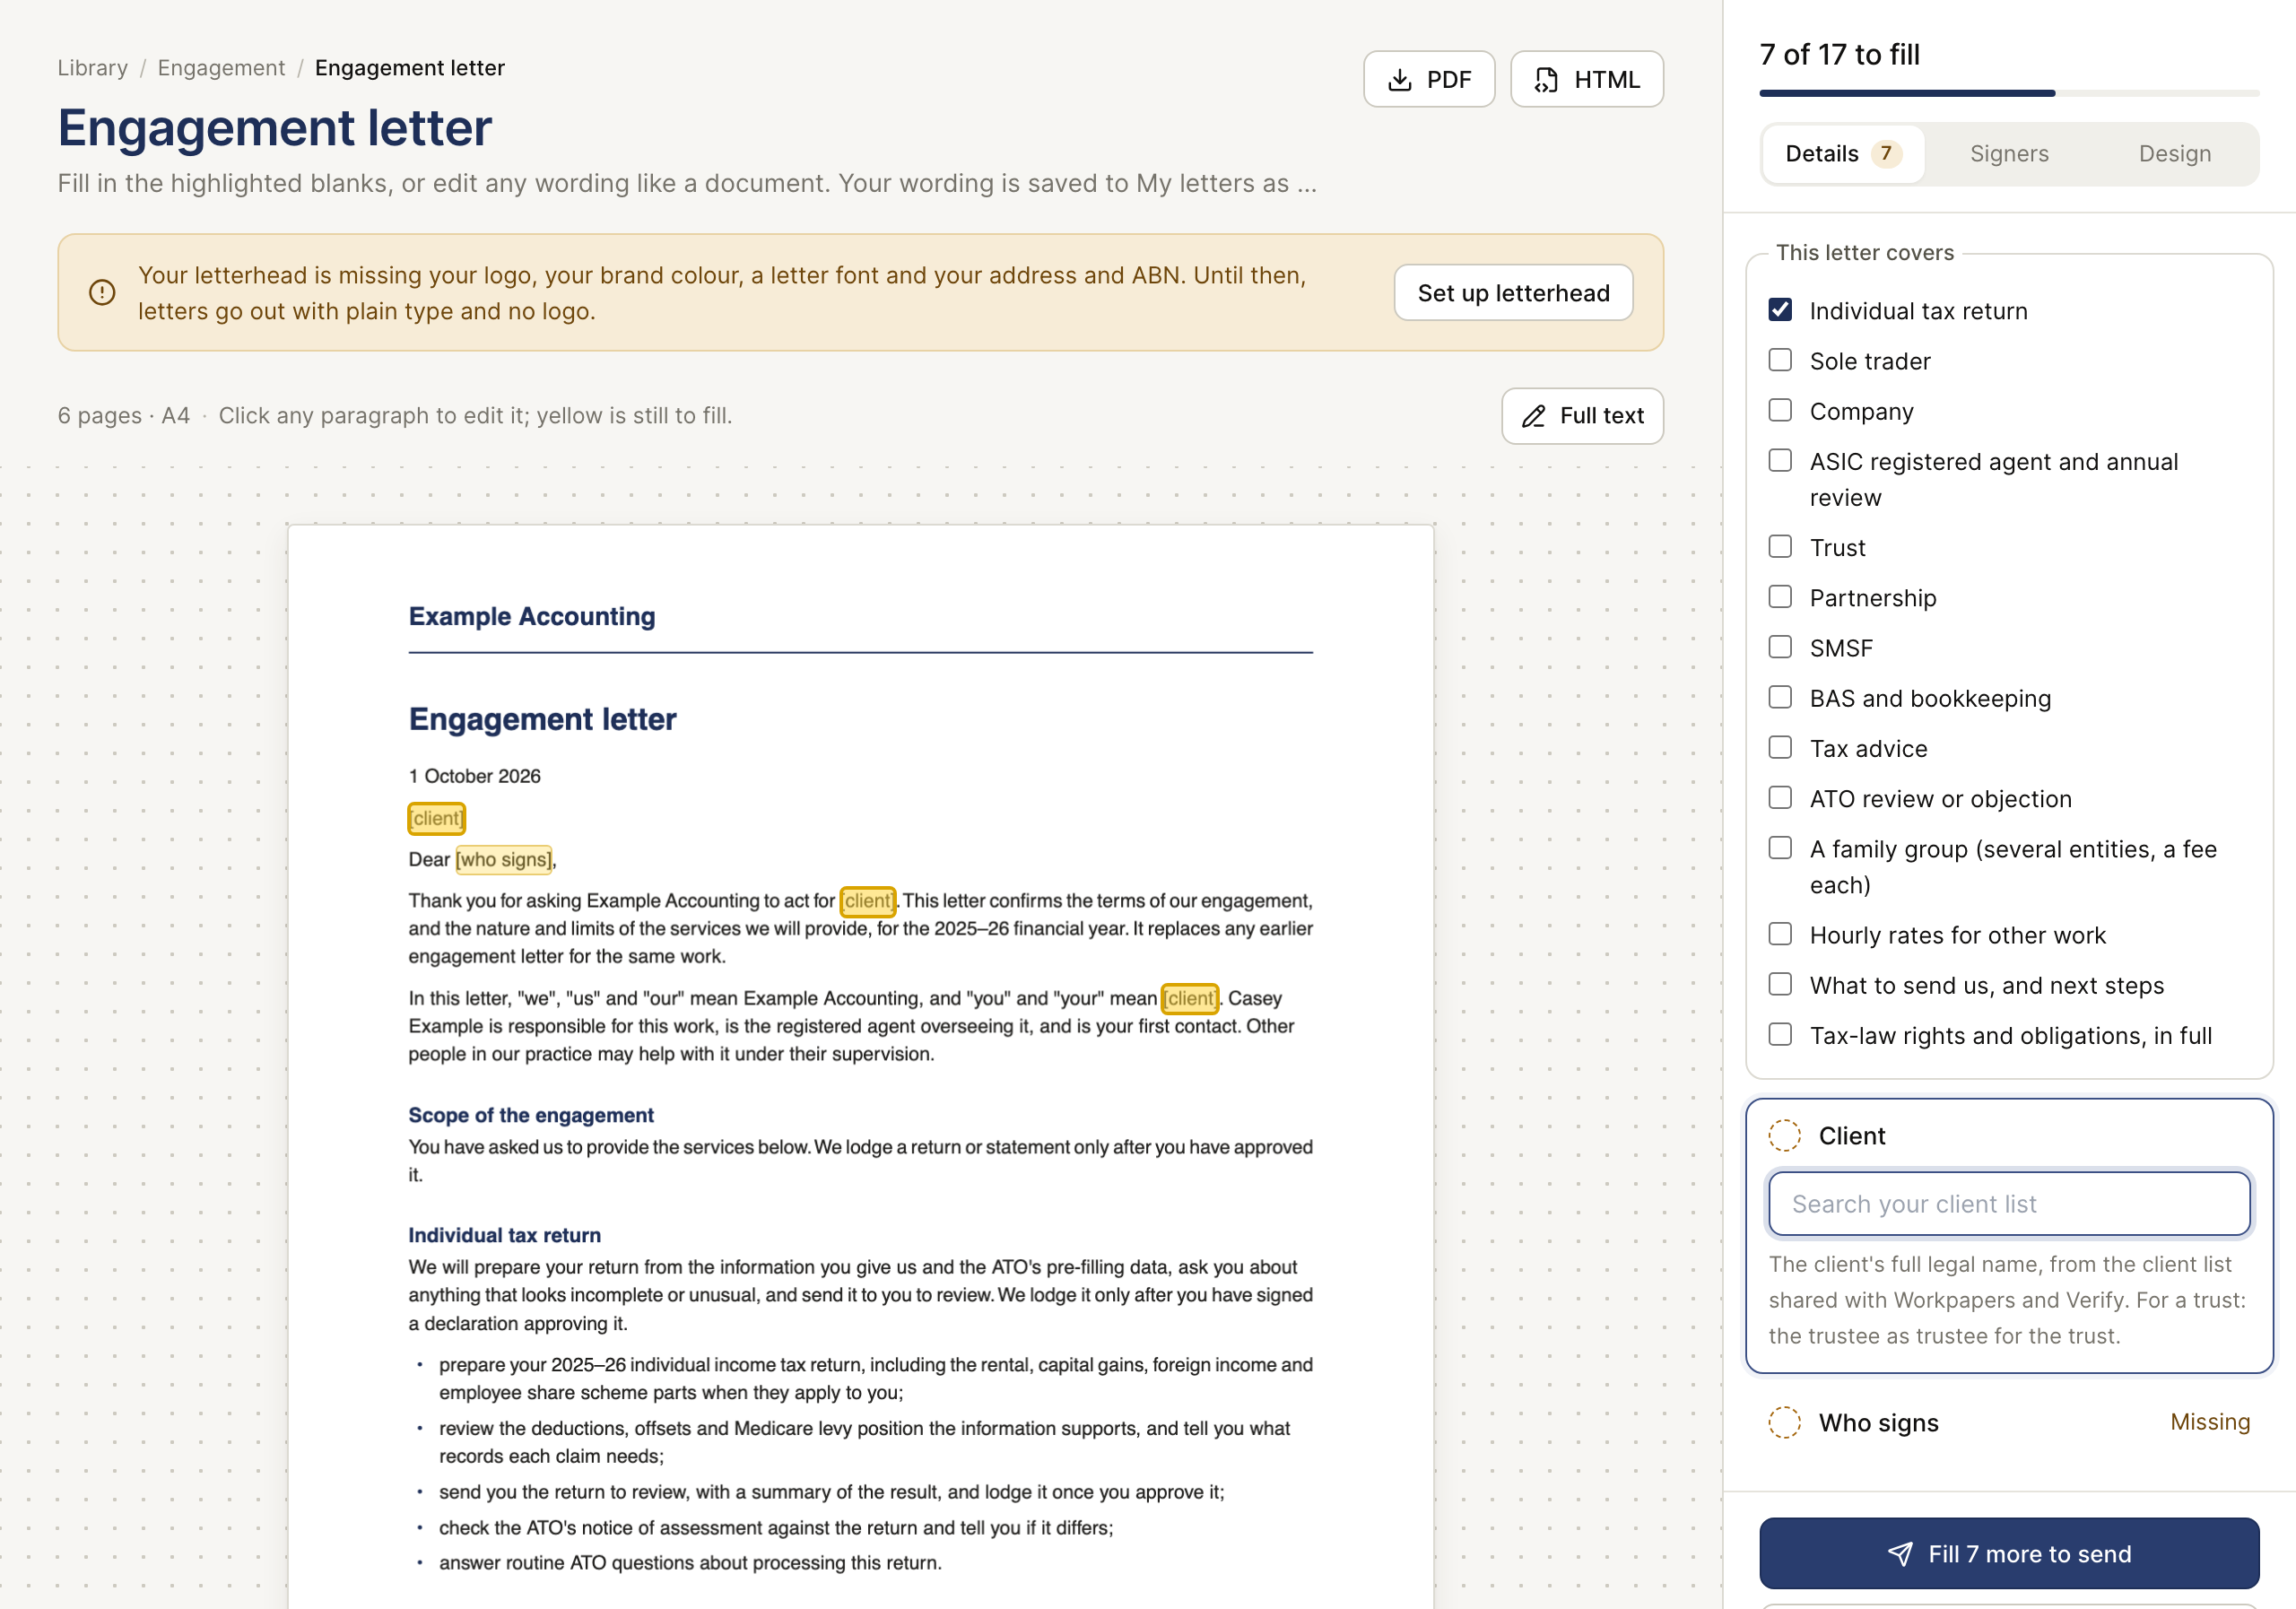
The actual editor on fictional data, showing highlighted blanks and the Details, Signers and Design tabs. This crop shows the beginning of a multi-page letter.
---
# Send a document for signature (/docs/sign/send-a-document)
Source reviewed: 2026-10-01 · Product documentation
On a completed letter, choose **Send a test to me** to check the signer page first. The test goes only to your own address, is marked as a test, and is not filed against a client. When the terms and signers are right, choose **Send for signature**. For several signers, the button names how many people will receive it.
After sending, Sign says whether the email went out. If it did not, **Copy signing link** gives you the link to send yourself. Open **View sent letters** to follow the request.
Already have a PDF? In [**Sent**](https://sign.beforemay.com.au/app/sent), choose **Upload your own PDF**. Select the client or use **Send a test to myself**, enter the signer, then **Preview PDF**. Check **I reviewed this exact document and the terms are right for my practice.** before **Send for signature** becomes available. The preview is tied to that exact file and recipient selection, so a change requires another review.
The recipient follows the highlighted fields on their signing page and chooses **Finish**. A signed copy and audit trail are kept with the request; once all required people have signed, they can receive the signed copy.
---
# System architecture (/docs/technical/architecture)
Source reviewed: 2026-10-02 · Engineering documentation
The practice products use shared BeforeMay accounts, practice membership and
client records. Product screens sit over shared modules for accounts, teams,
clients, files, mail, signing and identity checks.
## Main boundaries [#main-boundaries]
```mermaid
flowchart TB
accTitle: Practice system architecture
accDescr: Practice apps share account and client modules. Normal data access is scoped by membership; server functions coordinate privileged operations, Australian processing and external integrations.
A[Workpapers, Clients, Sign, Verify and BAS Review]
A --> P[Shared account, team, client and product modules]
P -->|Authorised account queries| D[(Authentication, practice data and private storage)]
P -->|Privileged or integration requests| F[Server functions: caller and practice checks]
F --> D
F -->|Queue work| W[Australian worker and recognition services]
W --> D
W --> G[Outbound identifier controls]
G --> AI[Configured external AI providers]
AI -->|Stage results| W
F --> E[Identity, mail and other connectors]
class F,G control
```
Arrows show responsibilities and principal connections, not every request or
deployment unit. Only the Workpapers processing route uses the AI branch shown
here. Verify's direct identity capture and browser-local file processing are
explained separately below and in [data flow](/docs/trust/data-flow).
| Layer | Responsibility |
| ------------------------------ | ----------------------------------------------------------------------------------------------- |
| Browser applications | User interaction, previews, local file parsing and authorised requests |
| Database and private storage | Practice-scoped records, membership, source documents and output files |
| Server functions | Validate callers, enforce privileged operations and coordinate integrations |
| Australian processing services | Recognise documents, apply outbound identifier controls and run the workpaper process |
| External providers | The configured AI steps, identity checks and connected services described in the Privacy Policy |
Workpapers' AI provider credentials remain server-side. A browser application's
publishable connection configuration is not a privileged credential. Access
must stay within the caller's authorised practice and permitted action.
## A workpaper's route [#a-workpapers-route]
1. An authorised upload creates evidence in private storage and case metadata.
2. Recognition and analysis prepare the document information used by the case.
3. A build run reads the case evidence and generates a draft workbook.
4. The selected review/repair stages and delivery policy determine release;
some remaining findings can accompany a delivered workbook.
5. The delivered/current version is available for the accountant's review,
permitted edits and download.
A rendered draft and a delivered workbook are distinct states. The public MCP
download tool exposes delivered output, not the earlier draft. Provider and
model choices can change by stage through configuration; a vendor name in a
historical architecture note is not the current runtime setting.
## Local and external flows [#local-and-external-flows]
Sift extracts digital PDFs locally. BAS Review parses the ledger export locally
and stores only the documented review state. Outlook reads a member's connected
mailbox and can file selected mail. Verify directs the person's identity
capture to Didit. These flows must be assessed individually, not inferred from
the Workpapers diagram.
Read [data flow](/docs/trust/data-flow) for destinations and [access controls](/docs/trust/access-control)
for credentials. Maintainers should use the repository's source and current
configuration for module, deployment and incident details.
---
# File formats and limits (/docs/technical/file-formats)
Source reviewed: 2026-10-01 · Engineering documentation
Different tasks accept different formats. A file that can be stored or previewed
is not necessarily readable by every extraction flow.
| Task | Input | Limit or important condition |
| --------------------------------- | ------------------------------------------------------------------------------- | ------------------------------------------------------------------------------- |
| Shared client receipt-upload flow | PDF, common images, CSV/text/JSON/XML, Excel, Word and OFX/QIF/QBO bank exports | Current shared upload cap: 25 MB per file; follow the selected product's notice |
| Client list import | CSV, TSV, TXT, XLSX or XLS | Reads the first worksheet; requires a header and client-name mapping |
| Sign's own-document flow | PDF | Check the document and signature placements before sending |
| BAS Review | Xero GST Audit Report CSV | Matching dates and basis; recognised tax-rate names |
| Sift | Digital PDF | Current cap: 20 MB; a usable text layer is required |
| Cloak public tool | PDF | Digital PDF local flow; scans have a separate OCR route |
The shared upload cap is not a promise that a file of that size can be processed
in every browser or viewer. Encryption, corruption, missing text and unfamiliar
layouts can still require a different source or manual review.
## Export before uploading [#export-before-uploading]
* Apple Numbers or OpenDocument spreadsheets: export to `.xlsx`.
* Apple Pages and presentations: export to PDF.
* RTF or OpenDocument text: export to `.docx`.
* ZIP: unzip it and upload the files inside; the shared receipt flow refuses ZIP.
* Old Word `.doc`: export to `.docx` or PDF for analysis. Storage acceptance of
the old format is not the same as AI readability.
Email files have an unpacking flow that turns the covering message and
attachments into ordinary files. Do not assume an email extension is accepted
by every direct upload endpoint. Encrypted mail needs a readable export; it
must not be interpreted as an empty email.
## Outputs [#outputs]
Workpapers delivers a plain `.xlsx`. Sift exports `.xlsx` or `.csv`. Sign
produces a completed PDF with its signing certificate. Verify can export a CDD
record PDF summarising the stored evidence and decisions.
An Excel export is a file handover, not a live link to the source system.
Keep the original evidence and the version you reviewed with it.
---
# Technical and integration guide (/docs/technical)
Source reviewed: 2026-10-01 · Engineering documentation
For questions about the guides themselves, read [use these docs with AI](/docs/technical/using-ai).
For external software, start with the [Workpapers MCP interface](/docs/technical/mcp).
For file-based handover, use [formats and limits](/docs/technical/file-formats).
For a technical assessment, read the [architecture overview](/docs/technical/architecture)
and [data flow](/docs/trust/data-flow).
## Choose the actual integration [#choose-the-actual-integration]
| Need | Current route | Boundary |
| ----------------------------------------- | ----------------------------------------------------- | ----------------------------------------------------------- |
| Read cases and obtain delivered workbooks | Workpapers MCP with a practice API key | The key's practice and granted scopes |
| Upload case evidence or start a build | MCP write scopes and the documented upload/build flow | Changes records; builds use the practice's allowance |
| Bring in a client list | Reviewed CSV/Excel import | User confirms additions and matches |
| Read and send a member's Outlook mail | The member's Microsoft connection | Their connected mailbox and the practice's reading settings |
| Review Xero GST coding | GST Audit Report CSV in BAS Review | No Xero ledger write-back |
| Convert a PDF locally | Sift's browser flow | No assumption of a public conversion API |
Do not use an internal database table or edge-function name as an undocumented
public contract. The MCP tools expose a deliberate subset of the system and
check their own credentials and scopes.
## Developers maintaining BeforeMay [#developers-maintaining-beforemay]
Local setup, secrets, database migrations, CI and deployment procedures are in
the repository's maintainer documentation. They are separate from the public
integration contract. The public architecture page explains the boundaries
without publishing credentials or operational access instructions.
For the maintained source map, reviewers can ask support for an evidence pack
appropriate to their assessment. Start with [assessment evidence](/docs/trust/audit-evidence)
to specify which controls and deployed version need to be examined.
---
# Workpapers MCP interface (/docs/technical/mcp)
Source reviewed: 2026-10-01 · Engineering documentation
The Workpapers machine interface accepts authenticated **HTTP POST** JSON-RPC
requests. It implements `initialize`, `tools/list`, `tools/call` and `ping`;
it is not a general REST API for every BeforeMay product. Obtain the configured
MCP endpoint for your practice from support before connecting. The hosted
function route ends in `/functions/v1/mcp`.
## Create and protect a key [#create-and-protect-a-key]
An Owner or Admin can create a key under **Workpapers → Settings → Connections
→ API keys**. Choose only the scopes the integration needs. Copy the key when
it is first shown: the stored record contains a hash and the full key cannot be
revealed later. Keep it in your integration's secret storage, not browser code,
a repository or a client document.
Send it as `Authorization: Bearer YOUR_PRACTICE_API_KEY`, with
`Content-Type: application/json`. Keys act as the practice, not the member who
minted them. Review and revoke them independently when an integration or team
member is no longer trusted.
## Scopes and tools [#scopes-and-tools]
| Scope | Tools | Access |
| ----------------- | ------------------------------------------------------- | ------------------------------------------------------------------------------------------ |
| `cases:read` | `list_cases`, `get_case`, `list_documents`, `list_runs` | Case details, document metadata and run state; no source file or recognised-text content |
| `workpapers:read` | `get_workpaper` | A short-lived link to a delivered workbook, including its current edited copy when present |
| `builds:write` | `start_build` | Starts a build subject to allowance and concurrency checks |
| `documents:write` | `upload_document`, `confirm_upload` | Authorises an upload and files it only after the bytes have arrived |
`tools/list` returns the tools allowed by the presented key, including their
input schemas. Scope checks also apply to calls made directly by name. Case
ownership comes from the key's practice, not a caller-supplied practice ID.
## First read request [#first-read-request]
Begin with `initialize`. The implementation answers with protocol version
`2025-06-18` and server version `0.1.0` at this guide's source review.
```json
{
"jsonrpc": "2.0",
"id": 1,
"method": "initialize",
"params": {
"protocolVersion": "2025-06-18",
"capabilities": {},
"clientInfo": { "name": "practice-integration", "version": "1.0.0" }
}
}
```
Then request `tools/list` and use its schema. For example:
```json
{
"jsonrpc": "2.0",
"id": 2,
"method": "tools/call",
"params": {
"name": "list_cases",
"arguments": { "fy": "2025-26", "limit": 25 }
}
}
```
These are request examples, not credentials or real client records. List tools
that accept `limit` default to 25 and cap it at 100. The current schemas do not
provide a pagination cursor; do not assume a capped response is the entire
practice directory.
## Build and download [#build-and-download]
```mermaid
flowchart TB
accTitle: MCP build and delivered-file access
accDescr: A scoped practice key starts a build subject to allowance and concurrency checks. Poll the run with backoff; only delivered output receives a temporary download link.
K[Practice key: builds:write] --> C[Check key, practice, allowance and concurrency]
C -->|Accepted| R[start_build returns run_id]
C -->|Refused| X[Inspect error and resolve the cause]
R --> B[Queued build and configured review stages]
B --> P[list_runs with cases:read and backoff]
P --> Q{Delivered output exists?}
Q -->|No: still active| P
Q -->|No: failed or cancelled| X
Q -->|Yes| D[get_workpaper with workpapers:read]
D --> L[Download current delivered copy within 300 seconds]
class C,Q control
```
`get_workpaper` also checks that the run belongs to the key's practice. Delivery
is identified by its output file, not merely a phase name or a successful
HTTP response. An earlier draft is not exposed through this tool.
Call `start_build` with `case_id` and optional `notes`. Starting work can consume
the practice's credits and build allowance. It returns a run reference; inspect
`list_runs` with backoff rather than holding the request open or repeatedly
starting builds. When the relevant run has a delivered workbook, call
`get_workpaper` with `run_id`.
An unfinished run returns `ready: false`. A delivered file returns a link with
`expires_in_seconds: 300`. Download before it expires or request another link.
The integration cannot obtain a pre-delivery draft through this tool.
## Upload a document [#upload-a-document]
```mermaid
sequenceDiagram
accTitle: MCP upload authorisation and confirmation
accDescr: Authorisation reserves a document and a storage path. The integration uploads bytes directly to private storage, then confirmation verifies and hashes them before filing the document.
participant I as Integration
participant M as MCP server
participant S as Private storage
I->>M: upload_document(case_id, filename)
Note over M: Check documents:write, practice ownership and upload rules
M-->>I: document_id, upload_url, method, content_type
Note over I,M: Authorised but not yet filed as build evidence
I->>S: PUT file bytes with returned Content-Type
S-->>I: Upload response
I->>M: confirm_upload(document_id)
M->>S: Read reserved file bytes
S-->>M: File bytes or missing-file error
alt Bytes arrived and confirmation accepted
Note over M: Hash bytes server-side and file the document
M-->>I: Confirmation result
else Missing bytes or refused confirmation
M-->>I: Error - resolve before starting a build
end
```
1. Call `upload_document` with `case_id` and `filename`.
2. Read `document_id`, `upload_url`, `method` and `content_type` from the answer.
3. PUT the file bytes to that signed URL using the returned Content-Type.
4. Call `confirm_upload` with the same `document_id` and inspect its result.
Authorisation alone is not a filed document. Confirmation verifies the stored
bytes and computes their hash server-side. A failed confirmation must be
resolved before expecting the document to be evidence for a build. A repeated
confirmation can report that the document is already filed; inspect state before
resubmitting the whole upload.
## Interpret failures [#interpret-failures]
Tool answers contain a text content block whose text is JSON. Check both
`result.isError` and the decoded value's `error`, not just HTTP success.
Protocol errors use a JSON-RPC `error` object. Rate-limit refusals can include
`retry_after_seconds`; wait rather than retrying continuously. Quota, scope and
ownership refusals need a configuration or practice decision, not another build.
Metadata can include extracted merchant and amount values. A downloaded workbook
can contain personal financial information. BeforeMay's outbound AI controls do
not govern what your own integration subsequently sends to another service.
---
# Use these docs with AI (/docs/technical/using-ai)
Source reviewed: 2026-10-01 · Engineering documentation
## Ask about one guide [#ask-about-one-guide]
Use **Copy Markdown** above any page and paste it into your assistant with your
question. This includes the guide's title, source-review date, text, links and
screenshots as Markdown references.
For a published page, **Open** includes shortcuts to ChatGPT and Claude. Those
shortcuts ask the service to read the page; they do not run a BeforeMay model.
The service may require you to sign in and may not be able to fetch the page.
A `localhost` preview is only accessible on your computer: copy its Markdown
instead of asking an external service to open that address.
## Provide broader context [#provide-broader-context]
| Export | Use |
| ----------------------------------------- | ----------------------------------------------------------------------------------------------------------------------- |
| [Documentation index](/docs/llms.txt) | Titles, descriptions and the Markdown link for each guide. An assistant can select the relevant pages. |
| [Full documentation](/docs/llms-full.txt) | All public guides together, with their source-review dates. Use as a file or pasted context when your tool supports it. |
These exports are generated from the same pages as the website. They do not
contain client files, practice API keys or internal review-evidence records.
The files live under `/docs` because the main website has its own `llms.txt`.
## A useful question [#a-useful-question]
```text
Using only the attached BeforeMay guide, explain how I prepare and test an
engagement letter. Cite the relevant sections. If the guide does not explain
something, say what is missing instead of inventing an action or button.
```
Check the answer against the linked guide and the actual screen. An assistant's
summary does not complete a signature, an identity check or an accountant's
review. Ask for clarification when it proposes a step absent from the guide.
Do not add client documents, TFNs, personal request links or credentials to a
documentation question. Any information you type into an outside assistant is
handled by that service; it does not pass through Workpapers' outbound controls.
## Site search and in-site chat [#site-search-and-in-site-chat]
The website's **Search** finds guide titles and passages locally using a
prebuilt index. It does not generate answers. The published documentation does
not currently include a BeforeMay-hosted AI chat.
For a software integration that reads practice data or starts work, use the
[Workpapers MCP interface](/docs/technical/mcp). The documentation exports are
public reading material, not credentials or permission to operate the product.
---
# Accounts, roles and access controls (/docs/trust/access-control)
Source reviewed: 2026-10-02 · Security and privacy documentation
The implementation uses several credentials for different purposes. Review
which one applies to the action rather than assuming every link is a login.
| Credential | Boundary |
| -------------------------- | --------------------------------------------------------------------- |
| Signed-in firm member | The practices they belong to, with role checks for privileged actions |
| Accepted client invitation | The invited client's relationship with the firm |
| Sign / Verify token | One request or check, subject to expiry and cancellation |
| Practice API key | The key's practice and granted MCP scopes |
| Short-lived file URL | Temporary access to the specific file whose URL was issued |
## Practice isolation and roles [#practice-isolation-and-roles]
Practice membership determines which practice's records you can access.
Privileged actions also require the appropriate role and permission for the
target record. The UI offers Owner, Admin and Member access, as described in
[team roles](/docs/account/team).
Removing a colleague changes their practice membership. Review machine keys
separately because those keys act as the practice. The MCP server checks scopes
when a tool is called; seeing a tool listed does not grant permission to use it.
```mermaid
flowchart TB
accTitle: Practice access boundaries
accDescr: Practice-member access depends on the signed-in account, target practice and permission for the requested action. This conceptual diagram does not describe every enforcement mechanism.
U[Practice member requests an action] --> S[Check account and target practice]
S --> P{Membership and required permissions permit the action?}
P -->|Yes| A[Read or change authorised practice data]
P -->|No| X[Refuse access]
class S,P control
```
This is a conceptual boundary, rather than an inventory of enforcement paths.
Client invitations, request links and [MCP keys](/docs/technical/mcp) have the
separate limits listed above. A permitted record access does not make the
associated files public.
## Shared sessions and second factors [#shared-sessions-and-second-factors]
The practice products share sign-in within the same browser on
`beforemay.com.au` and its product subdomains. Those products belong to the same
session trust boundary. Treat a signed-in browser as access to your practice;
each colleague should use their own account. Preview domains, private windows
and different browsers do not automatically share the production session.
The source-reviewed practice-member flow requires a passkey or authenticator
app, with a temporary setup grace period for eligible existing members. The
product shows the setup deadline when that grace applies. A successful email
or provider sign-in alone does not complete a required second-factor check.
[Sign-in guidance](/docs/account/signing-in) explains setup, screen locks and
recovery. An assessment should confirm the deployed enforcement, grace settings
and any dedicated demonstration-account exceptions separately.
## Files and request links [#files-and-request-links]
Source documents are in private storage. Authorised flows issue short-lived
signed URLs rather than storing permanent public links. A signed URL is still
a bearer credential while valid: do not paste it into a public ticket or
forward it to someone who should not read the file.
Signing and verification links are checked for the particular request. A
replacement link invalidates the previous link. The client's
Verify page exposes coarse check state rather than the firm's internal risk or
screening notes.
## Scope of this description [#scope-of-this-description]
This guide describes implemented access boundaries, not a penetration-test
report or a guarantee against every cross-practice defect. For assurance,
request the current deployed configuration and negative-access tests listed in
[assessment evidence](/docs/trust/audit-evidence).
---
# AI processing and human review (/docs/trust/ai-processing)
Source reviewed: 2026-10-02 · Security and privacy documentation
Workpapers uses AI to help read, classify, assemble and review working papers.
The accountant remains responsible for the figures and treatment they rely on.
The system's review and delivery steps do not lodge a return or replace the
practice's professional judgement.
## Inputs and provider choices [#inputs-and-provider-choices]
Processing can include recognised document text, processed source files,
filenames and case context such as financial year and taxpayer name. Provider
and model choices are configured per stage. The [Privacy Policy](/privacy)
names providers and processing countries; ask which apply to your practice
rather than relying on a fixed model name in a guide.
The policy states that client documents and extracted financial information are
not used to train our own or providers' general AI models. Provider retention
is a separate issue; see [retention](/docs/trust/retention).
## Identifier controls [#identifier-controls]
| Material | Control and limits |
| ------------------------------------------ | ------------------------------------------------------------------------------------------------------------------------------------------------------------- |
| TFN, Medicare, passport and licence values | Identified values are removed or substituted in outbound material; the gate stops on unsafe or unreadable input rather than sending the original as fallback. |
| Recognised text | Additional bank, email, phone and recognised crypto identifiers are coded or substituted according to the text policy. |
| Source files | Email and recognised crypto identifiers join the sensitive-identifier controls. Bank details and phone values are not removed by the same file policy. |
| Names, addresses and financial facts | Can remain because the working paper needs the client's context and evidence. |
This is redaction and pseudonymisation, not anonymisation. Detector coverage,
file type, layout and context affect which values are identified. Do not assume
that every personal identifier is removed. The original client record and
source document can still contain the information the firm needs. TFN storage
on a client record is different from TFN extraction or outbound AI processing.
Request scoped coverage and failure evidence for a technical assessment.
Verify's direct identity capture is a separate flow, described in [data flow](/docs/trust/data-flow).
## Draft, review and delivery [#draft-review-and-delivery]
A build produces a draft, which can be inspected read-only while review is
running or after some failures. A visible draft is not a delivered working paper.
When enabled, independent review and repair examine the draft before output.
Independent review can be deselected in the offered preparation choices. The
current delivery policy can release a rendered paper with remaining findings;
not every validation failure blocks delivery. Some failures hold or refuse the
run. Request current review configuration and delivery evidence if the review
process or provider independence is part of your assessment.
Checks address supported formula integrity, totals, breakdowns and workbook
presentation. Passing them does not prove that every source document was
complete, every judgement correct or every accounting/tax issue covered. A
formula can correctly sum the wrong inputs.
## Your review [#your-review]
Check the client and year, source amounts, material treatment decisions, missing
evidence and findings. Answer questions with the underlying evidence in mind.
Review changed output after an update. Use [the source-tracing tutorial](/docs/tutorials/trace-a-figure)
and keep the version you reviewed.
Review outstanding findings on delivered output. If the system refuses a
document or holds the run, resolve the cause or inspect the evidence manually.
Do not treat a skipped review, failed draft or unresolved finding as a completed
human check. With AI auto-answer enabled for the run, inspect the recorded
answers after preparation; this option removes an immediate human checkpoint.
---
# Assess the system and the business workflow (/docs/trust/audit-evidence)
Source reviewed: 2026-10-02 · Security and privacy documentation
Begin by naming the product, intended workflow, client-data categories and
version or review date. Ask for evidence that applies to that scope. A general
architecture diagram cannot prove that a particular access check or restore
worked in the deployed system.
## Technical assessment [#technical-assessment]
| Area | Evidence to request or inspect | What it should establish |
| ---------------------- | ----------------------------------------------------------------------------------- | ------------------------------------------------------------------------ |
| Data destinations | Current provider list, processing agreement and per-stage configuration | Where your practice's material can be processed and retained |
| Tenant isolation | Two-practice negative-access tests for records, files and server operations | One practice's credentials are refused access to another's records |
| Authentication | Account/second-factor configuration and request expiry/revocation checks | The credentials and trust boundaries of each client and firm flow |
| Outbound AI gate | Supported-format tests, identifier fixtures and failure-path evidence | Unsafe/unreadable input stops before outbound transmission |
| Workpaper delivery | Representative cases, validation results, review/repair records and output versions | What was checked and which workbook was actually delivered |
| Signing | Source hash, signer events, completed PDF and certificate | What was sent and which actions occurred, not independent identity proof |
| Verify | Provider evidence, missing/not-run components, assessments and approvals | What evidence supports the firm's CDD decision |
| Retention and recovery | Cleanup/deletion results, provider retention terms and dated restore exercise | What is removed, what remains and how recovery was tested |
| Change management | Source revision, checks for that revision and deployment marker | The evaluated change reached the environment in question |
Automated tests are useful implementation evidence. They are not an external
certification, a complete security audit or a promise that every production
configuration matches the tested one. Ask for the test scope, date and revision
alongside the result. This documentation makes no SOC 2 or ISO certification
claim.
## Business and practice assessment [#business-and-practice-assessment]
Define who will upload evidence, answer questions, review output, authorise
communications and retain records. Check the product's boundary against the
actual service your practice offers:
* Workpapers does not lodge returns; the accountant checks and lodges through
their existing process.
* A signing record does not decide whether the person had authority to bind
the entity or whether the agreement's terms are suitable.
* An identity result is one input to due diligence; scope, risk, further
evidence and sign-off remain practice decisions.
* A BAS exception decision does not change the source ledger; agreed changes
need to be made and checked there.
* Local PDF extraction is not an accounting or evidence-validation service.
Use representative cases, including missing evidence and provider failures.
Confirm the team can recognise incomplete results and recover without treating
a draft, stale result or untested rule as complete.
## Request a focused evidence pack [#request-a-focused-evidence-pack]
Contact [support@beforemay.com.au](mailto:support@beforemay.com.au) with your scope
and the relevant rows above. Request any needed agreements and operational
reports explicitly. Sensitive deployment details and client-level evidence
should be shared through an agreed access-controlled channel, not published
inside these public guides.
ATO/Digital Service Provider assessment material is prepared separately for
the agreed review scope. Identify the intended recipient and assessment purpose
when requesting it, so the applicable material and sharing arrangements can be
reviewed. These public guides do not imply ATO approval or DSP accreditation.
For policy and contractual terms, read [Privacy](/privacy) and [Terms](/terms).
For an incident or privacy request, use [privacy@beforemay.com.au](mailto:privacy@beforemay.com.au).
---
# Data flow and processing locations (/docs/trust/data-flow)
Source reviewed: 2026-10-01 · Security and privacy documentation
The [Privacy Policy](/privacy) describes documents and account data stored at
rest in Australia and our own processing services in Sydney. Some external
processing happens overseas. Use the product-specific route below when
assessing your practice's data.
## Workpapers [#workpapers]
```mermaid
flowchart TB
accTitle: Workpapers data flow
accDescr: Original files stay in Australian private storage. Supported outbound text and file copies pass identifier controls before configured AI processing overseas; delivered work still needs accountant review.
U[Practice: authorised upload]
H[Practice: accountant review]
subgraph AU[Australia: source evidence]
S[(Private source files)]
R[Document recognition]
G[Outbound identifier controls]
end
subgraph External[External AI: location depends on provider]
AI[Configured analysis, build and review stages]
end
subgraph Delivery[Australia: workpaper process]
W[Build, review and delivery policy]
O[(Delivered workbook)]
end
U --> S --> R --> G
S -->|Supported file copies| G
G -->|Processed text, context and copies| AI
AI -->|Stage results| W
W --> O --> H
class G,W control
```
This is the Workpapers route at a boundary level, not a network trace. The
outbound controls differ between text and file formats; they do not make all
remaining case information anonymous. Review may be disabled or degraded, and
delivery can include outstanding findings. See [AI processing and human review](/docs/trust/ai-processing).
Our own recognition and identifier-removal services run in Australia. Before
outbound AI processing, supported text and source files pass the relevant
identifier controls. Case context, recognised text and processed source files
can be provided to the configured AI services. The accountant's original source
file remains a practice record; the outbound copy has a different purpose.
The policy names possible AI processing in the United States and China.
Provider choice can vary by stage and practice configuration. Ask which providers
apply to your practice; do not infer that from an old model name or the location
of the worker that makes the request.
## Other products [#other-products]
| Flow | File or content processing | What can be stored |
| ------------------------ | ---------------------------------------------------------------------------------- | ---------------------------------------------------------------------------------------------------- |
| Clients and client files | Authorised client/practice upload and preview | Client records and filed documents |
| Outlook | Mail is read from the member's connected Microsoft mailbox | Envelope index; a stored file when mail or attachments are explicitly or automatically filed |
| Sign | PDF stored for the request and signed through the request-specific page | Source/signed PDF, request state and signing events |
| Verify | The person provides ID images and biometric captures directly to Didit in the EU | BeforeMay's result summary and due-diligence records; not those biometric images |
| BAS Review | CSV transaction rows parsed in the browser | Client/period, filename, aggregate figures, counts and decisions keyed by hashed finding identifiers |
| Sift | Digital PDF conversion in the browser | The conversion keeps the work in browser memory; you download the result |
| Cloak | Digital PDF detection/redaction locally; a separate Australian OCR route for scans | Check the selected route's notice and API arrangement |
## Providers and analytics [#providers-and-analytics]
The policy's provider table includes infrastructure, AI, payments, email,
identity and analytics providers. That table is the maintained list of
processing purposes and locations; a service listed there is not necessarily
used for every task.
Analytics are separate from document processing. The policy describes product
identifiers and page/error information that analytics can receive, and states
that client documents and their contents are not supplied to analytics. Optional
third-party sign-in and mailbox connections have their own provider interaction.
## Verify's distinct boundary [#verifys-distinct-boundary]
```mermaid
flowchart TB
accTitle: Verify identity evidence boundary
accDescr: The person gives ID images, selfie and liveness captures directly to Didit in the EU. BeforeMay stores a result summary and due-diligence records for the practice to assess.
P[Person opens a Verify request] --> N[Identity notice and consent]
N --> D[Didit: identity capture and check in the EU]
D -->|Result summary| B[(BeforeMay check record)]
B --> F[Practice assesses and records due diligence]
D --- I[ID images and biometric captures stay with Didit]
class N control
```
The connector receives a provider notification and re-reads the result using
its server credentials. The summary route above does not carry the ID images,
selfie or liveness video into BeforeMay's private storage.
Workpapers' AI redaction does not apply to ID evidence a person gives directly
to Didit: the provider needs to read the document to perform the check. Read
the identity notice before asking a client to proceed. See [Verify](/docs/products/verify)
and the identity-specific section of the [Privacy Policy](/privacy).
---
# Security, data and AI (/docs/trust)
Source reviewed: 2026-10-01 · Security and privacy documentation
Evaluate the flow you intend to use and the data it will handle. The guides
below explain product behaviour and implementation boundaries. The
[Privacy Policy](/privacy) and [Terms and Conditions](/terms) remain the policy
and contractual sources.
| Question | Guide |
| ------------------------------------------------ | ----------------------------------------------------------------- |
| Where does the data go? | [Data flow and processing locations](/docs/trust/data-flow) |
| What does AI receive and who checks its output? | [AI processing and human review](/docs/trust/ai-processing) |
| Who can see or change records? | [Accounts, roles and access controls](/docs/trust/access-control) |
| What is retained, and what does deletion remove? | [Retention, deletion and exports](/docs/trust/retention) |
| What evidence should we request? | [Technical and business assessment](/docs/trust/audit-evidence) |
## Read claims at the right level [#read-claims-at-the-right-level]
A source review describes what the implementation does. It does not establish
that a control was tested against your practice, that a restore was exercised
recently or that an external assessor certified the system. Ask for evidence
against the deployed version and the service you are adopting.
Australian storage does not mean all processing remains in Australia. Removing
selected identifiers does not anonymise a document. A completed identity check
does not complete every due-diligence obligation, and an AI-reviewed workbook
still needs the accountant's review.
## Contact [#contact]
For technical evidence and product questions, contact
[support@beforemay.com.au](mailto:support@beforemay.com.au). For privacy requests
or a suspected security/privacy incident, contact
[privacy@beforemay.com.au](mailto:privacy@beforemay.com.au). Tell us which product
and control you are assessing; do not send credentials or a client document in
the initial request.
---
# Retention, deletion and exports (/docs/trust/retention)
Source reviewed: 2026-10-01 · Security and privacy documentation
Retention depends on the kind of record and the practice's instructions. The
[Privacy Policy](/privacy) contains the maintained retention schedule. Do not
interpret a deletion in one system as deletion in every other system.
## Common actions [#common-actions]
| Action | What it changes | What it does not automatically erase |
| --------------------------------------- | ---------------------------------------------- | -------------------------------------------------------------------------- |
| Disconnect an Outlook mailbox | Removes the connection and mailbox index | Mail or attachments already filed as client/case documents; Outlook itself |
| Remove a firm member | Removes that person's practice membership | Practice records and practice API keys |
| Client deletes their mobile-app account | Deletes the sign-in and firm connections | Documents and messages already held by the accounting firm |
| Replace or void a signing/check link | Invalidates access or cancels the open request | Evidence and completed actions already recorded |
| Delete data held by BeforeMay | Applies the relevant record-deletion flow | A provider's copy governed by its retention terms |
## Record schedule [#record-schedule]
The policy describes uploaded documents and extracted fields being retained
while the client/job is active, then under the firm's retention requirements.
Identity-check results remain while the firm keeps the client record. Didit
holds its own images under the period configured with that provider; BeforeMay
does not hold those biometric images.
Some operational records have automated cleanup: rate-limit events after 7 days,
settled invitation metadata under the defined cleanup period and audit events
after 18 months. Other deletion depends on the record flow or a firm request;
there is no blanket daily purge of all client financial records.
## Provider copies [#provider-copies]
Files sent for AI processing can be retained by the provider under its own
agreement. The policy expressly distinguishes provider retention from deletion
in BeforeMay and describes immediate post-job provider file deletion as work
in progress. This guide does not present that plan as implemented.
## Export before closing [#export-before-closing]
Retain the records your practice needs: delivered/current workbooks, source
files, signed PDFs and certificates, and applicable CDD record exports. Check
the files open and relate to the intended client and period. An individual
product export is not a promise of a one-click full-practice migration archive.
Clients can follow [account deletion](/delete-account). Firm users should ask
the Owner to remove their membership; contact
[support@beforemay.com.au](mailto:support@beforemay.com.au) for practice closure.
Privacy requests go to [privacy@beforemay.com.au](mailto:privacy@beforemay.com.au).
## Backups and recovery [#backups-and-recovery]
Deletion from active records and expiry from retained backups are separate
questions. No recovery-time, recovery-point or backup-erasure guarantee is
established by this guide. If those are adoption requirements, request the
current backup policy and a dated restore-test result before relying on them.
---
# Connect and check Outlook (/docs/tutorials/connect-outlook)
Source reviewed: 2026-10-01 · Product documentation
## Before you begin [#before-you-begin]
Open [BeforeMay Clients](https://client.beforemay.com.au) in the correct
practice and choose **Email**. Each colleague connects their own Outlook
mailbox. Have access to the Microsoft account you intend to use; Microsoft
sign-in to BeforeMay and consent to use the mailbox are separate steps.
You need an Owner or Admin to enable reading for a practice that has not
enabled it. A Member can then connect their own mailbox. If your Microsoft
organisation requires administrator approval, resolve the approval shown by
Microsoft before treating consent as complete.
## 1. Check the practice's reading setting [#1-check-the-practices-reading-setting]
If **Connect Outlook to get started** is offered with the practice's reading
notice, read the notice before continuing. An Owner or Admin can turn reading
on here and proceed to Microsoft consent. A Member is shown who can enable it.
This is a shared practice setting. It does not connect every colleague's
mailbox, and it does not enable automatic client filing. If reading is already
enabled, proceed to connecting your own account.
## 2. Connect the intended Microsoft account [#2-connect-the-intended-microsoft-account]
Choose **Connect Outlook to get started**, or **Reconnect Outlook** / **Allow
reading** when the screen offers one of those instead. Allow the site's popup
if your browser blocks it. Select the intended Microsoft account and complete
the consent screen. Return to the original BeforeMay tab and read the result.
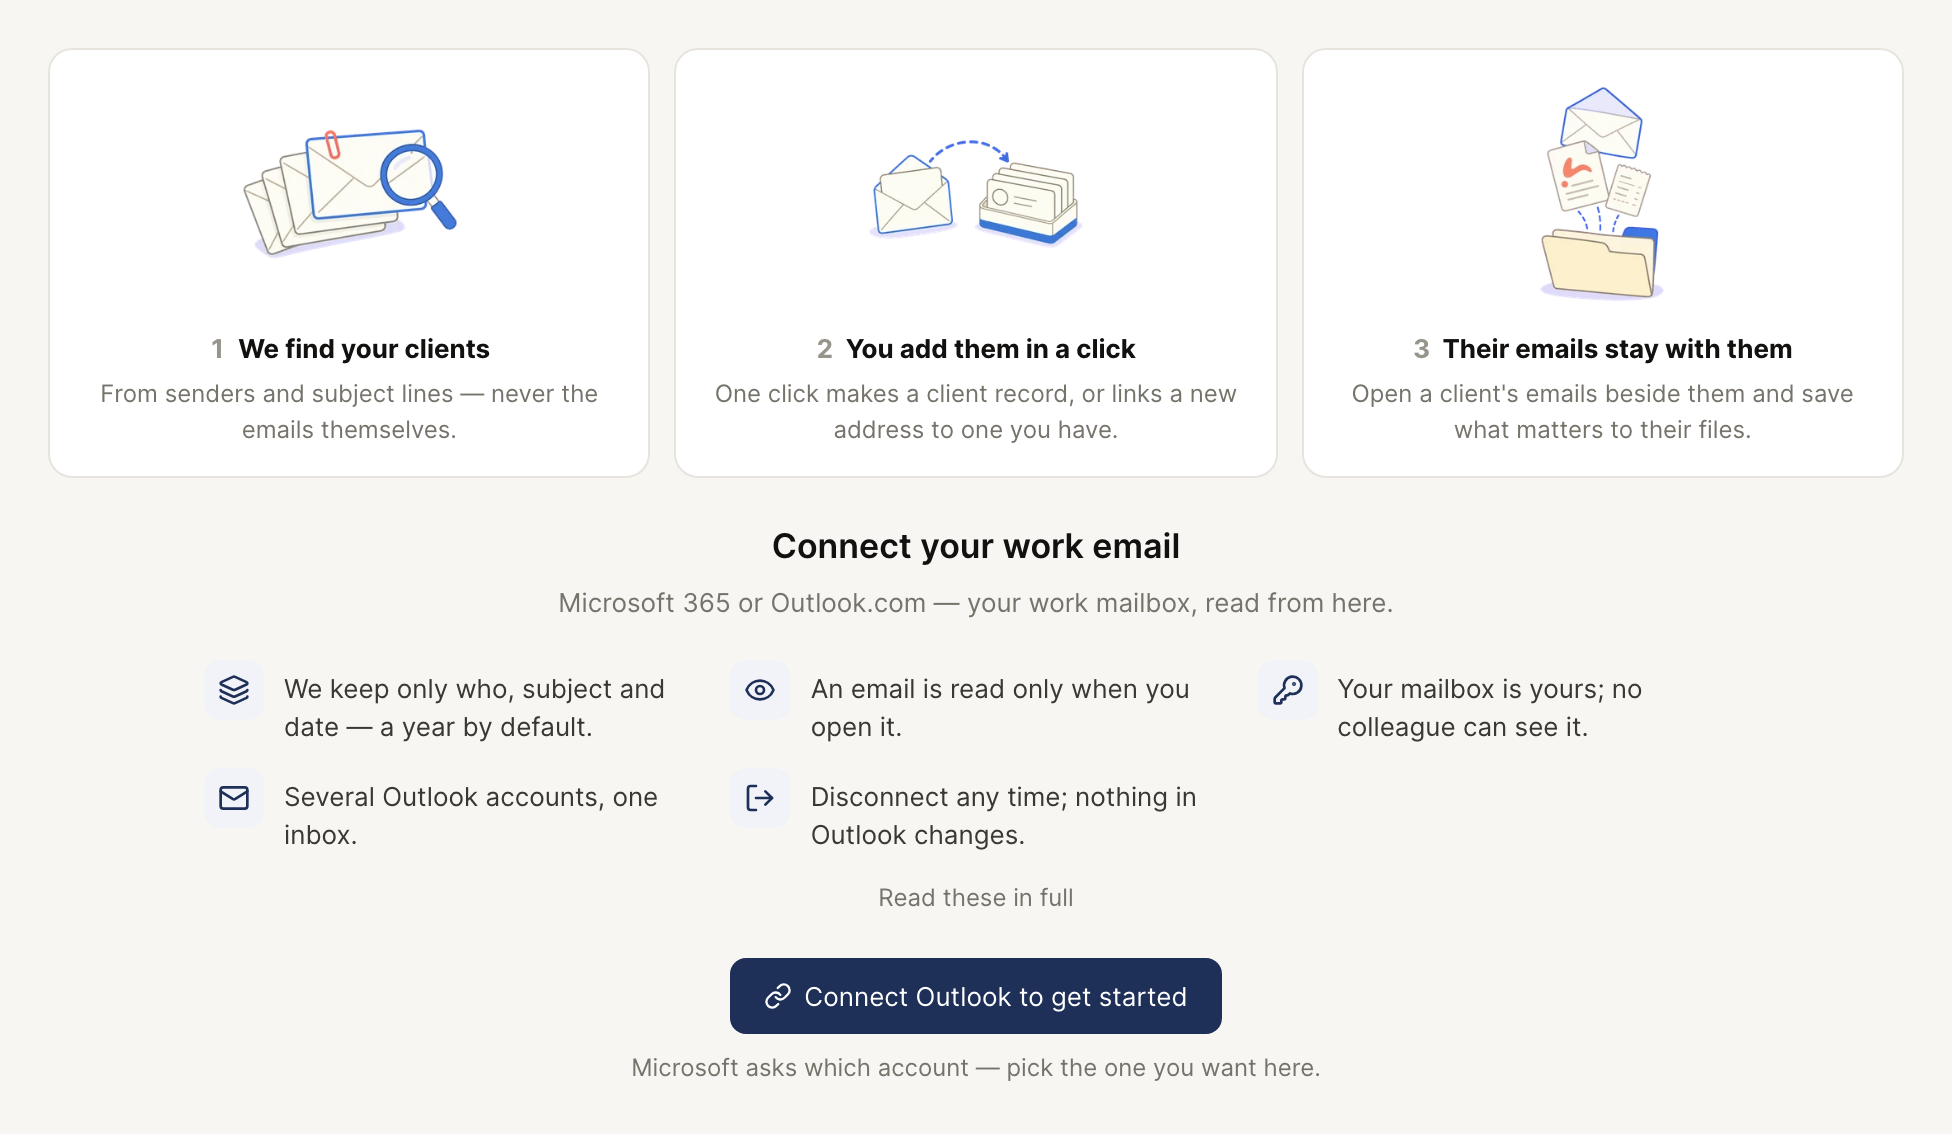
The actual shared Outlook connection screen after reading is enabled for a fictional practice, with no mailbox connected. This capture stopped before Microsoft consent; it is not proof of a live connection.
**Check:** BeforeMay reports the account as connected and the Email view moves
past the connection screen. Closing the popup, cancelling consent, or seeing
an error does not complete the connection.
## 3. Confirm the mailbox and sender [#3-confirm-the-mailbox-and-sender]
Open the mailbox menu and confirm the connected address. If several accounts
are connected, their mail is shown in one list. A new email lets you choose its
sender; a reply retains the mailbox the original email arrived in.
The most recently connected working mailbox is the default for BeforeMay's
chase emails and invitations. Connecting a second address can change that
default. Check the sender before issuing a client request.
**Check:** the intended account is listed without a reconnect warning, and
the address used for the communication is the one you expect. An account
connected only for sending still needs reading consent for the Email view.
## 4. Check reading with an existing message [#4-check-reading-with-an-existing-message]
Choose a date range that contains a known message, let the list load, then open
that message. Confirm its sender, subject, date and body. The first list or an
empty date window alone does not establish whether the connection failed.
The list is built from mailbox headers. Opening a body reads it from Outlook;
it does not automatically create a client file. A suggested client match also
needs your judgement before you use it.
## 5. File one message to the correct client [#5-file-one-message-to-the-correct-client]
Choose an existing message you intend to retain as a client record. Confirm
the matched client, then use **Save to files**, or **Save attachments** if you
only need the attachments. Check the result and open that client's **Files**
to confirm the intended file is present and readable.
If you are learning, use an example message and client intended for testing.
Saving it writes a client record. You can confirm a connection by reading an
existing message without sending a new email.
**Check:** the file is on the intended client, rather than only visible in
the mailbox. In Workpapers, bringing client mail into a case is a separate
evidence-import action; follow [Outlook and client mail](/docs/clients/outlook).
## 6. Decide whether to enable automatic filing [#6-decide-whether-to-enable-automatic-filing]
Automatic filing is optional and off by default. In BeforeMay Clients,
**Settings → Email filing** describes the practice-wide setting. An Owner or
Admin can enable it after checking client email addresses and the team's
connected mailboxes. It saves matching new client mail from connected
mailboxes with reading allowed; it does not send messages or backfill mail
received before the setting was enabled.
Manual filing and automatic filing have different completion checks. A
successful manual save does not show that the automatic setting is enabled.
## When a step does not complete [#when-a-step-does-not-complete]
| Symptom | Check | How to continue |
| ----------------------------------------- | -------------------------------------------------------------- | ------------------------------------------------------- |
| Popup blocked or Connection cancelled | The browser opened and kept the consent window available | Allow popups and start the connection again |
| Microsoft asks for administrator approval | The organisation's consent requirements | Resolve that request with your Microsoft administrator |
| Reconnect or Allow reading | The displayed account, connection state and reading permission | Use the offered control and finish consent |
| No messages in the list | Selected date range and loading/sync state | Use a range containing a known message, then refresh |
| Wrong default sender | The most recently connected working account | Choose the intended sender where offered before sending |
| File is on the wrong client | The client match and filing result | Resolve the filed record before repeating the action |
Expected result: the intended mailbox is connected, a known message can be
read, and any message you chose to file appears on the correct client. Sending
is a separate action; connection success alone is not email-delivery evidence.
Next: [Outlook storage and disconnecting](/docs/clients/outlook), or return to
[practice setup](/docs/account).
---
# Request and review an identity check (/docs/tutorials/identity-check)
Source reviewed: 2026-10-01 · Product documentation
## Before you begin [#before-you-begin]
Open [Verify](https://verify.beforemay.com.au) in the correct practice. Check
the person's name and email and decide the purpose of the check. Explain the
identity-provider processing to the client using the product's notice and
[Privacy Policy](/privacy).
## 1. Create the check [#1-create-the-check]
From **Identity checks**, choose **New check**. Select the person from the shared client
list or enter a new client. For a company or trust, open its client record and
identify the relevant people; the photo-ID check is on a person.
Choose **Proof of identity** or **AML/CTF due diligence**. Confirm the email and
use **Create and email**, or **Create link** if you will deliver the link yourself.
Copy the link from the result when needed: it cannot simply be revealed again
later. The current link expires in 14 days.
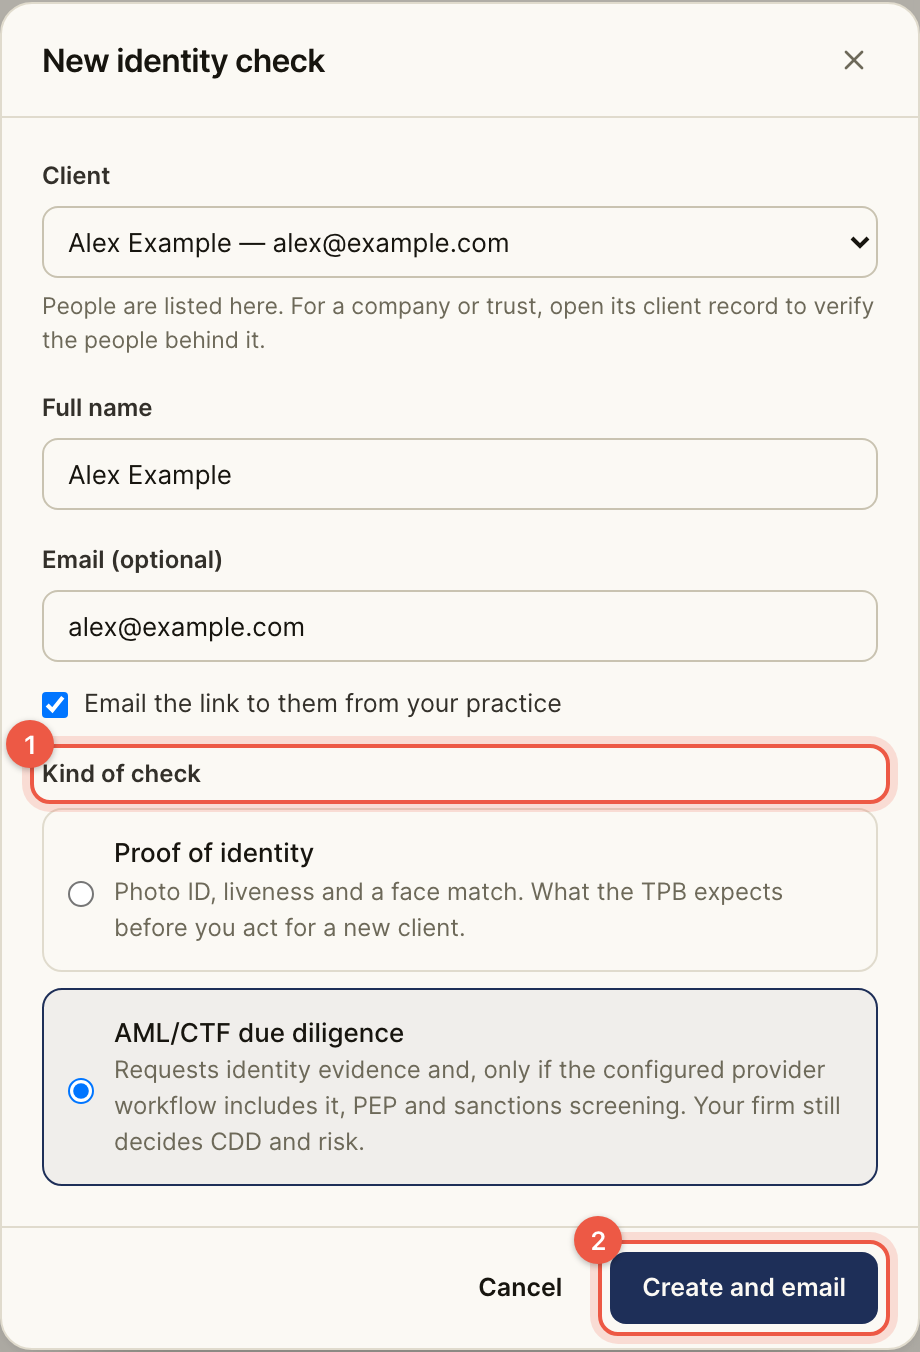
1: Choose the purpose. 2: Create and email the request. Alex Example is fictional; this capture did not create or send a check.
## 2. Let the person complete it [#2-let-the-person-complete-it]
The client opens the request, checks the firm name, agrees to the notice and
continues to Didit. Their ID image, selfie and liveness capture go directly to
the provider. They do not need a BeforeMay firm account.
If the request email failed, the check may still exist. Use its result or issue
a replacement link through the check page; do not assume an email error means
no check was created.
## 3. Review the returned evidence [#3-review-the-returned-evidence]
Open the check detail. Read each evidence component, warnings and the last
sync time. A successful overall status does not show that PEP/sanctions
screening ran. Inspect **Provider evidence** and every **Not run** result.
Record the relevant scope and risk assessment, add evidence and obtain any
required sign-off. Where monitoring raises a new alert, review and record the
reason for acknowledgement. Do not put the firm's internal screening notes in
a client message.

An illustrative result in the actual evidence component. Identity checks are shown as passed while PEP and sanctions are Not run. This is fabricated example data, not a provider check.
## 4. Retain the record [#4-retain-the-record]
Use **Export CDD record** and inspect the export. The expected result is a
record of the evidence and the practice's decisions, not an automatic approval
of every future service for the client.
If refresh fails, the existing result is still the last stored result. Resolve
the failure before treating it as current.
## Completion check [#completion-check]
1. Confirm the check is for the intended person and purpose; check link/email delivery.
2. Inspect the returned provider evidence, warnings, **Not run** components and
last sync time. A created link is not a completed identity check.
3. Record the practice's scope and risk assessment and any required review.
A provider's successful result is evidence for that decision, not the decision itself.
4. Open the exported CDD record and confirm it contains the evidence and
practice decisions you intended to retain.
Next: [Verify guide](/docs/products/verify).
---
# Import your client list (/docs/tutorials/import-clients)
Source reviewed: 2026-10-01 · Product documentation
## Before you begin [#before-you-begin]
Open **Clients** in BeforeMay Clients and choose **Import clients**. Prepare an
export from Xero Practice Manager, FYI, Xero or a spreadsheet. CSV, TSV, TXT,
`.xlsx` and `.xls` can be read by this import flow. Workbook imports read the
first worksheet; put the client list there.
For practice, [download the fictional client list](/docs/examples/client-list.csv).
It contains no real client data or TFNs. Import it only into a practice where
you intend to create test records.
## 1. Read the file [#1-read-the-file]
Drop the export into the import form. The wizard detects a header and suggests
a preset and mapping. It has not yet added clients. A file with no rows below
its header needs a new export.
## 2. Map columns [#2-map-columns]
Check client name (or first and last name), entity type, email, phone, ABN and
group. Leave irrelevant columns unmapped. ABN checks may query the register
when enabled; the wizard reports when the register cannot answer.
TFN columns are dropped and cannot be mapped. XPM's **Tax Number** is treated
as a TFN; Xero's **TaxNumber** is interpreted in the Xero export context as an
ABN. Inspect the detected preset instead of treating those headings as
interchangeable.
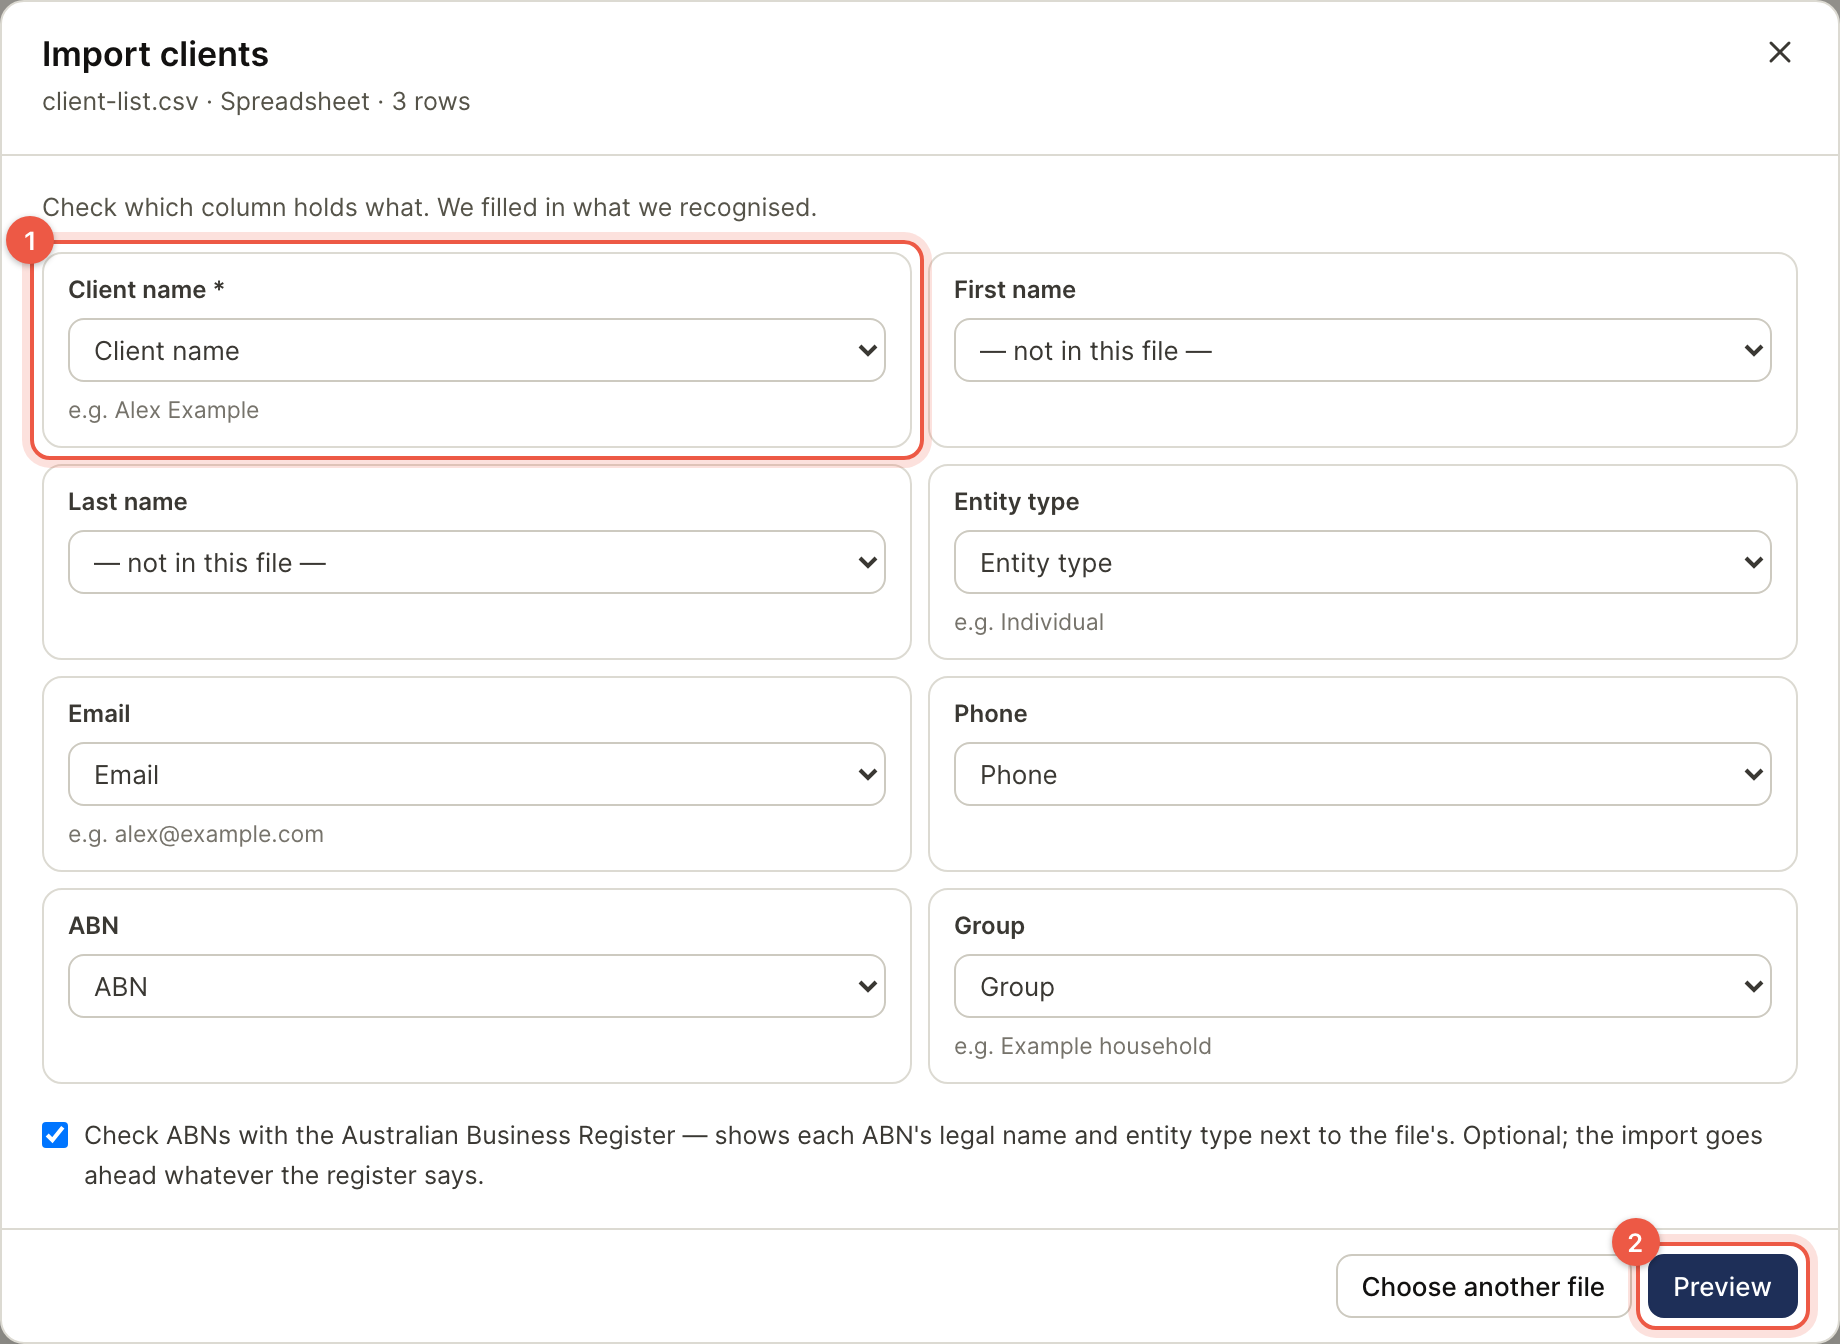
1: Confirm the client-name column. 2: Preview before writing. The screenshot uses the downloadable fictional CSV.
## 3. Review the preview [#3-review-the-preview]
| Row status | What to check |
| ---------------- | ------------------------------------------------------------------------- |
| New | Confirm the name, type and contact details before creating. |
| Already a client | Default is Skip. Choose Update empty fields only if the match is correct. |
| Repeated in file | Default is Skip. Inspect the source before creating another record. |
| Can't import | Correct the reported problem in the file or mapping. |
Matching is a suggestion, not an automatic merge. **Create anyway** deliberately
creates a separate record. Empty-field updates do not replace existing filled
values.

The actual preview of three fictional clients. Review the proposed records before confirming; this screenshot was captured without importing them.
## 4. Confirm and inspect the summary [#4-confirm-and-inspect-the-summary]
Confirm the import only after reviewing the rows. Keep the result CSV from the
summary and inspect failures as well as successes. If the operation stops part
way through, compare that summary with the directory before retrying; do not
assume no rows were written.
Expected result: the intended records appear in the shared client list and
unwanted duplicates have been skipped.
## Completion check [#completion-check]
1. Read the summary's **Created**, **Updated**, **Skipped** and **Failed** rows;
retain the result CSV.
2. Open an intended addition in the client directory and check its details.
3. For an empty-field update, verify the intended field was filled on the
existing client rather than assuming a second record should appear.
4. If anything failed or stopped part way through, compare the summary with
the directory before retrying those rows.
Next: [client records](/docs/clients). With the directory ready, choose your
[first product task](/docs/account#6-complete-one-task-and-inspect-its-result).
---
# Follow a tutorial (/docs/tutorials)
Source reviewed: 2026-10-01 · Product documentation
Choose a walkthrough for the task you need. Check which practice you are in
before following a step that creates records or sends a request.
If this is your first visit, start with [Set up your practice](/docs/account).
It connects sign-in, practice selection, security, colleagues and clients to
your first product task. You can stop after any step and use its result check
before continuing.
| Task | What you need | What you finish with |
| ---------------------------------------------------------------- | ---------------------------------------------------- | ---------------------------------------------------------- |
| [First working paper](/docs/getting-started/first-working-paper) | A client, year, return type and readable documents | A delivered workbook ready for your review |
| [Trace a figure](/docs/tutorials/trace-a-figure) | A delivered workbook and its source files | A checked figure with evidence and any correction recorded |
| [Import clients](/docs/tutorials/import-clients) | A practice list in CSV or Excel | Reviewed additions or empty-field updates in the directory |
| [Connect Outlook](/docs/tutorials/connect-outlook) | Your own Microsoft mailbox; practice reading enabled | A checked connection and, if chosen, a filed client email |
| [Send a letter](/docs/tutorials/send-a-letter) | Sign access, the correct client and signer | A signing request and a record you can follow |
| [Request an identity check](/docs/tutorials/identity-check) | Verify access and the person's contact details | Identity evidence for the firm's assessment |
| [Review a BAS quarter](/docs/tutorials/review-bas) | A matching Xero GST Audit Report CSV | Recorded exception decisions and agreed corrections |
## Practise with samples [#practise-with-samples]
The Workpapers demo and Sift's built-in sample let you inspect example material.
BAS Review has its own [sample practice](https://bas.beforemay.com.au/demo).
The client import tutorial includes a fictional CSV you can download. Importing
it into a real practice still creates real directory records; use a designated
test practice when learning that workflow.
Each walkthrough names the expected result and common failure cases. An error,
a missing field or a rule that did not run needs attention before you treat the
task as complete.
## Use the completion checks [#use-the-completion-checks]
Follow **Before you begin**, the numbered or named steps, then the result check
at the end. A screen image helps you find a control; the state after the action
tells you whether the task succeeded. The captions identify example screens
and actions that were not performed when capturing them.
| Stage | What to confirm |
| ------------------------ | ---------------------------------------------------------------------------- |
| Before an action | Right account, practice, client and period; required permission and evidence |
| After saving or creating | A success result and the intended record visible in its list |
| After sending a request | Request creation and email delivery checked separately |
| After processing | Delivered output or returned evidence, rather than a pending draft |
| Before finishing | Your review, remaining exceptions and the retained/exported record |
For a second task, reuse the same shared client record where appropriate. A
Sign request or Verify check does not require you to create a Workpapers case;
a working paper does need its own client, year and return context.
---
# Review a coded BAS quarter (/docs/tutorials/review-bas)
Source reviewed: 2026-10-01 · Product documentation
## Before you begin [#before-you-begin]
Open [BAS Review](https://bas.beforemay.com.au), or use its
[demo](https://bas.beforemay.com.au/demo) to learn with the sample practice.
For a real review, export the client's **GST Audit Report as CSV** from Xero
for the quarter and accounting basis you intend to review. Keep that export.
## 1. Set the context [#1-set-the-context]
Select the client, dates, cash or accruals basis and BAS type. These settings
change how the rules interpret the quarter, so confirm them against the source
report rather than accepting an unrelated default.
## 2. Read the export [#2-read-the-export]
Choose the CSV. Check that the reported dates, transaction count and aggregate
figures make sense. Resolve parser warnings and unrecognised tax-rate names.
The tool does not silently map an unknown rate to BAS Excluded.

The actual setup screen with the built-in sample quarter, accruals basis and Simpler BAS. Your choices must match your own export.
## 3. Review each exception [#3-review-each-exception]
Read the transaction, current coding, suggested treatment and effect on the
figures. Check the original invoice or other evidence in your bookkeeping
system. Accept or dismiss the finding on that basis.
**Not run** means the rule lacked information or did not apply; it is not a
successful check. For example, an export without attachment information cannot
establish that each transaction has a valid source document.

The sample quarter’s exception panel shows the coding issue and the review decisions. The built-in demonstration is not a client review.
## 4. Finish the quarter [#4-finish-the-quarter]
Check the outstanding-finding count and the agreed corrections. Signed-in
review state can be saved against the client and period; check the save status
before leaving. Retain the CSV because the transaction rows stay in the browser
and are not saved as a ledger on the server.
Make agreed coding changes in Xero separately and export again if you need to
verify the corrected ledger. BAS Review does not write the corrections back to
Xero or lodge the BAS.
Expected result: you can explain each reviewed exception and reconcile the
agreed changes with the quarter's figures.
## Completion check [#completion-check]
1. Match the client, period, accounting basis and BAS type to the retained export.
2. Resolve parser warnings and inspect rules marked **Not run**.
3. Inspect the outstanding-finding count and the decisions already recorded.
4. If saving a signed-in review, confirm the save status before leaving.
5. Check agreed changes separately in Xero, using a fresh export when needed.
Recording a decision here does not update Xero or lodge the BAS.
Next: [BAS Review scope and storage](/docs/products/bas-review).
---
# Send an engagement letter (/docs/tutorials/send-a-letter)
Source reviewed: 2026-10-01 · Product documentation
## Before you begin [#before-you-begin]
Open [Sign](https://sign.beforemay.com.au) in the correct practice. Have the
client details, engagement terms, fees and the person authorised to sign. The
practice must review the letter's wording before sending it.
## 1. Prepare the letter [#1-prepare-the-letter]
Choose the letter from the library and fill the highlighted blanks. Confirm
the client, entity, financial year or engagement period, services and fees.
Read the whole rendered PDF, including the acceptance wording. Check who signs
for each entity and any extra signers or signing order.
If you already have an approved PDF, use **Upload your own PDF** from **Sent**
and check the signature placements instead of recreating the letter.

Choose an engagement letter design in the actual Sign library. This is a fictional practice.

Fill the highlighted blanks and review the rendered letter. This crop shows the beginning; read all pages before sending.
## 2. Send a test to yourself [#2-send-a-test-to-yourself]
Use **Send a test to me** in the letter flow. The test is addressed to your own
signed-in account and marked as a test. Open its link to inspect the actual
recipient experience. Confirm the document, places to sign and final copy.
A test does not complete the client's engagement.
## 3. Send the client request [#3-send-the-client-request]
Return to the letter, check the recipient addresses and use **Send for signature**
(or the multiple-signer button). Read the result: a created request and a
successfully sent email are separate outcomes. If email failed, use the link
provided for the request and resolve delivery without creating accidental
extra requests.
## 4. Track and retain it [#4-track-and-retain-it]
Open **Sent**, select the document and inspect every signer's status and event
history. Once the document is complete, download **Signed PDF**, including its
certificate. Retain it with the client record and confirm the signed version
matches the scope you intended.
## When it does not finish [#when-it-does-not-finish]
* Expired or lost link: use **New link** for the open signer and send the new link.
* Wrong document or signer: void the remaining open request and prepare the
correct one. Voiding does not erase a completed signature.
* Multiple signers: **Waiting** can mean their turn has not started. Check the order.
* Declined: speak to the client before issuing another request.
## Completion check [#completion-check]
| Stage | Confirm |
| --------------- | --------------------------------------------------------------------------------- |
| Prepared | Read all PDF pages and confirm client, scope, fees, signer fields and order |
| Test inspected | Your test link shows the intended recipient experience; it remains a test |
| Request created | The intended request is in Sent, with the correct people |
| Delivered | Read the email result, or deliberately deliver the provided link if needed |
| Signed | Every required signer has completed their step; Waiting and Viewed are incomplete |
| Retained | Download Signed PDF with its certificate and check the signed version |
Next: [Sign status and evidence](/docs/products/sign).
---
# Check a figure against its source (/docs/tutorials/trace-a-figure)
Source reviewed: 2026-10-01 · Product documentation
## Before you begin [#before-you-begin]
Open a Workpapers case with a **delivered** workbook. Have access to the
original source documents. A draft under review or from a failed run is not a
completed deliverable.
## Open the figure [#open-the-figure]
Choose a figure in the workbook and inspect its source reference or the related
workpaper line. Note the section, ATO item and whether the figure is an extracted
amount, a judgement such as an apportionment, or a formula total.
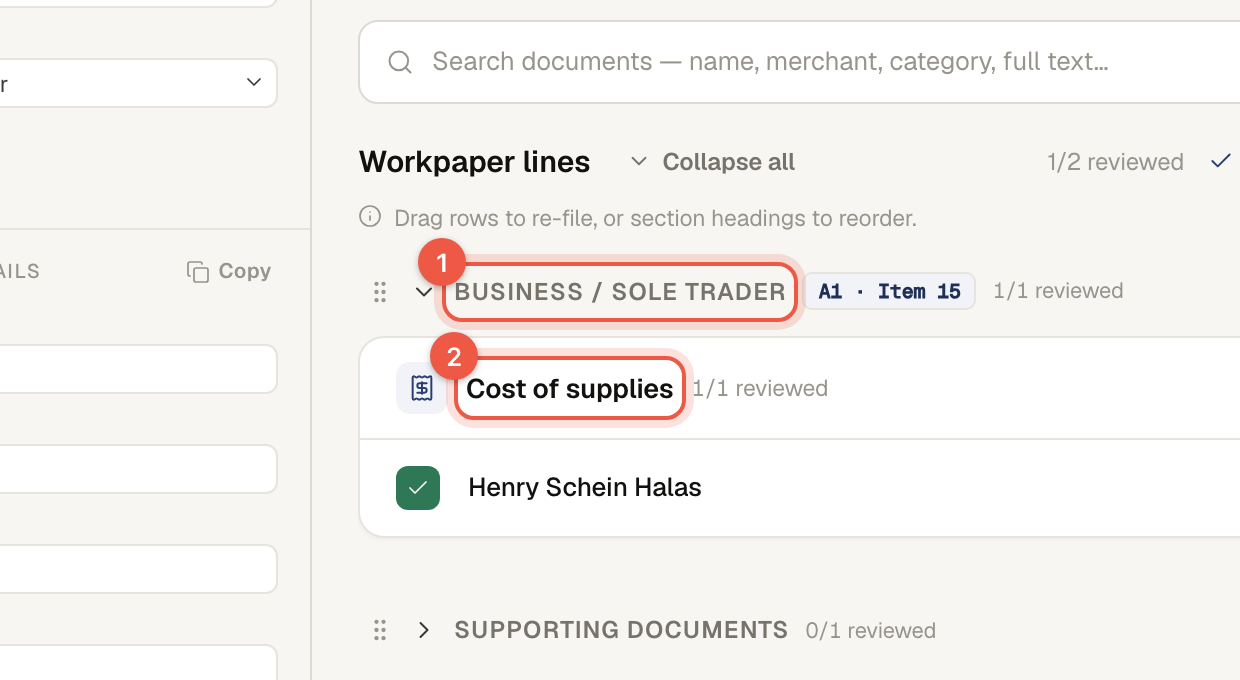
The workpaper line is a useful starting point for the amount, ATO item and review state.
## Read the evidence [#read-the-evidence]
Open the referenced document from the cell or case. Compare the actual amount,
period and owner with the line. For an aggregation, inspect the contributing
records. For a formula total, follow the contributing cells; the total itself
may not be an amount printed on one source page.
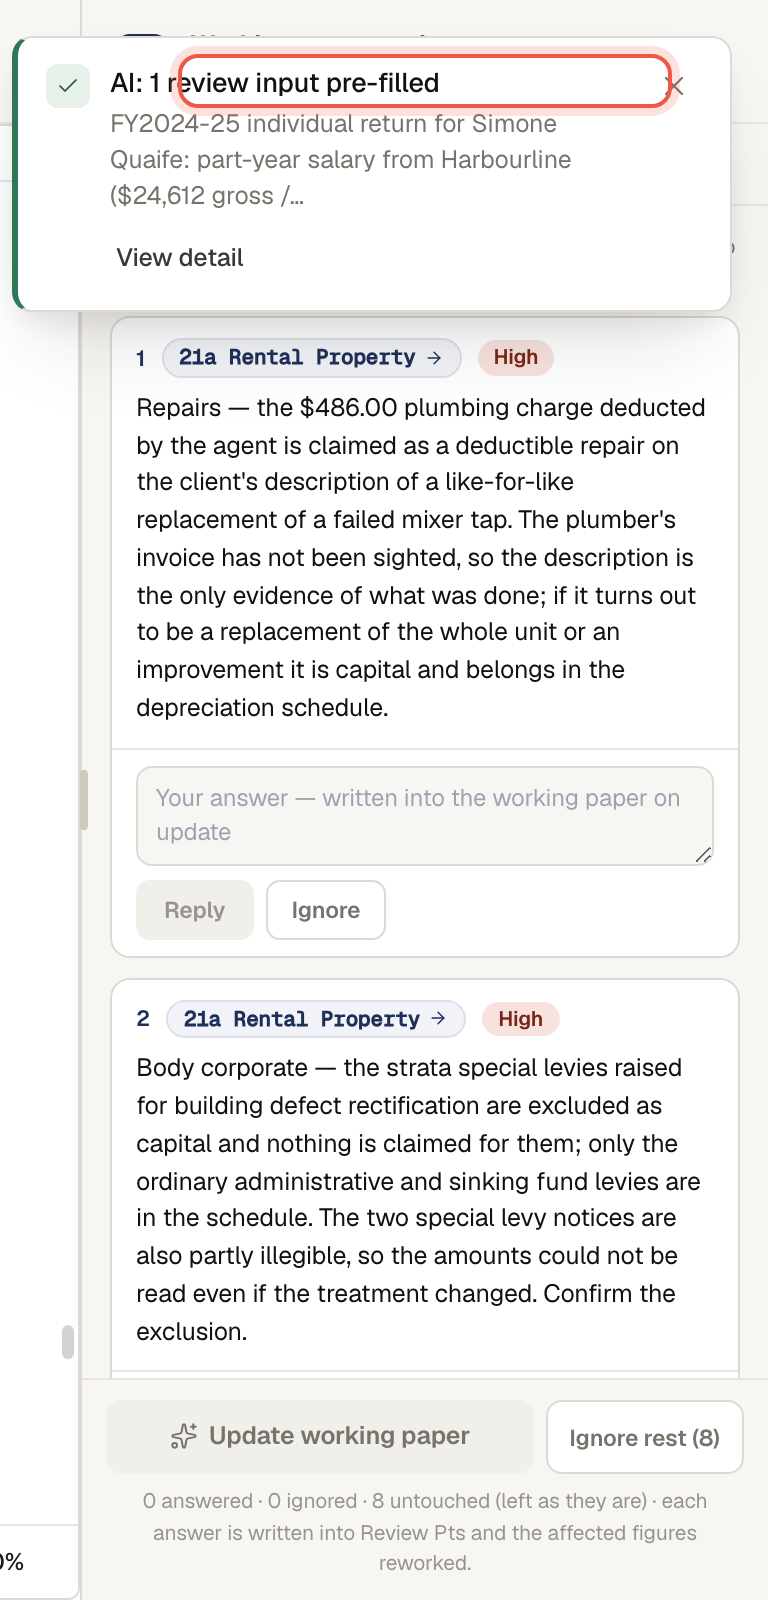
The explanation panel helps you inspect the build's reasoning. Check it against the original evidence.
## Resolve the difference [#resolve-the-difference]
Read any review point attached to the treatment. Use **Reply** to record the
answer or correction, then hand the answers to the
workpaper assistant using the current panel. Inspect the proposed change and
its result before considering the correction complete. Use **Ignore** only when the point is not relevant, with enough
context in your own review records to explain the decision.
For a direct edit, use an editable non-formula cell and save the version.
Formula cells are locked. If the problem is missing or incorrect evidence,
replace or add the document and refresh the working paper through the case flow.
## Check the result [#check-the-result]
Open the resulting version and compare the figure again. Check the affected
subtotal and estimate, not only the one cell. Confirm you are reviewing the
saved/current version rather than an earlier preview, then record completion
through the case's review controls.
## If the source is missing or unclear [#if-the-source-is-missing-or-unclear]
Do not mark the figure checked solely because the workbook has a number. Ask
for the underlying record, inspect related evidence or contact support if the
source reference will not open. Include the case, version and cell reference
in the report; omit TFNs and personal link tokens.
## Completion check [#completion-check]
Confirm the saved/current workbook version, the original amount and its period
and owner, any judgement or aggregation, and the affected totals after a change.
Retain the source reference and your review answer. An explanation panel or a
plausible total alone does not replace the underlying evidence.
Next: [editing and versions](/docs/working-paper/editing-and-versions).
---
# Keep the client due diligence record (/docs/verify/client-due-diligence)
Source reviewed: 2026-10-01 · Product documentation
The identity result is one part of the file. On the client's check page, **Is this engagement a designated service?** records the engagement-specific scope assessment. **Customer risk** records the inputs and the resulting rating. The questions and their answers stay with the check.
Use the forms to enter what you know about the customer, the work and the evidence behind the assessment. The risk form offers **Override the rating (optional)** when the practice reaches a different documented view. Add supporting material with **Add document** and use **Approve** or **Decline** on the sign-off panel. A later **Reassess** adds a new assessment; the earlier one remains in **Assessment history**.
Choose **Export CDD record** to download the client's assembled record as a PDF. Read it before filing: the export reflects what has actually been entered, including missing or unresolved evidence. Verify also has a [Practice compliance](https://verify.beforemay.com.au/app/compliance) area for the practice's own register, risk assessment, personnel records and program PDF. These are records and prompts in the product; the practice decides how its own AML/CTF program applies.
---
# Verify (/docs/verify)
Source reviewed: 2026-10-01 · Product documentation
A new client has sent their details, but the practice still needs an identity check and a record of its own decisions. [BeforeMay Verify](https://verify.beforemay.com.au/app) keeps the check, provider result, audit trail, scope assessment and customer risk record together.
The client opens a link on their own device. The practice sees the result in **Identity checks**; it does not receive the client's ID photos in the app. A provider approval is identity evidence. The firm still reads the screening outcome and records its own assessment where needed.
The public [self-test](https://verify.beforemay.com.au/self-test) helps frame a practice-wide scope question and saves nothing. The signed-in client's scope assessment belongs on that client's record.
---
# Read an identity result (/docs/verify/review-a-check)
Source reviewed: 2026-10-01 · Product documentation
Open a row in [Identity checks](https://verify.beforemay.com.au/app). The list distinguishes **Waiting on the client**, **Provider approved** and **Need your attention**. A provider-approved result still needs you to read the evidence and any unresolved screening hit before relying on it.
The check's **Identity** section shows the name and date of birth read from the document, masked document details, and separate outcomes for document authenticity, liveness, face match, government database matching and PEP and sanctions screening. **Not run** means that result was not supplied; it is not a pass. The **Audit trail** records events such as the client opening the link, consenting and the result arriving.
An open check updates when the provider returns a result. **Refresh** asks again; if that request fails, the page says that the displayed result is the last stored one. A new ongoing-screening hit appears under **Needs review — new screening hits** and on the check. Read it, record an acknowledgement with **Acknowledge**, and reassess customer risk if the information changes your view. The acknowledgement records who acted and when.

Fabricated example evidence in the actual result component. Not run screening must be reviewed separately from passed identity checks.
---
# Send an identity check (/docs/verify/send-a-check)
Source reviewed: 2026-10-01 · Product documentation
Open [Identity checks](https://verify.beforemay.com.au/app) and choose **New check**. Choose an existing person under **Client**, or **+ A new client**. A new person is added to the shared BeforeMay client list when the check is created.
Enter **Full name**, an optional **Email**, and the **Kind of check**. If the email is valid, **Email the link to them from your practice** is available. Choose **Create and email** or **Create link**. The result says whether the email was sent; when it was not, copy the link and send it yourself.
Copy the link while the creation dialog is open. Its text cannot be shown again later. The client's link expires after 14 days. On an open check, **Send a reminder** or **New link** issues a replacement; the previous link stops working. **Cancel check** closes an open check.
For a company or trust, open its client record to identify the people behind it and send their individual checks there. The new-check selector lists people, not the entity itself.

The actual new-check form for Alex Example. No identity check was created or emailed for this capture.
---
# Ask about the working paper (/docs/working-paper/ask-the-assistant)
Source reviewed: 2026-10-01 · Product documentation
Open the case's working paper. Beside the sheet, open **Chat**. The panel **How it was built, and ask anything** explains the build and gives you a place to ask about a figure.
{/* SCREENSHOT: Current working-paper Chat panel explaining a build, /cases/c1/workpaper */}
Name the sheet, cell or source document in your question. For example, ask why a particular bank interest line uses one statement when two were uploaded. The reply stays in the case conversation.
For a review point, use its **Reply** box or **Ignore**, then choose **Send answers to the assistant**. The assistant takes those recorded answers into the update. A reply does not itself change the workbook.
{/* SCREENSHOT: Delivered paper with Chat open and a question naming a cell, /cases/c1/workpaper */}
Use **History** to check the delivered versions after an update. If you are changing a figure by hand, see [Editing and versions](/docs/working-paper/editing-and-versions).
---
# Editing and versions (/docs/working-paper/editing-and-versions)
Source reviewed: 2026-10-01 · Product documentation
You can type into the workbook without leaving the page.
## What is editable [#what-is-editable]
Non-formula cells on the current delivered paper. Anything computed is locked,
and the subtitle says **editable, formulas locked**. The lock stops an edit from silently
detaching a total from the lines it sums.
{/* SCREENSHOT: Current delivered workbook after loading, showing an editable cell and the formulas-locked subtitle, /cases/c1/workpaper */}
## What an edit does [#what-an-edit-does]
Manual cell changes autosave on the current delivered paper. The title bar
reports **saving…** or **saved** and counts the manual edits. **History** records
each hand edit alongside the delivered versions. An update normally starts from
the edited file; a fresh build starts again from the documents.
If the title bar says **not saved — retry an edit**, do not assume the
downloaded workbook includes your change. A fresh build can also leave
earlier manual edits behind; the page says so when that happens.
## Going back [#going-back]
{/* SCREENSHOT: Current History rail with delivered versions and a manual edit, /cases/c1/workpaper */}
Choose a delivered version in **History** to open it read-only. Its row has
**Download** and, if it is older than the current paper, **Restore**. A restore
becomes another entry in the history.
## Re-running after new documents [#re-running-after-new-documents]
Add or replace a document and the case shows **Documents changed since the last
generate.** Choose **Update** in that strip when you are ready to rebuild from
the changed source set.
---
# Prepare a company or trust paper (/docs/working-paper/entity-papers)
Source reviewed: 2026-10-01 · Product documentation
On **Cases**, choose **New case**. The **Company** and **Trust** cards say **By invitation — tap to request** until your practice has access. Select one to open **Company & trust** and send the access request. Wait until the practice is enabled before creating that case type.
{/* SCREENSHOT: New case dialog showing locked Company and Trust cards and the invitation request, /cases */}
Once enabled, choose **New case** again. Use **Upload & auto-fill** if you have last year's return or this year's ATO prefill, or **Enter manually** if you do not. Select **Company** or **Trust**, check the financial year, then choose **Create case**. Each type uses its own working-paper template. Add the current-year trial balance through its [trial balance page](/docs/working-paper/trial-balance), then upload the other records needed for that entity.
The trial balance page lets you classify accounts, check debits against credits and save prior-year comparatives. Review any draft issues it reports before treating the finished workbook as final. Company and trust files are assessed in the context of the whole case; the case does not require a per-file review tick on those entity types before a first build.
---
# Reading the workbook (/docs/working-paper/reading-the-workbook)
Source reviewed: 2026-10-01 · Product documentation
The deliverable is an `.xlsx`. Open it from the case or use **Download** in the
working-paper view.
## Lines carry their ATO item [#lines-carry-their-ato-item]
Each section of the workbook says which ATO item it feeds, and each line under it
is either reviewed or not. That is the unit of work: not "the case", but a line.
{/* SCREENSHOT: Current workpaper line with ATO item and source link, /cases/c5 */}
## Every figure has a source [#every-figure-has-a-source]
A source link lets you open the document behind a figure from the workbook.
When a figure looks wrong, use that link and read the source before changing the
cell or replying to a review point.
The build also keeps its own account of itself: how the paper was assembled,
and a place to ask about any part of it.
{/* SCREENSHOT: Current working-paper Chat panel explaining a build, /cases/c1/workpaper */}
## What was checked before delivery [#what-was-checked-before-delivery]
The build runs checks before delivery. They include:
* formulas recompute to the values stored in the file
* totals tie to the lines beneath them
* multi-document breakdowns tie to the figure they roll into
* the workbook can be opened and its output checked
**Formula integrity checks failed** means the paper did not pass that check.
Read the case's failure detail before trying another build.
Some rendered papers can be delivered with remaining findings under the
configured delivery policy. An available workbook still needs your review;
delivery does not establish that every check passed. See
[AI processing and human review](/docs/trust/ai-processing).
## The estimate rail [#the-estimate-rail]
The case page shows an estimate — **Estimated tax payable**, and the taxable
income behind it — in the right-hand rail. The delivered-workbook summary reads
the file's mapped figures; check the current workbook and its version when
reviewing that summary.
{/* SCREENSHOT: Current estimated tax payable rail after a build, /cases/c1 */}
For company and trust cases the rail is empty until a build has run. That is
expected: those entity types are built from the raw documents in one pass rather
than read file-by-file, so there is nothing to estimate from beforehand.
---
# Add a trial balance (/docs/working-paper/trial-balance)
Source reviewed: 2026-10-01 · Product documentation
Open an enabled company or trust case and go to its trial balance page. Choose the current financial year at the top.
If a trial balance is already among the case files, choose **Import uploaded trial balance**. Otherwise choose **Upload file** and select a CSV, Excel or PDF export. The page parses it locally and puts accounts into workpaper buckets.
{/* SCREENSHOT: Trial balance page for an enabled company case, with Upload file and Save, /cases//trial-balance */}
Check the account mappings, especially any account marked unmapped. The page shows **Total debits**, **Total credits** and **Debits − credits**. Fix an account classification or the source file, then choose **Save**.
{/* SCREENSHOT: Trial balance accounts table with an unmapped account and Save, /cases/c4/trial-balance */}
**Reconciled — the working paper is ready.** means the arithmetic and classification checks on this page passed. If issues remain, the case can still generate a draft; the page lists what needs fixing before the paper is final. The page also has a prior-year view for comparatives.