Set up your practice
The account, workspace and team shared by the BeforeMay practice products.
Source reviewed Product documentation
Use the same BeforeMay account for Workpapers, Clients, Sign, Verify and BAS Review. Your account identifies you; your practice membership decides whose clients you can work with. A client accepting an upload invitation has a separate client account and does not become a firm member.
Choose your starting point
| Your situation | Start here | Confirm before continuing |
|---|---|---|
| A colleague invited you | Open their invitation and sign in with the invited email | You join their practice, with the intended role |
| You are setting up a new practice | Open the product you need and sign in with your own work email | The practice belongs to you and has the right name |
| Your practice already uses another BeforeMay product | Open the next product with the same account | The same practice and client list are selected |
| You are a client uploading, signing or verifying | Follow the accountant's request | Use the client access flow, rather than setting up a practice |
The path is sign in → confirm the practice → complete the setup shown → add clients → complete a first task. Outlook and inviting colleagues are useful when you need them; neither is required for a solo user's first working paper.
1. Sign in with the right account
Open Workpapers, Clients, Sign, Verify or BAS Review. Use the address your colleague invited, or your own work email for a new practice.
Choose an offered provider or Send magic link. The email contains a link and a six-digit code. Complete any second-factor setup or check shown before working with practice data. The sign-in guide explains passkeys, authenticator apps and the temporary setup deadline some existing members see.
Check: reaching the product with your account is the sign-in result. A message saying that a code was sent does not mean you have signed in yet.
2. Confirm which practice you are working in
If an invitation is offered, check the practice name and choose Join. If you already belong to several practices, select the intended one. A new account may start with a generated practice name; confirm it in setup before using it in client-facing work.
If you expected an existing practice but cannot see it, check your sign-in address and ask its Owner or Admin to check the invitation. If invitations could not be loaded, reload and resolve that error before creating another workspace. A second practice has a separate directory; it does not reconnect you to the first one's clients.
Check: the correct practice name is selected and your role is appropriate. An empty directory is expected in a new practice; it needs investigation if you expected an existing client list.
3. Complete the setup steps shown
The wizard adapts to the practice and your permissions. A practice already set up in another product can go straight to the new product's welcome, with any policy update shown when applicable. You should not expect every screen below on every visit.
| Step | What to do | What confirms this step |
|---|---|---|
| Terms and disclosures, when shown | Read the documents and acknowledgements; accept using the screen's controls | The acceptance succeeds and the wizard advances |
| Practice details, for a new practice's Owner or Admin | Confirm the firm name; add a tagline and logo if needed, then continue | The save succeeds; no error remains on the step |
| Security, if not already completed at sign-in | Add and confirm a passkey, or set up and verify an authenticator app | The verification succeeds; simply displaying a QR or opening a passkey prompt is incomplete |
| Team, for an Owner or Admin | Invite the people who need access, or set up the team later | Created invitations are distinct from colleagues who have joined |
| How you heard about BeforeMay, when shown | Choose the relevant option or continue using the offered control | The wizard reaches the product's welcome |
| Product welcome | Use the final button to enter the product | You reach the product workspace after completion succeeds |
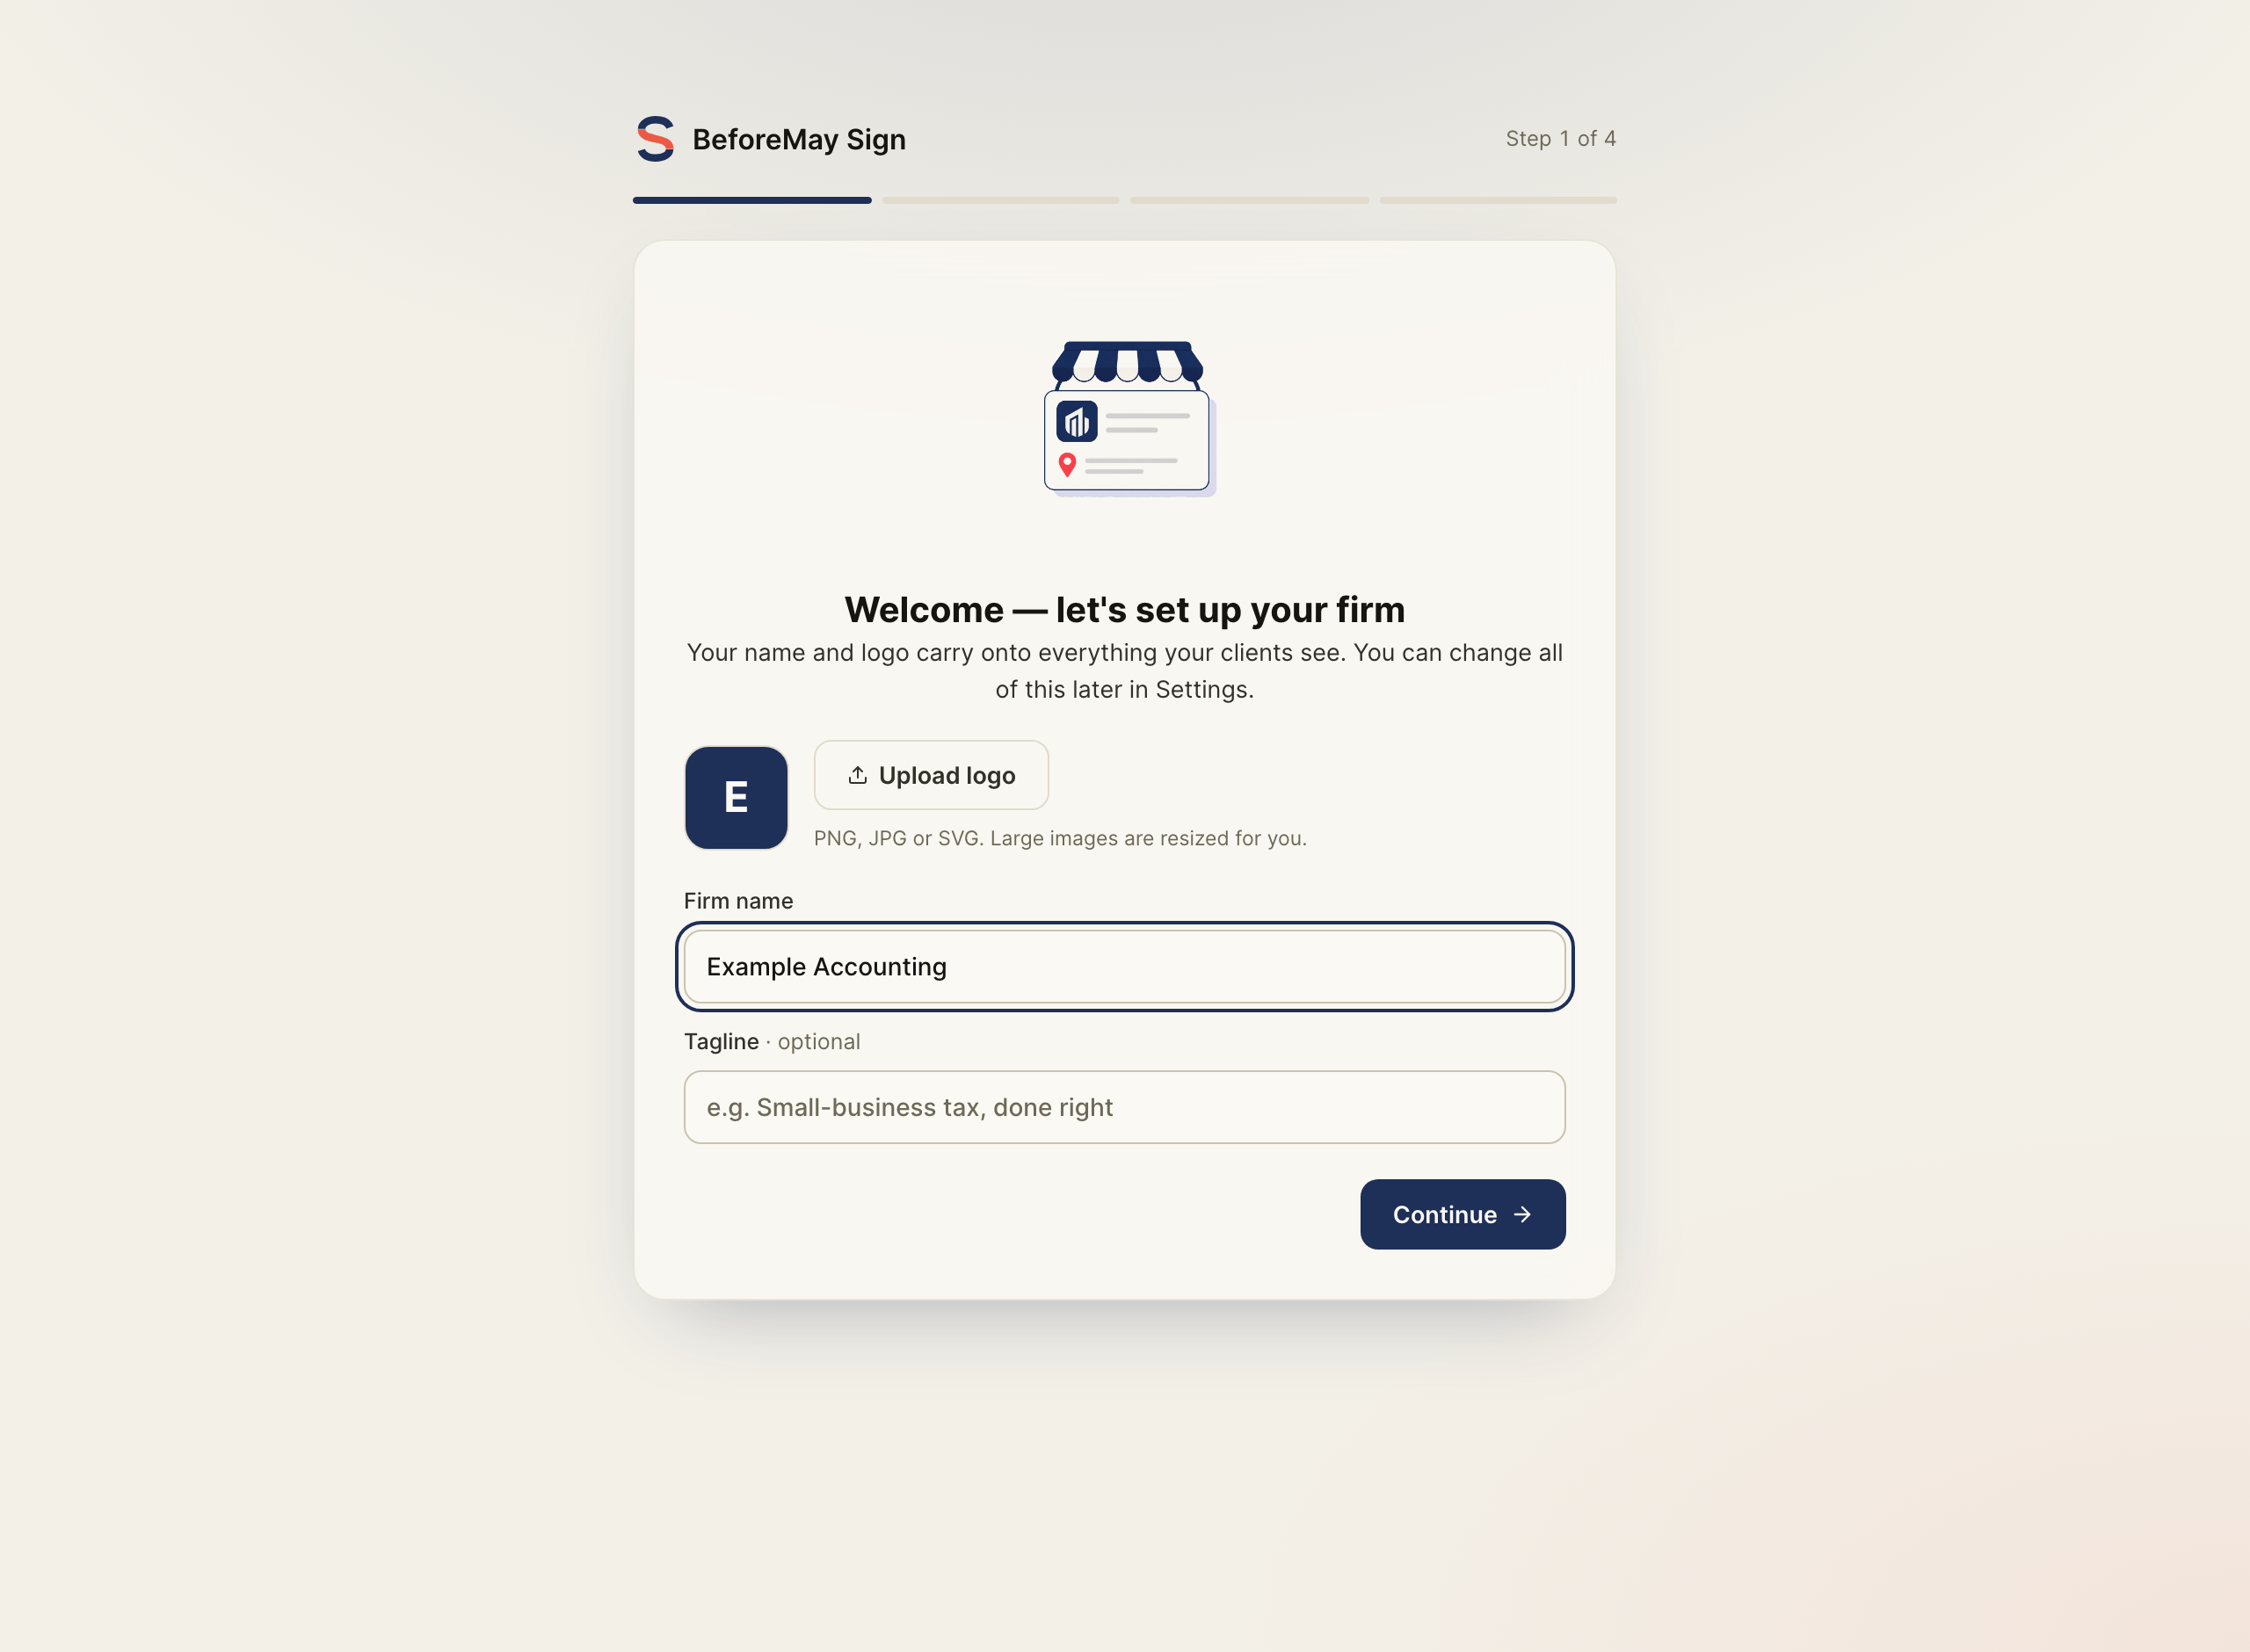
Team and some optional setup steps offer Set up later. Using it does not create an invitation or complete that optional task. Practice-member security setup requires a second factor; eligible existing members may postpone only within the temporary grace period shown on their screen.
4. Add the people and clients you will work with
For colleagues, use Team. Check the accepted roster, not only the Waiting to join list. Each colleague uses their own login.
For clients, open the shared client directory. Add a client through the product's client controls, or import a list. Inspect the preview before confirming. Then open one intended client and verify their name, entity type, email and relationships before sending anything.
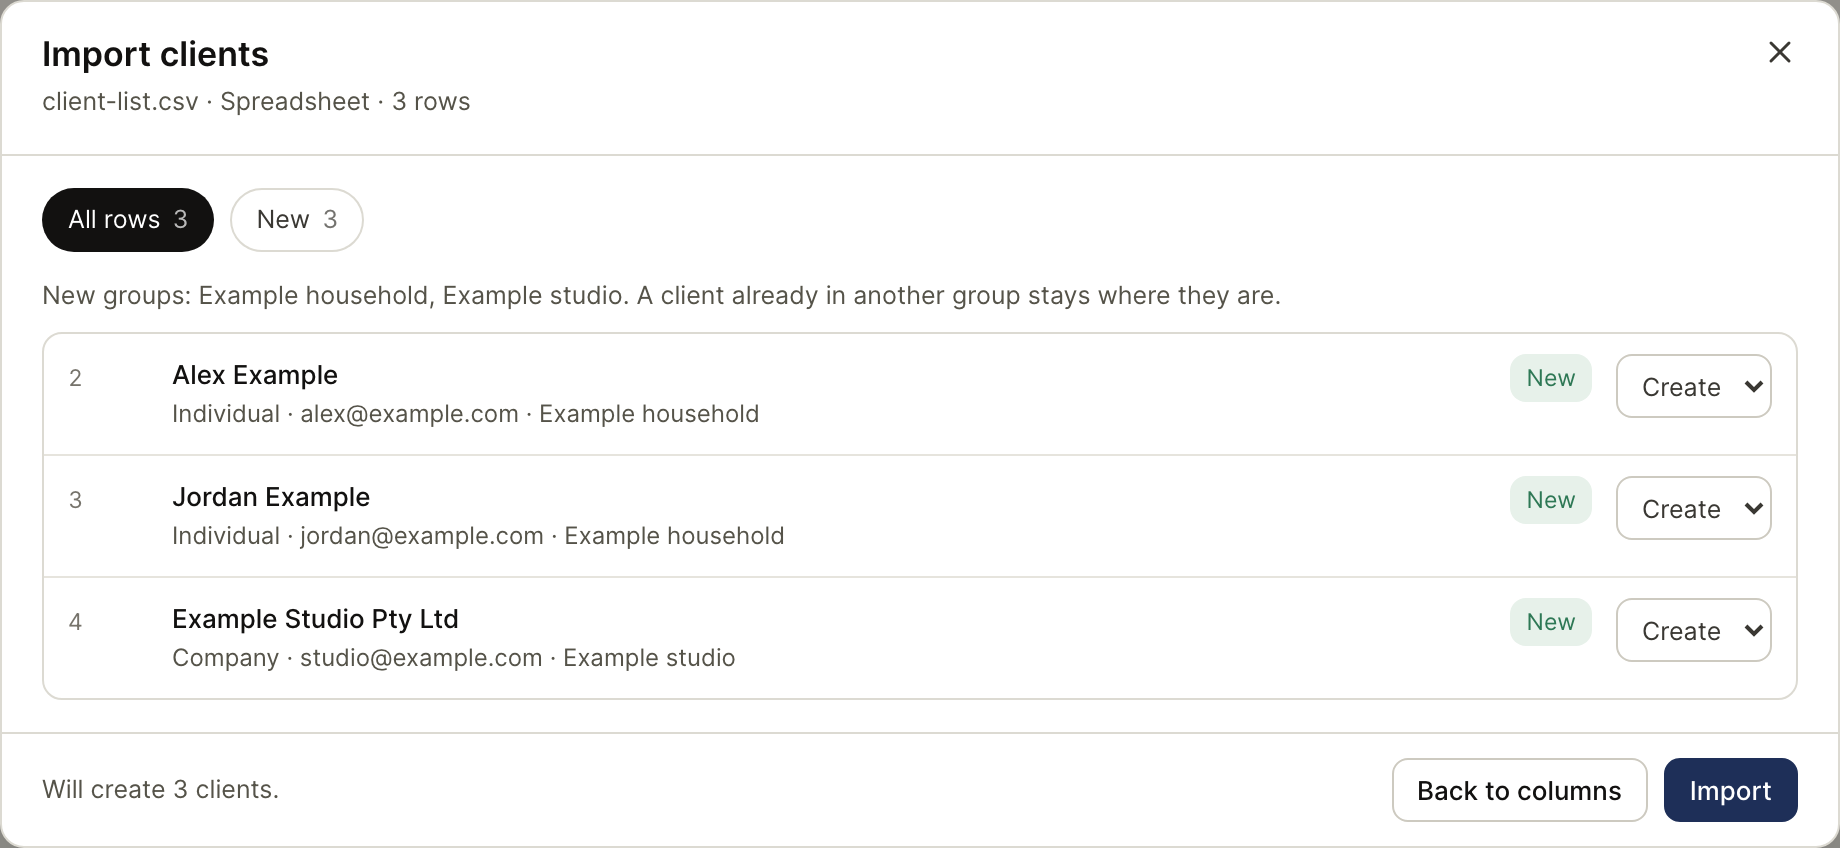
Check: the intended clients appear in the directory after the save/import result succeeds. A file preview alone does not confirm that records were written.
5. Connect Outlook if your workflow needs it
Microsoft sign-in proves who you are. Connecting Outlook separately lets the product use your mailbox after consent. For client mail and filing, follow Connect and check Outlook.
Each colleague connects their own mailbox. Confirm the connected address and sender before relying on mail delivery or sending requests.
6. Complete one task and inspect its result
| Product | Follow this walkthrough | Completion means |
|---|---|---|
| Workpapers | Build your first working paper | A delivered workbook exists; complete your own review before marking the case complete |
| Clients | Import your client list | The intended records are visible and the summary's failures have been inspected |
| Sign | Send an engagement letter | A request exists and delivery is checked; the engagement is signed only when every required signer completes it |
| Verify | Request and review an identity check | Returned evidence is inspected and the practice's assessment is recorded |
| BAS Review | Review a coded quarter | Findings are reviewed and agreed changes are checked in the source bookkeeping system |
Before considering setup complete, confirm the right account, practice, role and client. Confirm required security setup and any mailbox you connected. Finally, use the tutorial's result check; arriving at the product's home screen does not establish that your first client task is finished.
Moving between products
The practice products share the account, directory and team. On the
beforemay.com.au domain and its product subdomains, the session is shared
within the same browser. A different browser, private window or preview host
may ask you to sign in again. Product setup can still ask for information
specific to that product or acceptance of an updated policy.
Check the practice name before working: having the same account does not mean all practices you belong to share their data.
What is separate
Sift's browser conversion does not require a BeforeMay account. Cloak's developer dashboard uses its own account system. Signing and identity-check recipients use a request-specific link; those links do not give access to the firm's workspace. See client access.