Import your client list
Read a CSV or Excel export, map columns and confirm each addition before it is written.
Source reviewed Product documentation
Before you begin
Open Clients in BeforeMay Clients and choose Import clients. Prepare an
export from Xero Practice Manager, FYI, Xero or a spreadsheet. CSV, TSV, TXT,
.xlsx and .xls can be read by this import flow. Workbook imports read the
first worksheet; put the client list there.
For practice, download the fictional client list. It contains no real client data or TFNs. Import it only into a practice where you intend to create test records.
1. Read the file
Drop the export into the import form. The wizard detects a header and suggests a preset and mapping. It has not yet added clients. A file with no rows below its header needs a new export.
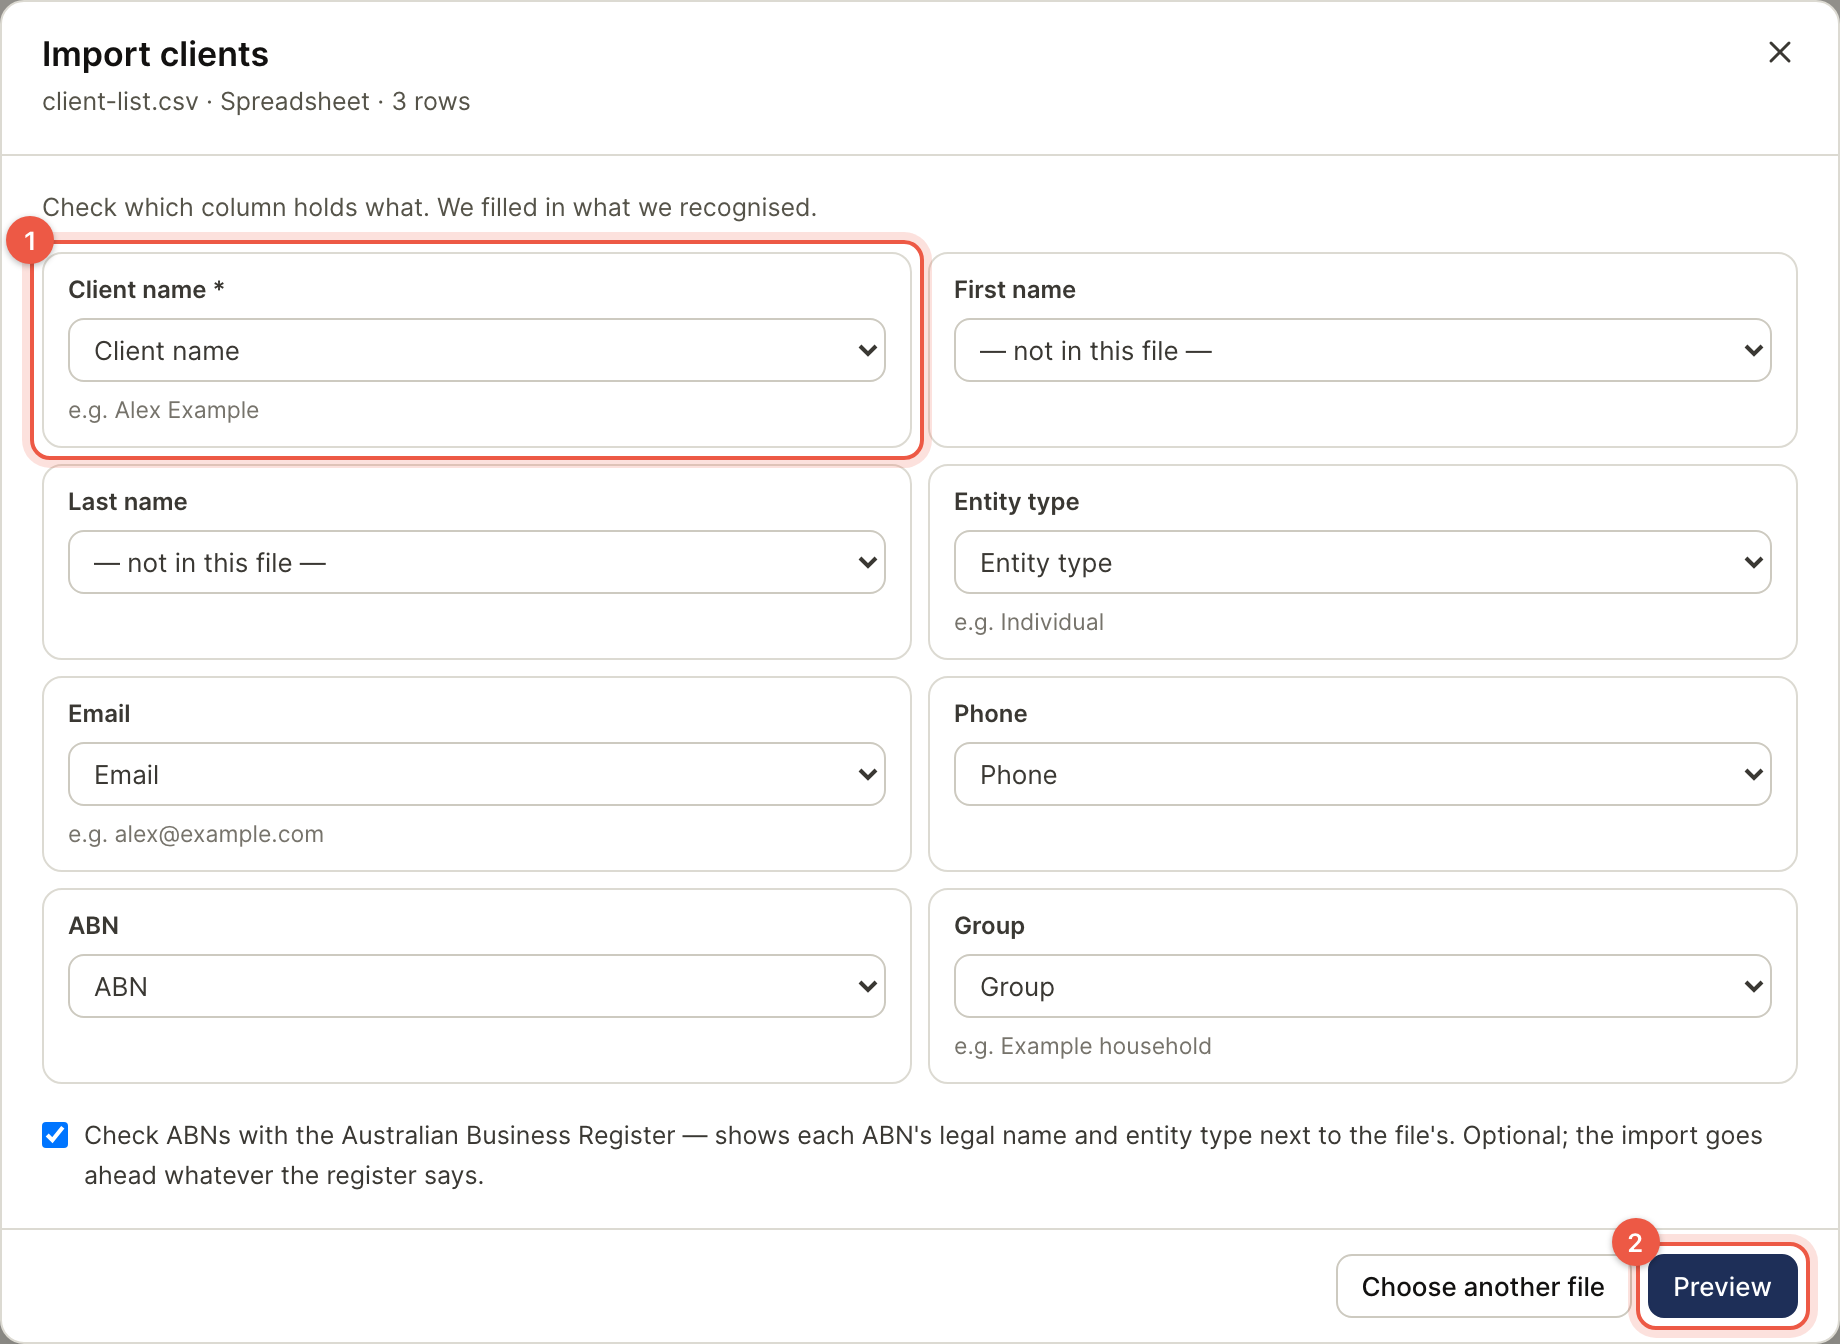
2. Map columns
Check client name (or first and last name), entity type, email, phone, ABN and group. Leave irrelevant columns unmapped. ABN checks may query the register when enabled; the wizard reports when the register cannot answer.
TFN columns are dropped and cannot be mapped. XPM's Tax Number is treated as a TFN; Xero's TaxNumber is interpreted in the Xero export context as an ABN. Inspect the detected preset instead of treating those headings as interchangeable.
3. Review the preview
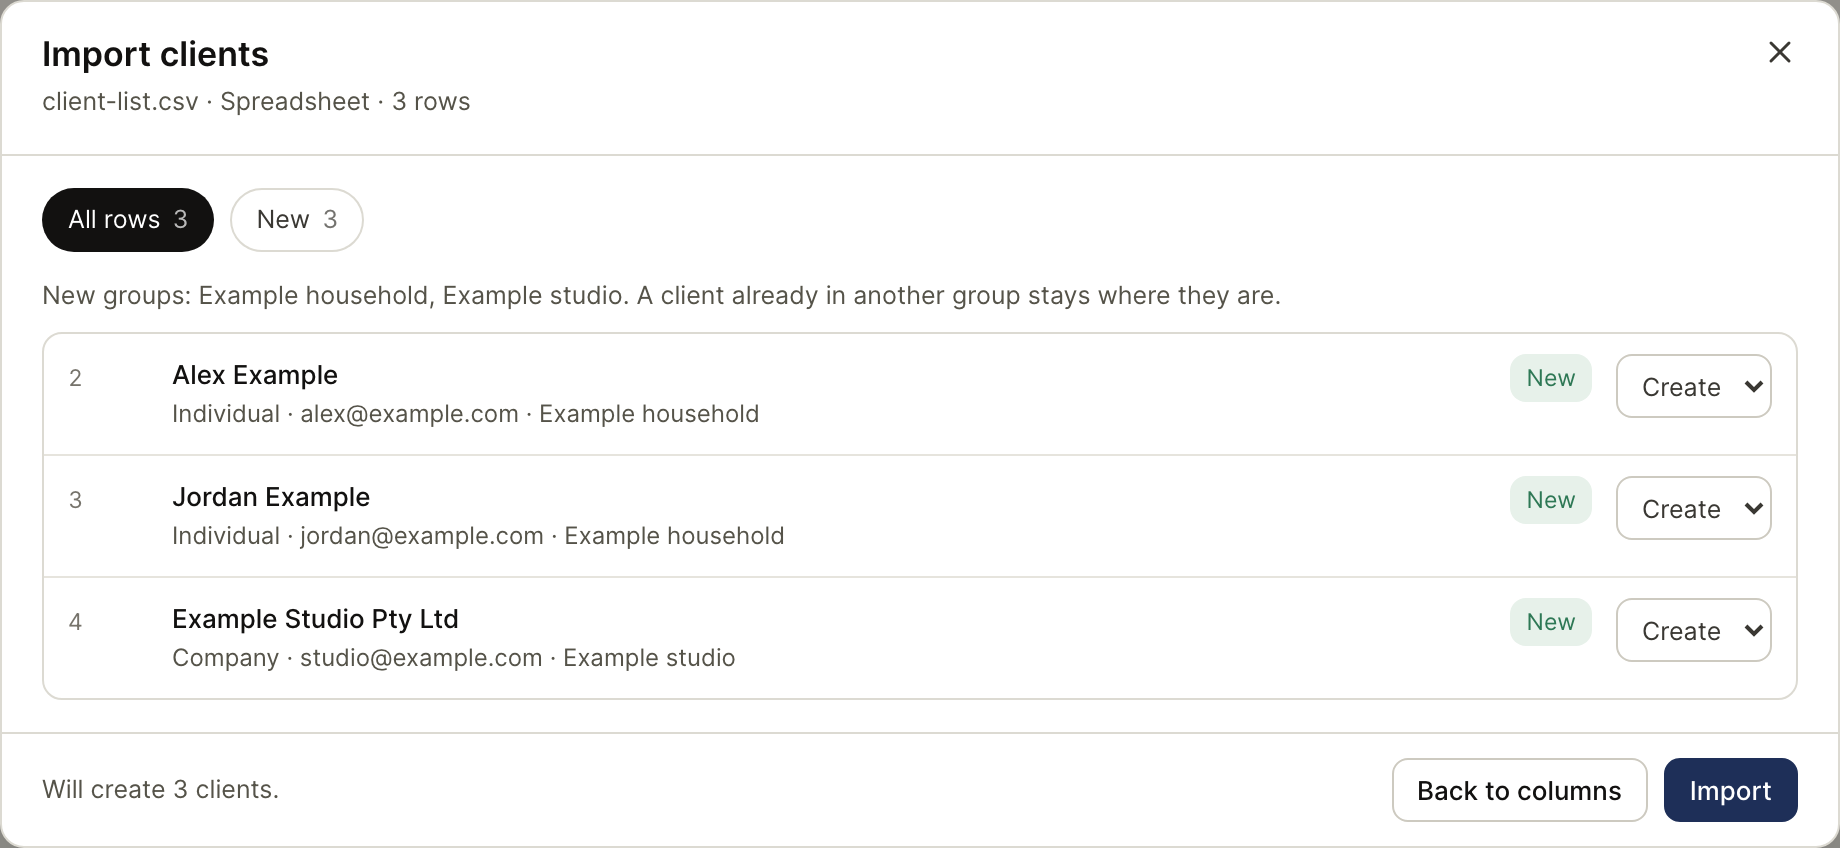
| Row status | What to check |
|---|---|
| New | Confirm the name, type and contact details before creating. |
| Already a client | Default is Skip. Choose Update empty fields only if the match is correct. |
| Repeated in file | Default is Skip. Inspect the source before creating another record. |
| Can't import | Correct the reported problem in the file or mapping. |
Matching is a suggestion, not an automatic merge. Create anyway deliberately creates a separate record. Empty-field updates do not replace existing filled values.
4. Confirm and inspect the summary
Confirm the import only after reviewing the rows. Keep the result CSV from the summary and inspect failures as well as successes. If the operation stops part way through, compare that summary with the directory before retrying; do not assume no rows were written.
Expected result: the intended records appear in the shared client list and unwanted duplicates have been skipped.
Completion check
- Read the summary's Created, Updated, Skipped and Failed rows; retain the result CSV.
- Open an intended addition in the client directory and check its details.
- For an empty-field update, verify the intended field was filled on the existing client rather than assuming a second record should appear.
- If anything failed or stopped part way through, compare the summary with the directory before retrying those rows.
Next: client records. With the directory ready, choose your first product task.